This Secret Will Make Your 360 Wig Look Like Scalp! 2022 New Yaki Wig Wispy Baby Hairs⎪Genius Wigs
- Posted on 08 February, 2022
- Lace Front Wig
- By Anonymous
Yall,this is the most natural 360 lace wig ever !! So love this Yaki hair ,Yall ! That’s the reason why so many sisters would like to choose it,PrePlucked hairline with melt with your skin 360 lace frontal just make everything perfect. I hope that you all enjoy this video. Be sure to like, comment and subscribe.
____________________________________________________________
*************** $25Coupon code: 25Beige ***************
➡️ BUY it in here: https://bit.ly/3ecwK5T
Wig SKU: GWT08
Hair length: 16inch
Hair Density: 180%
Lace Color: CRYSTAL LACE
1.Crystal Lace — The High-end Lace Material, More Durable, Lay Flat , See-Through and Be more Undetectable. Totally Match all Skin Tones.
2. Grown Hairline—Less Obvious Knots, Pre-sewn Transitional Hairline, just looks like growing from your scalp, Mimics Your Real Scalp Well.
3.The Back is so natural as the front ! Can do bun style,high ponytails and more.
More Wig Review Videos: https://bit.ly/3tN9Tmp
Customers Post Review Photos or Videos on social media get cash back,check details in here:https://geniuswigs.com/
----- Geniuswigs Benefits ------
*** Free Shipping all over the world
*** Free Exchange or Return for Brand New Wig within 7 Days
Seller Guarantee: Geniuswigs Supply Same Quality Products to Youtubers and Customers
613 Lace Front Wig: https://bit.ly/2RfSkys
Headband Wig: https://bit.ly/3uILJLb
Perfect Hairline Pixe Cut wig: https://bit.ly/3uGtYMc
Colored New Fashion Wigs: https://bit.ly/33FoohK
360 Frontal Wigs: https://bit.ly/2PyIJlc
13x6 Deep Parting Wigs: https://bit.ly/3oc4HaE
Follow Geniuswigs.com
YouTube: https://bit.ly/3bobZ66
Instagram: https://www.instagram.com/geniuswigsus...
Facebook: @GeniusWigsofficial
Pinterest: https://www.pinterest.com/geniuswigs/
Twitter: https://twitter.com/geniuswigs
-------------------------------------------------------------
Hey loves! ♥ Become a Beige-ian by SUBSCRIBING here ▼
https://www.youtube.com/user/Mahoghany...
NEW VIDEOS POSTED EVERY WEEK!
TURN ON POST NOTIFICATIONS
**I do not own the rights to any of the background music being played in this video. The background music is for entertainment purposes only. Here's the music playlist, check out the amazing Artists below ▼
1.) Ryan Little - Signs - https://thmatc.co/?l=AD837857
2.) Mr. Chase - Good Deed (feat. Ichika) - https://thmatc.co/?l=0FFC0F3C
Thanks for Watching!
Contact me: ▼
https://beigemedia.wixsite.com/beigeoj...
L E T S B E F R I E N D S: ▼
INSTAGRAM: BEIGE OJAI
TIKTOK: BEIGE OJAI
TWITTER: BEIGE OJAI
FACEBOOK: BEIGE OJAI
SNAPCHAT: BEIGE OJAI
BEIGE OJAI
P.O. BOX 520
LANHAM, MARYLAND 20703
#360wiginstall#360wiglacemelt#360wigtutorial
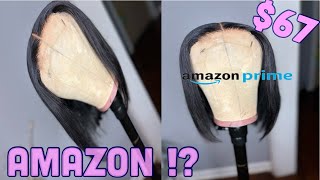
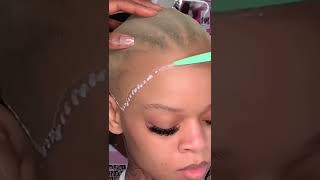
Do hey guys welcome back to my channel? My name is beige if you're new here welcome, don't forget to give this video a thumbs up and comment down below before you leave. Today'S video is going to be a tutorial on this wig that was sent to me from genius wigs. I will have all of their information the promo codes and direct links down below in the description box. So the wig that i received is a 16 inch yaki textured 360 wig, and this wig was created using the new crystal lace from genius wigs the way it comes with four combs, an adjustable strap and a removable elastic band. The hairline is pre-plucked and also bleached for you, so no extra work is needed on your end. So, let's test out this new crystal lace grabbing a sample piece of transparent lace. I'M going to spray got to be ultra glue, gel and blow dry it until it's tacky and then apply that lace to my hand. Next i'll be grabbing the new crystal lace from genius. Wigs applying that, to the right side of my hand, crystal lace, completely melts into any skin tone and complexion, i'm going to leave it up to you, though, comment down below in the comment section, which lace would you prefer the lace on the left, which is the Normal transparent lace or the new upgraded crystal lace on the right from genius. Wigs, let's chat down below okay, so a huge, huge, huge part of making your 360 wigs look natural is to get rid of that adjustable strap in the back. Not only can you not fully bleach the wig in the back, because there is an adjustable strap blocking you from bleaching it, but it is also extremely hard to make your wig look natural, because no one has that unnatural, looking band in the back of their natural Hair, obviously so you would have to get rid of that and fully pluck the back portion of the wig and fully bleach the back portion of the wig so that it can look identical to the front portion of the wig. You want that front hairline and the back hairline to look as natural as possible and to be identical to someone's actual head, so i'm going to have to remove that adjustable, strap and that comb in the back and to do that i'll be using a seam ripper. The goal is to get rid of the entire adjustable strap. So if you have the extra time make sure you remove the entire thing, i only remove the middle portion of it, but, of course, take the extra step to remove the entire full adjustable strap. If you can now that that middle portion of the adjustable strap is removed, you can see that the knots were not bleached underneath it. So i'm going to have to go ahead and bleach that bar that used to be the adjustable strap so that all of the knots in the back are bleached so that it can look like a frontal back there. And here are the results from doing that. Speaking of the frontal, i am now going to remove some of that extra density from the hairline. I want this 360 to look as natural as possible, so taking this extra step is going to make a huge difference in the final install to do that i'll, be doing the beige method of zigzag, plucking and parting. Of course, whatever we do to the front hairline, we have to do to the back. So i'm going to take this time and pluck away some density from the front hairline and then do the same thing to the back, and here is how the hairline looks after plucking. And here is the amount of parting space that you get, and here is what i was talking about earlier when you remove the entire adjustable strap, you will not see this peeking through the back hairline and, of course that does not look natural. So if you have that extra time, it is highly recommended that you remove the entire adjustable strap from the back, so that you won't see that through your wig. So now it is time to tint the lace grabbing, a lace tint that is the color of my foundation, i'm going to spray that, along the entire 360 perimeter of the wig next i'll be grabbing one that is the color of my scalp and spraying that in The inner portion of the frontal i'm going to do two layers of each and then blow dry in between each layer of lace, tint moving on to prepping the baby hairs grabbing. My comb, i'm just going to map out the amount of baby hairs that i want in the back area of the wig and then i'll be using an eyebrow razor to shave them down. This is always optional. You do not have to have baby hairs on your wig at all, and you definitely don't have to have as much baby hairs as i am taking out and, of course you do not have to make your baby hairs as long as i chose to do on This wig either i'm just going to map out the amount of baby hairs that i want and then i'm going to use my flat iron to curl. It grabbing rollers i'm going to roll those baby hairs so that they can be out of the way during styling and also to help keep their form and shape. It'S now time for styling, i'm going to grab silk therapy from bio silk, apply that to the hair and then in small sections, i'm just going to flat iron through this hair. Look how natural this looks! Y'All look at the texture and the density, i'm obsessed with it. It is now time to cut away that extra lace grabbing a pair of scissors, i'm going to carefully cut along the hairline following the natural curvature of the frontal. I'M going to do this to the front and back portion of the wig not cutting into the hair but cutting right in front of the hairline all right. So now it's time to install the wig to prep my skin i'll, be grabbing alcohol and applying that to my forehead next i'll be grabbing scalp protector and applying that to my scalp grabbing even's, wonder: lace bond! I'M going to spray a thin layer of that to the hairline and then blow dry grabbing the wig, i'm just going to place it on my head and it's proper placement and then use my fingertips to press the lace into my skin. Putting my head scarf on for about 15 minutes, i'm going to allow it to set. I did do some baby hairs off camera. The wig was a little small for my head so because of that i had to put heavy baby hairs on the left and right sides of the wig. But here are the results of that. I'M just going to do some styling and i'll show you guys. The finished look in a second, the same way that i installed the front portion of the wig is the same way that i will be installing the back portion of the wig. So i'm going to spray that wonder: lace bond to the lace and my hair blow dry it for a few seconds and then press the lace into my skin. And here is the finished. Look. Thank you so much for watching. If you have any questions, don't forget to leave them down below. In the comment section, i will have all of the information, the promo codes and direct links to the wig worn in this video down below in the description box. I did have fun with this wig. I did create a few hairstyles and of course there is this one heart-shaped hairstyle that has been trending all over the internet and i did try to do that with this wig. So if you keep watching, you will see that hairstyle as well. I did have fun with it. I think that this is a very natural looking wig from the density to the texture. I think that this is definitely something that you should try. However, i do suggest that you measure your head first before ordering this wig. It is a 360 wig, so you want to make sure that it completely covers the entire perimeter of your head so that it can be a flawless melt and a flawless install. If it's too small for your head, then your hair will be peeking through and you will have a complete disaster. You will have to have heavy heavy heavy baby hairs to cover that up. So keep that in mind when you are ordering just compare your head measurements to the measurements of the wigs on their website, just to make sure that you are getting the proper size. Let'S chat about this wig down below in the comment section and if you're new here don't forget to give this video a huge thumbs up, comment down below and subscribe down below as well. I can't wait to see you all in my next video bye guys. I


Comments
Beige Ojai: **The CUSTOMIZED wig worn in this video is FOR SALE, email if interested: [email protected]
NurseMoniqueT M: Looks very natural and pretty on you . I love how you slay the back that’s dope I’m going try that method. Thank you for your tutorial it was very informative I’m now subscribe to your channel.
MidnightAndI: This came out amazing!
Michelle Junior: It came out beautiful!!!!
Shalonda H.: Love it Beige and the hearts were cute!
Sweetpea: Beautiful install
Beautiebymark: Looks Amazing. GReat Technique.
irolot: That Crystal lace is a beast
Shirley Broussard: Great job
Jasmine W: Looks good, it's hard to from the back
Nina La Bella: ❤️❤️❤️
Valerie Watkins: Nice
Paricia Jones: ✅✅♥️♥️