Very Detailed Frontal Wig Install From Start To Finish | Ali Pearl Hair
- Posted on 31 October, 2019
- Lace Front Wig
- By Anonymous
●▬▬▬▬▬▬▬▬▬♛Alipearl Hair♛▬▬▬▬▬▬▬▬●
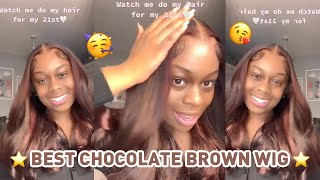
Hair details: 180% density straight lace frontal wig 22inch
Direct Link ➤http://bit.ly/33htxeC
★ Alipearl official hair store ➤http://bit.ly/2T4w6vN
►Use code:“alipearlyoutb”to save $10
Best selling straight hair 3 bundles with closure➤http://bit.ly/33ghjCD
Recommend staright hair 3 bundles with frontal ➤http://bit.ly/2T6gYxS
Get to know our latest promotion ? http://bit.ly/2H0Gmmc
Follow @"alipearl_hair" on Instagram:https://goo.gl/SjMrzq
#alipearlhair #alipearlhairwigs #alipearlhairbodywave #bodywave #affordablewigs
Amazon store hair link:
Body wave Closure with bundles:
https://www.amazon.com/dp/B0783MNYML?t...
Straight Frontal with bundles:https://www.amazon.com/dp/B0786YRGQJ?t...
E-mail: [email protected] (Provide Wholesale)
WhatsApp: +8617719937661
Follow @"Ali Pearl Hair" on FaceBook:https://goo.gl/GFnwNk
Follow @"Ali Pearl Hair" on Twitter: http://bit.ly/2Wb7J0
What is up you guys? It is young Africana back at it again with another video, and today I have my beautiful client / model I'll, be showing you guys how I installed this way from start to finish, this hair was provided by Ali Pro. I have the 13 by 4 frontal wig in Brazilian straight and 16 inches. So if you guys want to purchase that the link is down below in my description box, but starting off, I'm gon na be bringing her hair in straight back. So you want to make sure that the braids are nice and small and pretty much flat like as long as it's flat. It'S fine! So these are the infamous Meek Mill use, as you guys can see, they're nicely flat and ready to go baby girl. So you guys this is the wig after I finished customizing it, the wig does come pre plucked by I decided to [ __ ] it just a little bit more and also bleach it as well as you guys can see. Mine are a little over bleached, but that is very fixable and right and I'm going ahead and go in the back and just cutting off that excess lace and the back as well, but yeah. This video was pretty much about you. You know fixing your mistakes, because there were a lot of these things that I didn't make, but there are easily fixable you guys. I also went ahead and went in the back of the nape area, where the adjustable straps are just adjust. The wig just so compare her head better. Now, I'm going ahead and carving out her ear tabs just to cut around her ear. This is very crucial guys when you guys want to make sure that you do this, especially for my beginners, because this can make or break your install. You don't want your lace covering the ear. Okay, so yes cut off the air time. I made sure I cut where those only lakes are. If you see the adjustable strap, please avoid it and just cut where the laces act, so yeah we're gon na. Do that to both ears, of course, and not to do it to one ear, and now I'm gon na go ahead and put on this wig cap on her head. Yes, it's a light. I know, but we're gon na go ahead and put makeup over it to match her skin tone, but right now what I'm gon na do is also cut off the ear tabs on this bad boy as well. This just I feel like it, has a better fit, and also too you can get all the creases and crevices around her ear and loosen to God to be spray on her head now. This is one of the mistakes that I had made, so it wasn't really on my part. It wasn't my fault, you guys so I'm hoping spraying the guns to be spraying her head in, like all of a sudden, all the spray just come crashing down onto her eyebrow and I'm like bro, I'm pretty sure I sprayed it on her hairline. But this is one of the mistakes that I did end up fixing. So what I'm doing right now, I'm spraying it you know over here. I think I'm doing something. Clearly, ain't do nothing yeah, I'm just over here spraying it and everything just came crashing down her face, so I'm gon na show you guys in the next clip what I did to fix it. So before I fixed it, I went ahead and got some sewing thread and also my needle and what I'm doing right now is I'm going across around the crown for a head from ear to ear and I'm slowing that down. Just because I know I'm not gon na keep the whole entire cap on I'm gon na be cutting like so this avoids the cap to you know just be all over the place. You want it to keep it neat and keep it cute. So I'm just using that, so I can. I can be able to cut off anything, that's behind where I sold. So yes, I'm over here using my blow dryer just to make sure everything is dry. Before I come and be, you know, captain say the cap and you know doing my thing and trying to fix this problem cause. Clearly this is the problem and we got to fix it. So all right, I went ahead and I use my boat hope blue. Yes, I once I went to use the boat, blew you guys and I'm gon na put it all around the perimeter where her hair line starts at I'm just gon na be using that and I'm going to use my popsicle stick, I'm just gon na smear it Down, you only need one coat one coat. We do it good and you just want to make sure that everything is tacked down, as you guys can see right here and losing my popsicle stick and I'm just going to go around the perimeter of her hairline. Just so that I know that it's secure and the cap is not going to go anywhere now. I'M gon na go ahead and use my blow-dryer and just dry that until it turns clear - and I repeat, do not do anything until the glue is completely clear. I'M telling you I've done it before and you don't want to do it while is wet, because I knew it ain't gon na shoot money thaw so, yes make sure it's nice and dry. The blow dryer is supposed to speed up the process. So hopefully it does speed up a little bit for me and for y'all too, but yeah yeah just keep on drawing until it turns clear. Now I'm going ahead and using my scissors, I'm gon na cut in the middle first and I'm gon na go side-by-side, and this is kind of like the little difficult part a little bit. So you want to braise up wherever the spray went all over it. Just so you're able to cut it, I try to do as gentle as possible because it's not a gentle task guys but yeah, I'm just gon na keep on doing that until I get to where the coolest I and I'm just gon na cut around the perimeter. Pretty simple, you know simple stuff: you guys nothing crazy. Now, I'm going to cut off all of that excess cap on the back and I'm going to use my concealer. I just used a regular concealer. I use a board to UM Born This Way. Concealer. I forgot what color what this I came to speak. Brian. Are you guys? I don't even know what color I use, but I just use something: that's near his skin tone and yeah. I'M just gon na use a regular buffer brush brush that on Danny. Like you know regular now, I'm going in with 91 % isopropyl. I don't know how to pronounce that, but it starts with an i alcohol, I'm going to with 91 percent alcohol, I'm just going to my limiter just to make sure that all the makeup, all the guys, do on her face. It'S gone all the oils or the natural oils as well as gone, because this is what helps your frontal maps and all of y'all. Now I'm using the bolt holds glue. This is the regular one. I'M not using. The bolt has acted, I'm just using the regular glue and I'm just doing little dots all around the perimeter and I'm gon na use. My popsicle stick like how I did when I was attacking on the cap and just gon na smear it down. You kind of want to make sure you have some width on there, so I'm trying to go as far back on the calf as possible, because this is one of the reasons as to why sometimes, if your lace end up lifting very fast is because the width Of the pool, it's not enough - and I learned this from my sister Berta Jane, like that she of the truth yarn, like that's that's what I watched when it comes to hair, is everything like she really taught me about this front to life, and, like me doing This technique changed the whole entire game. For me and like, I feel more confident and doing front rows now, even when I mess up so yeah, I'm gon na go ahead and use that same concealer that I use on her head onto the cap and by the way, so the amount of layers that I'Ve used of glue our three layers. I use three layers of glue. You want to make sure that each layer dry completely before you even put on the next layer, because it's like foundation like if the bricks ain't good in the house, everything's gon na, come crashing down. So you want to make sure that everything is dry before you put on your next coat of glue. I promise you you're gon na love you for this. Thank you drops mic nah, but yeah alright. So now I'm going to go ahead and just tack on that front: toe wag y'all! You want to make sure that you're, a hairline or the hairline on the wig is in front the arm of the glue or right where the grooves at you don't want it before it, because I'm telling you you're gon na end up with mad links. On top of your head and it's gon na look crazy, I'm telling you so yes, I'm gon na go ahead and have my client hold down both sides. Just so I know everything is cured and while she's doing that, I'm gon na go with my blow dryer on medium heat and blow that on and then also use my god to be spray just to give it extra security and extra melt as well. And then they're gon na go back in with my blow dryer and just blow that and use my rat tail comb to be like press down the smudge in that glue. Now I went ahead and use an elastic band, I'm just to help press down with the flu. I'M just gon na leave it on. While I go ahead and Flatiron and kill two birds in one stone, so imma, just let that sit and I'll be using my Garnier Fructis flat iron arm spray and just gon na spray that, on her on her hair, was flat. Ironing and the fine. I do have is the baby list, nano titanium flat iron and I believe it's a one-inch one. I have both of them, which is 1 inch and the 1 and 1/2 inch one I'm using a one-inch one right now. I'M just gon na go track by track. Flyer - and here I'm pretty sure, everybody know how to fly and a hair, but but my peoples that don't I'm just using the trace method, which is the comb in front of the Ferrari and I'm just going to trace it down. This, will guarantee you sleep mix. Yet they'll mean yes and I'm gon na go ahead and go on to where the frontal areas are as well and flat iron right here for the most flattest and sleep as a result. Now I'm removing the elastic band and I'm gon na go ahead and cut three sections, so one for the middle and then two for the sides. So yeah I'm gon na go ahead and use my razor just to cut off the lace, and this is what will guarantee you like the most natural results. Is you using a razor um instead of like a scissors, because it would give you the more of that jacket II? You know ruffed. I don't even know how to explain what the hell is: a repeting guys but um yeah, most jagged type of outcome, and that's what you want. You don't want a thing straight across from your head. Cuz, you gon na look crazy. You feel me and also to a little disclaimer. Yes, I know the lace is a little white one. My camera is picking up these rear hues of colors. I don't know why it looks a lot better in person. Secondly, you want to make sure that your lace is a probably a shade lighter than your client skintone, and I'm gon na tell you why in a second, so the reason why you wanted to be a little bit lighter is in front of her being light. It'S a lot different than how it looks like in real life like underneath different lights. So just no different lighting means different hues of your lace, and I will rather my links. Look a little bit lighter then a little bit darker and in natural lighting and looks it looks more natural and matched her skin tone more than how it does under a ring light. And she ain't gon na be under a ring light for a week and a half. You feel me so with that being said, that's what also baby here's a use for as well. So, even though it's picking up these weird hues we're gon na melt some more when I use the mousse and everything so maybe girl don't worry about this, don't try to leave no negative comments either cuz. I will come to your ass. You feel me anyways back to things that matter most, I'm gon na go ahead and take out a row of her hair and from the perimeter. This is where all my baby hair is gone. Yeah, you feel me and I'm just gon na go ahead and just take them out and then use my hot comb and I'm gon na hot comb on her hair. That'S in front also the hair on the back as well. Now I'm going ahead and parting. The part I wanted the part in the middle some parting it in the middle and i'ma just use my hot comb just to flatten out that area. Now, I'm just using these small little baby scissors just to cut off my baby hairs. You want your baby here to be at least like an inch, and if you want to cut it shorter, you can cut it shorter, but I prefer starting off with it ends, because again your friends will can grow. So I ready to start long and if you feel like it's too long, then cut them shorter. I'M just gon na cut that all around the perimeter at least one inch and then I'm gon na go ahead and use my Nairobi mousse as well as my rat tail comb and I'm gon na go ahead and form these baby hairs. Now the key to success when it comes to the baby hairs, it's be gentle now before I use gon na kill wise. My legs keep on just enough, like I'm tired of this [ __ ] that I used to go mad all right. You guys makes me tight, but baby hairs don't come overnight, like you do have to practice it crap and be very light handed because I'm a very heavy-handed person and you just have to be really really play. What did I also notice, too, is that using your rat tail combs a lot better than using like the baby here at the small baby, hair combs? More so because um, it's a lot bigger so like I'm, not explaining like you're, not putting so much force and like there's not like sharpness on the UM on the rat tail comb for it to lift up your lace while you're smoothing it. So that's when I notice, because my legs didn't lift up at all for the first time since me using um the rat tail comb. So please use a rat tail comb. It'S very beneficial also to use a lot of mousse as well, not too much but be generous okay. So, with that being said, just using a lot just so the baby hairs will be forced into places that they don't want to go. The most is supposed to help you not hurt to you guys and one more tip make sure that your moves that you're using is alcohol-free. Like I said earlier, the Musa I'm using this in April. If you loose, you can get off the Amazon we just applies or wherever you can get, it make sure it is alcohol free, because the alcohol goes up your frog too, so snug this payment. Now I went ahead. I use this silk scarf and I put it around it cut off while I was putting it on so I couldn't catch it on camera, but yeah. I'M just gon na tie that around and I'm also coming out the hair, just making sure that every strand is out that I need for when we cut the supply, so we get into the fun part where you're cutting off this Bob. You guys so again, you wan na make sure your hair is nice and straight there's no kinks and no, you know curls in it. So when you're cutting it, you get the true length of the hair. Now ask my god, I'm just using my comb and it's going to go ahead and shave off their hair, while I'm doing that this method personally helps to me some people, you know: do it like that instead, but I just like to do it and then wherever I clean up I'll clean up that I'm just gon na go around the perimeter. Just like that very simple, very easy. You might have to go in a couple of times. Cuz again, I like to start off long and then probably get shorter. If my client wants a shorter bob, which he did end up getting shorter, but it was just more of trial and error and just keep on cutting to where it gets, even so just keep on cutting and also I prefer, for you guys to start the back And then go to the front just so that you know it's even now again, I'm going track by track, I'm just a flat iron, the hair and to give it a little bump. And while I'm doing that, I'm just gon na clean up any mistakes that I did make when cutting and just cut it even more evenly even more evenly but yeah. So yet I suggest for you guys to do this. If you want the bluntest and nicest cut bob see yeah, just I'm just going in, for you know, you know double checking you guys as math teachers, we say haha yeah. Now I'm going in with my blow-dry and I'm just gon na blow the front of her hair just to make sure that um that hair on both the baby hairs are nice and dry. You wan na make sure to cheer baby here's a fully dry before you take off the silk wrap and, as you guys can see, she is looking lady mummy bum and we not even done yet so right. Now I'm going in with my hot comb and again, I'm just going to go in with it just to make it more flat and more seamless you now, I'm just going in with the high beams route coverage, and this is where I'm gon na fix my mistakes. What I'm doing right now is using the metal part of my rat tail comb and putting it in the middle of where my middle part is that I'm just gon na be doing short. Bursts of spray of this spray is a root coverage, so it does help just for grades, but also too just in case it'd be messed up and have some juice just seeped onto the roots, as you guys can see - and I am little like I even messed Up with the bleaching, everything is fixed, its fixable, and you can do this. You got this money done just because he must have doesn't mean that you can't fix it, and now I'm just going ahead and I'm gon na comb out those baby hairs. Cuz, I'm not a big fan of the whole crunchy baby or, like my baby, hands nice, and so that's my booty. You feel me, but now yeah for real, though I'm just gon na go ahead and comb out those baby hairs just to give it a nice, natural and fluffy. Look now, I'm going in with the carrot. Hair wax. Stick! I'M just gon na put that all over here just to tame all the flyaways that we're trying to you know this gate. Ah i'ma catch you and you are gon na have to chill, but no but yeah um. This is pretty much to finish myself up how the hell of days, so this is just a representation as this thing and as a matter, if you mess up it's how you finish, you did yeah, I'm just gon na go ahead and continue to comb out and Fix - and you know just make her more fabulous than how she already is, and this is the final, it's all you guys. I hope you guys enjoyed this video like comment and subscribe to my channel. If you have not clicked that bail notification next to my name, to make sure you get the drop before the drop even drop, you feel me but yeah. I hope you guys enjoyed this very in-depth tutorial down below what videos you guys would like to see and I would catch y'all in the next segment. I see you later nuisance.


Comments
Young Africana: LAST TIME I WILL BE EXPLAINING THIS ... My Camera Lighting And Exposure Is Off And Made The Install Look A Lil Orange. If Y’all Can ACTUALLY Watch The WHOLE Video Till The End Where I Used A Different Camera Ya Will CLEARLY See The Install In It’s True State. Negative Nancys Will Be Deleted And Blocked .
LoveSomeMontana: U did an amazing job and was soooooo detailed
Morgan Leigh: Just a tip... please be more attentive to your client.When it came to using hot tools she flinched the entire time ,you kept the blow dryer in one spot for too long and she also made faces when you used the hot comb. So please be more attentive to if your client is actually okay most times they won’t say if they aren’t.
Tina Bloodsaw: From a professional stylist. Job well done and you keep the viewers entertained
Kamesha G: Your scalp is naturally lighter than the rest of your body so having a lighter lace isn’t really a bad thing unless it’s too light
tiffany Harris: I love the way you took ur time on this video and explained every step that you took!! I’m just now buying my first lace front lol smh I don’t believe in wasting money especially my own money!! Lol so I found your video and now I’m confident that I can do it myself you go girl!!!
Qionne Bickham: You did an awesome job!! I loved it and it looked professional❤️❤️
J’adore Ashley: Loved the end results❤️ I’m a dark skin girl and I used to have issues blending my lace. I found that when I use a darker foundation (1-2 shades darker than me) on my lace, it comes out so natural looking. I personally would rather have my lace look darker as oppose to it looking lighter.
JynxLxc: Beautiful install, work in smaller sections when you apply the spray for the cap. Spray, blow dry, spray blow dry, repeat. It’ll get the cap on in under 10 mins without any excessive lifting
Liyah Rochelle: !!! Thank you sooo much for this video! I have been wearing wigs since like last November and I don’t know how to do shit but kind of lay it down with got 2 b. This is very detailed and I appreciate you acknowledging your mistakes and showing how you corrected them because a lot of us make those same mistakes and I don’t know how to fix them so I just don’t do anything. ❤️❤️ you are amazing and she looks beautiful. & f*ck all these negative ass bitches that just NEED something to say bc 1. Your scalp is naturally not supposed to make your facial skin tone... if it does there is something seriously wrong and they need to go to a dermatologist. 2. At the end of the video, you can see the difference in the light and the way it looks after everything sets and it looks fabulous. Even if you did everything absolutely perfect , they would still have something to say. Keep doing what you doin and again thank you love !
Laurynski: You did a great job. Excellent footage and very detailed explanation especially for a beginner like myself. Thank you!
XYAssassinXY: Yesssssss sis I feel confident trying this damn install again because I was finna give up!!! Thanks for the insightful video Queen ❤️
Lex: Most impressive shit in this video is her lashes stayed in tack after you covered them
Kahyja’s Tv: Looks great ☺️ glad u posted this trying to learn how to install and lay them down u explained it well thank you
Autumn Jontz: This was such a good video! Super realistic for beginners usually they do perfect and I’m like ugh why didn’t mine come out like that!
charnell2681: You did a great job, very detailed and to the point. I'm gonna try this tomorrow.....wish me luck
Andrea Gathings: You Just Put Me On To Some Tips I Didn't Know While Installing Thank You Boo! ❤
Diaphé: You did a really good job came out real cute. Thanks for the video love
Simply Keish: Loveeeee this! Very detailed ❤️
Ms.Attic: Her skin has such a beautiful glow.
Jordybee: This came out really good loved it ❤️❤️
Lixandraspartan: You did that sis , ignore the negative comments. I learned alot from this video and you did a great job
Nivea Hiett: LOOKS BOMB !!! Thank you sm I learned a lot actually
Fly and Loc'd: You did that!!!!!!! I'm a licensed cosmetologist. Been one for 26 years and I say you ate this! Bravo young Queen
Alicia Newman: You did an amazing job with this wig and guys in the beginning she said she over bleached! You’ve gained a subscriber
Renée Rose: You did that!!! Question: how long does your installs usually last with the method in this video?
Creal9x: This is a wonderful video for a beginner like me. I loved the in-depth details. You did a wonderful job. Great video thanks for sharing. I’m new let’s stay connected
Coco B: Aww pooh you did a great job! You inspire me!! & I love your “how to make a wig on a sewing machine” tutorial.. It was very helpful, keep up the great work & keep dropping content it’s so appreciated..
YVETTE WRIGHT: Thank You so much for the detailed video it help me out. You did an amazing job.
Jennifer Oboh: I love this install! You taught me a lot as I navigate lace front installs! Thank you!
Ebonita Applebum: Have you client tilt their head slightly back when spraying the got2be so it won't run towards their eye area. It should keep that from happening or have their faces sticky from it running everywhere.
Odella Woodson: all i can say is WOW!!!! the technique was flawless and the encouragement to fix mistakes was very helpful. thank you
alyssaa nicolee: soooo we’re just going to ignore her skin
Modupeoreoluwa Komolafe: I love this....Soo detailed and neatly done. I love the way you perfected the mistakes . That was more important to me because we are not robots and you are bound to make mistakes occassionally.... I love the way you owned the art. You have definitely mastered this art Thanks for being Soo clear with the explanation
Mercy Designed Me Beautiful: Great Job and it's good to show that it's okay to make mistakes the goal is to keep practicing to get to greatness so keep doing what you do...and thanks for teaching me a few things
My Beautiful and Unique Life: Your commentary omg I was very entertained and getting educated on the process of installing the wig at the same time...you do a bomb tail job
Boy Mom Avi: Yes very natural looks like a silk press GREAT JOB❤️
Nefertiti Vogue: Great job sis , this vid was very helpful
Ms Melodeez: I have watched so many videos on this and yours is the best and my outcome was really different trying your way. Thank you!!!!
Liyah Baby: I like how you can braid hair with nails and I can't even button my pants
Zaina T.: Omg I love the hair this was very helpful thank you
Taylor Bowman: Loved it sis keep up the good work!
Mo de Dulce: Love this!!! You definitely explained the discoloration, I have experienced the same thing. Keep slaying honey!
D Grace: How long does the lace front process take? Also, I wonder if it would work just as well if I were to slick back my hair instead of braiding it (I don't know how to braid my own hair yet).
nyasiamyaxo: ommmg your finish look was AMAZING keep up the good work hun !!!
Christine Creamer: You did a beautiful job, and I learned something years ago when someone gives you a advise no matter who it comes from isn’t a bad thing, but leaving a bad comment isn’t good , but it shows people are looking at your videos which is a plus and obviously they must like your work they just didn’t agree with one thing you did wrong to them. But in life everything is a learning process. I love your work you keep doing what you love to do. And who cares about the negative comments continue sister to do what you love to do, and keep showing these videos I love to watch.
Corey Miller: I learned so so much from this video ♥️ nice work too btw.
NeeCee Hayes: Awesome job...best I've seen, just beautiful!!!!
Akakpo Mercy: This so amazing gonna try one on
LaLa KuSHH: IDK why I find frontal installs so therapeutic for me. Instead of using Got2B to hold down my bald cap I just use a layer of my Boldhold glue (I use a scalp protector first and before applying the glue to install my wig) I find my installs lay way longer and my edges don’t break off like it does when I use the freeze spay.
Avis Rosser: You did a beautiful tutorial especially for beginners like myself to learn it was very detailed and looks very natural I hope I can get mine to look like yours
The Choi Family: It looks amazing
Eneka Rentie: You did amazing job
Sandra Olojede: Love this please do a layering and curling video x
Molise.m: I’m glad you’re giving Ericka J some credit This came out very good love it ♥️
Key NICOLE: Love it ♥️.! Definitely going to try again now
Zanera Jones: I love that you showed your mistake and how you fixed it
Nihcondra Mallard: This looks REALLY GOOD!!
Andrea SJ: I love love love this! You did your thing with this frontal!!
Charnae Winchester: I loved the glue method, at the end it still looked a little orange to me even with the different lighting but overall u did a really nice job. Baby hairs was on point to!
Treasure Achinanya: damn all this look so long. i really dont know how to do my own hair and im terrified of messing up my wig, so imma just do this in a salon. you're so gifted
Alexi Watson: This was very informative ❤️
Lady Kim Kreations: Thanks so much for the tips! Wish I could send a pic cuz I'm sooooo satisfied with the results!
Beeze Boo: Some of these comments are proof that no matter how good you are at what you do someone will always have something negative to say ♀️ why can't we just uplift each other and only spread positivity between us women?
Emira Best: When you get to the point where you’re cutting off the excess wig cap in the front, how do you keep it from rolling backwards? I’m struggling with that. Even if I add more glue, hold the rolled part down with a comb and blow dry it at the same time. It’s not a lot. It’s literally the tiniest bit but it’s too small to get with the scissors.
CurlyisConfident: Great job!!! Beautiful
Christy L: Your video was entertaining as well instructional! Thank you good work!
Keke Caldwell: That's flawless
Kimony Giddings: I love the outcome
pryncess johnson: That is super cute I think you did a tremendous outstanding job I would love to be a client and get mines done
The Real Meahmi: it was one of the best installs I’ve seen but it was a little too light even after you filmed w/ another camera w/ out the light don’t get mad when people give you constructive criticism it’s the truth nobody is trying to hate we all have the same opinion it’s too light for her but besides that you did a wonderful job
Queen E: You did an excellent job my dear!
Stacie Szekely: That looks great wonderful job
sherri rucker: I lovedddd thisss you helped me out so much detail by detail very in depth u the bomb. Comb keep doing it sis
IAM IB: I love this video! And your personality! You reactivitated my passion for hair
elamelanin: Alipearl hair's lace is one of the most difficult laces to work with, She did the best that was possible trust me I've used this lace and this is amazing in comparison to what i achieved lol
christ chasers: Idk what people are talking about this looks great! It's laid looks natural. Great job
AnaBella: Girl you did so good!!
Keayana Hill: Her lashes is bomb and you did a great job.
Dolan Imagines: How long does it last for, before you have to re-install the hair??
shantel davis: You did absolutely wonderful.
Noella Fru: Oh wow loved the tutorial
Ericka Russell: Thank you! You helped me so much
La Renn Esther TV: She did better than me!! Beautiful practice makes perfect
Temisha Henderson: Small tip: try using the got2b gel at the edge then put cap on and it will give you better view on where to put the spray and also keep it from running.
Candycane: Girl you did a great job
L.A Hair And Beauty: Love how the lace matches so Great with her skin tone #blackgirlmagic
Nekia Harris: You did a great job baby girl ♥️
Tasha Official: I love this young lady skin its looking flawless . Melanin Popping . However the hair tutorial is a bomb am loving it .
Vera Iloka: So so beautiful Good job
AfroCare Princess: Does this stay in place for weeks or needs to be redone? Iam just new to wig life and so curious I love this look
Tati’sTeaTime: listennnnnnnnnn through this video i hooked my wig up i loved the outcome !!!!
ItsMeOmas: For darker skin the stocking cap method usually leaves us a lil extra orange even with the added foundation no lie
Kerhiry's World: I love this ... learned a lot from this video ty
Mystique Self-Care: FRIENDLY TIP: I didn't read all the other comments so I'm not sure if someone said this to you already. I used to do this too (spray gots2B on my cap then it runs all down my face). So what I do now, I hold the blow dryer to my hairline, pointed where the air blows back into my hair, then i spray a little and dry as I go. Doing this I've been able to keep the spray JUST on my hairline and nowhere else I don't want it. hope this helps! or maybe you have figured out another technique by now...
Kery J: You did an amazing job. which concealer you used and where you purchase your trimmers?
Quiarra Starks: Good job ! how long did it take ?
Vivacious Looks: Love it ❤️
Absolute Boss: I went through her comments and I see about 10-12 negative comments and it’s like for whattttt the install is niceeee
Crystal Beasley: Love it.. wonderful.. I got a front lace and I do hair but never installed a wig.. I going with your steps this is bomb