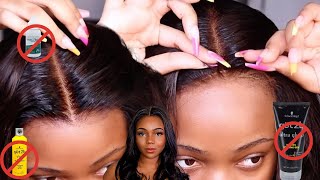
How To Make A Lace Front Wig | Very Detailed Tutorial | Glueless Lace Frontal Wig
- Posted on 15 January, 2020
- Lace Front Wig
- By Anonymous
Hey Luvs!! It's Shay Amour here and today's video I thought I would do a video showing you how to make the perfect lace frontal wig. This video is beginner friendly and super detailed. I will be doing a in-depth custom lace front wig tutorial. In this tutorial you will see how to do the following:
-Sew in a lace frontal
-Sew in your tracks/wefts/bundles
-How to get a seamless looking wig
-How to do fold-over method
-How to put your wig in a ponytail
-How to cut excess wig cap underneath your lace frontal
-How to style your custom wig
-How to install lace front wig
★☆★ OPEN ME FOR MORE DETAILS ★☆★
Hey Amour Gang!!
AMOUR WIGS
WEBSITE: http://www.amourwigs.com
WIG SPECS:
Peruvian Straight + Body Wave
Length: 14/16/16
13x4 1/2 Lace Frontal
6 inch Deep Parting
Straight Bob Wig
Pre-plucked Hairline
Slightly Bleached Knots
Lace Color: Medium Brown
Color: 1B Off Black
100% Human Hair
DIRECT LINK TO ORDER CUSTOM WIG MADE BY ME: http://www.amourwigs.com
HOW TO MAKE A WIG TUTORIALS PLAYLIST:
https://www.youtube.com/watch?v=iUQsIs...
Sew-In Weaves, Custom Wig & Quickweave Tutorials Playlist: https://www.youtube.com/watch?v=9BVJpQ...
★☆★ FOLLOW ME BELOW ★☆★
I N S T A G R A M ♡ @iam_shayamour
F A C E B O O K ♡
https://www.facebook.com/amourwigs
https://www.facebook.com/amourluxuryco...
T W I T T E R | @iam_shayamour
★☆★ I AM NOW SELLING WIGS & 100% VIRGIN HAIR ★☆★
Shay Amour's Wig Company: Amour Wigs
Website: http://www.amourwigs.com
Contact Amour Wigs: [email protected]
O R D E R V I R G I N H A I R
♡ If you are interested in ordering 100% virgin hair, please visit my website: http://www.nvmyhairboutique.mayvenn.co...
♥♥♥♥♥♥♥♥♥♥♥♥♥♥♥♥♥♥♥♥♥♥♥♥♥♥♥♥♥♥♥♥♥♥♥♥♥♥♥♥♥♥♥♥♥♥♥♥♥♥♥♥♥♥♥♥♥♥♥♥♥♥♥
M U S I C
Title: Judge U
Artist: Apt416
Instagram: Apt416music
Title: Whatcha Do
Artist: Apt416
Instagram: Apt416music
✉For business inquires: if you are a company that would like for me to do a product review, giveaway, sponsorship, or other opportunities, please email me [email protected]
I know it's been a while, since I posted a video. The reason for that is because I've been doing a lot of different things and you guys will see what I've been up to very very soon. But today's video I wanted to come at you with a custom wig, making series I've gotten a lot of questions. Comments beams on how to make the perfect wig. You guys have been telling me that you're having a lot of issues with making a wig for yourself as well as for someone else, so I decided to do this super detailed video or a tutorial to show you exactly how to make the perfect link for into A wig like a pro I'm going to be showing you guys what supplies you need to make a wig: how to sew down a lace front tool: how to sew in your webs how to make sure that once you take the wig off the wig still, if It'S your head and everything else. So, if you guys are interested, definitely keep watching the video, hopefully this video won't be too long. I believe it's probably going to be two parts so make sure you guys check out part 1 as well as part 2, but yeah. Let'S go ahead and get started you. This is the dome cap that I am using, so I'm going to go ahead and place it, so you want to adjust the wig cap to make sure that it's fitting down on the canvas head and try to you know. Sam mimic, the way that it will sit if you were putting the wakeup on your head, you don't want it the wake up in the front to be too far down you want to make it seem like okay, this is the face. This is where the hairline starts, and then you know this is where the ears will be, and this is the nape of the neck. I went ahead and place the lace frontal onto the wig out, but there's one thing that I'm going to do: I'm going to actually cut the ear tabs off, because I really don't like the full length of a lace frontal now that I've went ahead and cut Off the ear pieces, this is how my frontal is sort of looking right now, as you guys can see I've already bleached the nuts on this frontal. This is an old frontal, but I loved it so much because it looks so realistic. But if you guys are interested to see exactly how I customized or bleach the knots on my front. So I will put the link to the video up above, but so what we're going to get into now is we're going to go ahead and position this frontal onto this way. Cap now mind you guys when it comes to placing the frontal, you do not want it to place the front hairline right at the very front of the wakeup. You don't want to do that. What you want to do is you want to pull the frontal down? Maybe about one like I have or one inch in front of the front of the wakeup okay and then you want to pin the back down just to make sure it's not moving make sure everything is flat as possible. Make sure that the very front of the wakeup is right at the middle. I went ahead and position the front, so, as you guys can see, right here is where I'm going to start sewing and then I'm going to sew all of the back. That looks like this and, as you guys can see, that frontal piece or the strip on the front Opie is laying down flat. That'S what you want and the other side looks flat as well. So that's exactly how your frontal lay on your wakeup before you start sewing now in order to solve the fronts who you're going to need to needle and thread. So I'm gon na take my first needle and thread and I'm gon na start sewing down. So pretty much I am sticking the needle on the top fabric. Please you guys one of the main things that I've noticed or I've heard is that you guys are sewing through the elastic band. Do not sew through the elastic band, because if you do 9 times out of 10, that unit will not fit your head anymore, because you pretty much made it super super tight. Ok, so there's a top piece of fabric that looks like this. If I can pull it up, this is the top piece of fabric. This is the only I mean moving closer. This is the only piece that you should be sewing through when it comes to sewing your wigs okay. So I'm only going through the top piece of fabric to sew down my front saw and I'm just pretty much, only doing a traditional stitch technique which is going through the wig cap fabric, going through the lace frontal and then just pulling it out. That'S a traditional stitch method. Okay, make sure your stitching is closed. Oh girls, don't mean I went here and sewn down both sides, so the next thing to do is: go ahead and sew down the back of the frontal and the way that I sew down. The back of the frontal is, I saw a little bit on one side and then I switch over to sew down the other side. The reason why I do that is to make sure that the back of the frontal does not start puckering and then, if it does start pressuring, then your lace frontal will not lay down flat. So that's the reason why I'm you guys are gon na see me sew one side a little bit and then the other side a little bit okay. So the way that I do this is instead of doing the traditional sewing technique. I'M going to do. I think it's called the blank stitch method where you place the needle and thread halfway through the frontal and the way cap, and then you take this piece here and you wrap it behind the needle and thread and then you pull through. Oh, let me see if I can get even closer, so you guys can see what I'm talking about so, like I said, I take the needle and thread I put it halfway through the weight cap and the frontal, and then I take the piece of thread and I wrap it behind the needle and then I pull through so the same thing again and you guys will see the difference with the stitching. Once I started stitching more. Oh, you kept from all the time that I've been right here with you. You haven't said. I know dive in drugs on law, okay, so this is how it looks, I'm not for sure if you guys are able to see that because the cap is so dark but yeah you'll get you guys will see it more once I started sewing down the webs. So, as you guys can see, I sold a little bit of the frontal on one side, and so what I'm gon na do now is I'm going to sew a little bit on the other side and I'm just going to go back and forth back and forth Until I completely sewn down the front, tell me: was it something I've done, yeah cuz, I don't want. I don't want a night to be a hard one. I just want you to come over here. Take this. You know that was over here and I'm just gon na overlap, there's needle over here, just to make sure that everything is secured. So this is pretty much my last stitch. So what I'm gon na do now is go ahead and tie a nut, and then I'm gon na just cut off the excess thread so pretty much the way outside the night. Is I wrap it around my finger and then I turn it and then pull the needle through and then tie it off, and I don't usually do this twice and I usually do it on both needle and threads same thing for this needle that was over here. Tie it off and then I'm gon na take my scissors and I'm just gon na cut as close as possible to the knot that I made and we're done alright. So if you guys can see, this frontal is super flat. It'S laying down flat, there's no puckering, and if you sew your lace front to like this every single time, you wouldn't have any issues with your frontal, not laying down flat when you install it onto your head, so that was to part it it's flat. In order to sew down your first bundle, the first thing that I do is I go ahead and take my needle and thread, and I sew in the back of it. So I stick the needle and thread through the weft and the knot that is on the other side is going to be behind or in the back of the weft. So when I started sewing it down, you won't see the knot. That'S on the thread. It will be laying against a wig cap, so one of the techniques that I always use to make sure that I'm able to wear my unit up in a ponytail is the way that I saw the first whiffed. So I'm going to start pretty much where I kind of line up where the weft is supposed to go. Is I pretend we're exactly the back of my ear is going to be a so pretty much. The back of my ear is going to be about like right here, so I start the first weft about right there, okay and that's how it should be, and the reason why I sewn through the well first is because this left is not going anywhere. I don't. I don't have to like try to hold it down, so it'll stay in place. It'S staying in place just like this, so I start with the traditional technique. First, I sew through the fabric, as well as the left make sure that the beginning of this left is sewn down and then once I do that, I go ahead and start with the blanket stitch method which is wrapping the the thread behind the needle and then Pulling it through, so I'm sewing at the very tip of the back of the wig cap. Okay and remember do not so through the elastic band, you only want to sew through the top piece of fabric. That'S it so you're going to keep doing the same thing until you get to the other side and you're going to stop where the back of your other ear should go first row as you guys can see. Hopefully a consistency is very neat. This is not going anywhere. That'S the reason why I love this type of stitching, because your wife is not going anywhere. It is tightly and properly attached to the weight cap, so I've gotten to the very end of my first needle and thread so I'm gon na actually go ahead and tie this off and then cut it off and then start with a new needle and thread. So the next thing I'm gon na go ahead and show you guys is how to do the fold-over method. I do not cut the West when it comes to sewing down the bundles and making a wig. The only time that I do do that is when I get closer to the frontal or closer to the front, a closure. So here's, my new Anita, went through it. So what I'm gon na do is I'm gon na go through the top fabric. Only - and this is pretty much how you would start a new needle and thread go through the top fabric. First, pull it through and then continue to stitch. So I do the traditional stitch technique, which is just going through the fabric and going under the weft or do about maybe like two times and then I continue on with a blanket stitch method. Okay, so now what I'm gon na do is I'm going to go ahead and show you guys how to do the fold-over method? So I'm going to do my very last stitch and the way that I do my very last stitch to make sure that the weft is not going to move. Is I pull the needle n thread half way through and then I actually take the piece of thread and then I wrap it around the needle twice just like that, and then I pull it through and that is going to secure that way see the weft is Not going anywhere, it's not sliding anything. So, in order to do the photo format that all you have to do is take your piece of weft and you're just going to fold it over fold, it over make sure if you need to use a tee pin to hold the weft and place so it Won'T drop alright, so the what is folded down. So what I'm going to do is I'm going to stick my needle and thread through the weft through the top piece of fabric, pull it through and you're gon na. Do this a couple of times just to make sure that fold-over piece is super super flat? Okay and if you need to just use your finger to hold it down even more as you guys can see, I'm using my thumb to make sure that that piece is fold it down as flat as possible and then after I do that, then I'll just start Back again, with my regular sewing technique: okay, alright! So the next thing I'm going to talk about is make sure you guys know how to space apart your weft okay, because that can make or break your your custom wig. Okay. So when it comes to placing or spacing out your weft, it all depends on how many bundles that you have and how much hair is in each bundle. So let's say that, because I'm using three bundles right now and my bundles have pretty much about three ounces. 2.5 to 3 ounces of hair in each that's a lot of hair, so I would be able to just do a finger with a part per row when I started sewing down my um, my wife's now. Let'S say that if you wanted to pull in four bundles of here, I would say: do about a half an inch or a half of a finger with a part when you're sewing down your West. Now, let's say that you only have two bundles of hair two bundles over here. I suggest you use about one finger or one-and-a-half finger apart, because you're going to run out of hair. If you try to sew your wells close together, because if you think about it, you don't have a lot of hair, you only got two bundles of hair and if you don't have a lot of hair in those bundles, you once you get up here, you're going To run out of here and then your your wig unit is not going to be finished, okay and what people don't realize when you make your unit you're, going to use a lot of hair once you get to the crown and once you get closer towards the Front of the front: okay, that's where most of the hair or most of the hair, that's going to be used on your web stats. A lot of space here, if you guys can see the nape of the neck, is only a little bit of space. But then, when you get closer and closer and closer up to the frontal this space here, that's a lot of hair that you're going to have to use okay to close this up. So, like I said, I would suggest that you guys kind of figure out how much hair is going to be used when it comes to making the wig and then thinking about how much space that you're going to put between each web right now doing a finger Width apart, okay and that's for right now, because you don't need a lot of hair in the back or you don't need to stack your bundles on. I mean stock. Your rolls on top of each other when it comes to the back, and if you need to just to make sure that your whip is not you know all over the place. You can't use your t pins to keep the wefts and place okay second row, and I wanted to show you guys this if you want this area to be seamless as possible. So let's say that if you wanted to pull back your hair like let's say that if you wanted to you know if the wind blows and your hair gets blown back, you don't want to see any webs. Okay, you don't want to see any tracks. So, in order to cover that up, you want to make sure that every time you get to the edge of your wig cap on either side, you want to make sure that you're curving your weft upwards and I'm going to show you what I'm talking about. So, as you guys can see, that is where the first whiffed was - and this is the second one or the second row and I'm going to sew as close as possible to the first left. Okay, so I'm going to sew as close as possible. So, as you guys can see, that's where the first wealth is. This is where the second weft is lien, so any close as possible, and now what I'm going to do is I'm going to start curving, the needle I mean I'm sorry curving the weft upwards, and this is going to help with getting the seamless look when you Wear your wig unit, okay, so I've gotten here and so what I'm going to do now is I'm going to start on my third row. So I'm going to fold back I'm doing the fold-over method again hold that weft down sew it in place just to make sure that it's not going anywhere and then start sewing at the third row. So you're pretty much just doing the same thing. Over and over again when it's, when you're in this area of the wakeup, nothing really changes you're, just doing repeating the same steps over make sure that you're pinning everything down, because if you guys do not notice, when you make your custom wig, the wig cap tends To move you're pulling the reason for that is because you're pulling you're yanking whatever and that moves the wig cap. So you want to make sure that if the wig cap is moving reposition it because if you don't reposition it once you get done with making the wig your wig is not going to fit properly. So I'm always making sure that I'm repositioning I'm adjusting the wig cap just to make sure that it still stays. We'Re live for love online, take a look at the sky and I have never been in love this way. This guy is so special to me. Even if he didn't love me. Oh, if you didn't love me I'll still, love you NEP didn't want me girl. I still want you. Whenever the sky is gray, you make it blue there's something about the way you're gon na choose a little it's all there. I don't know what you do, whoa a girl in something, and I don't know what you do. Oh no, I don't know the first bundle. I'M done sewing that in so I'm just pretty much showing you guys, like I said I you just all you have to do is just do the same stitching technique just back and forth back and forth. You know fold over the rough to start your new row. So this is pretty much where I ended for the first bundle, and I want to show you guys what I meant by when I told you guys, that's so as close to the edge of the wakeup as possible, because, as you guys can see, you can easily Pull this up like if you were going to work out, and you wanted to pull your hair up and like a ponytail, you definitely can another thing that you guys see now is when I was telling you to make sure that you curve your wefts when you Get to the edge of the wig cap because it gives you a seamless look as you guys can see, you can't see any tracks or any webs. All you see is hair. So it will look like that all throughout the edges of the wake up all the way, so you get to the frontal. So what I'm going to do is I'm going to start on my second bundle and it's pretty much the same as if you were sewing. The first bundle in you want to take your needle and thread. You want to stick your needle through the back of the weft, so that not that's and the thread is on the back of the weft. So, as you guys can see, the thread is through the weft, so I'm gon na start. Where I end it. I'M gon na stick my needle through the wakeup pull it through and that second bundle is right there, so just make sure like you hold it down. So it won't move all over the place. While you are sewing that piece on one time now for the golem up in the place system to get some space, you don't get down. Okay, so pretty much sewn and a half of the second bundle - and this is how I was looking. So I got about this much space that I still need to fill in and luckily enough I still have half of the second bundle, as well as a full third bundle. So this is where I'm going to start cutting the weft, because I'm getting close to the frontal - and I just want to make sure that everything lays down flat. So I won't be doing the fold-over method anymore. So I ended my left over here. So I'm going to take the remaining second bundle and I'm gon na start sewing everything down. Okay, so with this row, I'm going to be sewing the weft and attaching it to the side of the frontal, no need to try to tell you something. Tell them stairs or okay, so I'm in the process of closing the wig, so I'm still sort of sewing the wefts and au shape. Like I started at the beginning, one of the things that I am doing now is I'm making sure that when I get to the frontal, I am connecting a little bit of the weft to the to the front. Oh okay, because you want to make everything connect. You don't want the webs to be away from the frontal, so that's what I'm doing and, like I said when I get to closing up the unit, I always start cutting the left, because you don't want your your wig unit to be bulky. So that's the reason why, when I'm and I start to close up the unit, I start to cut each row or each weft, and this is going to allow your units who, like super flat as possible once again, if you're looking to wear your unit up in A ponytail, you won't have any problems with bulkiness or anything like that, and I'm still carving the left upwards and then I'm just going back and doing the same thing as far as like the sewing technique. Another thing is, I am, laying the wefts a little bit closer, so instead of having a one finger, width apart, spacing I'm pretty much having the wefts song close together because, like I said, I want a full unit and that's the reason why I am sewing the Weft close together instead of spaced apart, you last thing that I'm doing is pretty much so in the last two three tracks to close up the unit and as you guys can see you know, all you have to do is just keep sewing the tracks like back And forth back and forth, making sure that when you get to the end, you are cutting the web's. Do not do the fold-over method anymore, so I probably need to sew down two more tracks and then I will be done with my unit. So the next thing that I will be showing you guys is how to cut the excess weight cap from underneath the frontal, because you guys do not need that anymore, because I know I got a few questions about. Do you keep that underneath? Don'T you cut it off? What do you do? Yes, you do cut the excess wake up from underneath the frontal and then after I do that. What I will do next is go ahead and wash the hair, and I will show you guys exactly what products I used to wash my units but yeah. So I am on the last left that I'm going to be sewing and then I will be done. The way that I saw the last left is, I make sure that I connect it to the back of the frontal. Do not sew your last left on top of it, because if you do and when you pull back the frontal, it will be kind of bulky right there. So you don't want to do that. You just want to sew as close as possible and connecting just a little bit of the back of the front tool to your wife when you start sewing it down. So hopefully you guys can see this, so I'm sewing in the last left and I'm only taking like a piece of the back of the frontal. Oh, but you have to do what you have to pay out. I say we think about it: lying down, okay, so this is the finished unit after I have sewn all the web's in, so I'm going to show you guys now how to cut the excess lace off okay. So this is how you get the inside of your Ganesha. Look after you sewn in your was as well as your frontal. Okay. So, like I said there is an excess piece which is here. You do not need this at all. You can easily cut it off and it won't mess up your weight unit or anything like that. So the way that I cut it is, of course I take my nippers or scissors. I cut down the middle and I click close to the back of the frontal, but I don't click too close because you don't want to unravel the thread here. So I leave a little bit of the wake up the excess wake up. So I pretty much cut one side: it's not go and cut the other side. You I cut everything off so, as I said, I will go and wash the unit now when I do wash it. I shampoo it as well as condition deep conditioning let it sit with some conditioner for a little bit and then I'll. Actually let this I always let my wig sit or let it air dry. I never use a blow dryer to dry the hair. So let me show you guys what I'll be using to wash things. Okay, so pretty much. I always used the one and only argan oil moisturizer and repair shampoo, but it looks like this. You guys can get this anywhere. You can get it from Sally's. You can get it from Amazon and then I go in with their moisture repair conditioner. So I always use these to wash my units if it's like a curly wig. I do go in with some awesome, oyster eyes and conditioner just to get the curls to pop, but anyways, like I said, I'm gon na go ahead and wash this unit and then I'll come back and show you guys how I style it as well as motion. I shake get down girl how to make. I really hope that this video helps you in some type of way with making your own custom wig units for yourself or for a customer or someone else but yeah. I know this is a very long video, but I wanted to make sure that this was super detailed, because I know I get a lot of questions from you guys and I really appreciate you guys reaching out to me trying to ask me you know for help. As far as like helping you with making your custom wig units um, I hope I went over everything I think I was able to answer all of you guys questions. If I didn't, you can always leave a comment down below in the comment section and let me know what I left out, but pretty much. This is the end of the video. I really hope you guys enjoy this full detailed tutorial on how to make a lace front wig. If you guys do not know, I am still selling a few weight units on my website. If you guys are interested to get a custom wig made by me, I only have a few left once these run out. I will not be selling any more so if you guys are interested in ordering - and I suggest you go ahead and hurry up in order, because once it's sold out, it's pretty much over with okay. So I just want to say thank you so much for watching. Also, if you guys do not know this probably will be one of my last custom, wig tutorials, I have a lot of them, so I just wanted to make sure that this one was very detailed and full. So you guys are able to see, starts to finish on how to make a wig. After this, I don't think I will be posting any more custom, wig tutorials. If you have not checked out the previous ones that are, I will leave the playlist. I did create a playlist that has like pretty much all my WIC tutorials, so I will link that up above as well as down below in the description section. So I just want to say thank you so much for watching again, and I will see you guys in my next video


Comments
Anita De La Cruz: You are a great teacher! I hope I can make my next wig like that!
It's Just Me Nicola: You are so thorough. Thank you so much for this video. Excellent job!
MCNaturall: Excellent work Shay! Thanks for sharing your talents with us.
Charmaine Sanders: Thank you so much for this video, very helpful
Tricia Montgomery: That is beautiful...thank you for showing a very detail how to make a wig
Bintu Toure: This was very helpful , thank you! ❤️
CurlsNCoils: Thanks for the info. The wig looked so nice and natural,
Hayat Bussey: Very good video! Wig look great! You curled the heck out this unit
Garnell Dennis: Love it you make it so easy look so natural
Eno Avenue: This tutorial is brilliant!
Nova Millapo: Beautiful can't wait to make mine
Vivian O. Koomson: It’s helped me a lot watching this video
Obaa Maame: This is the best tutorial everrr so detailed
Marie Eneus: The most detailed video I came across YouTube. Good job sis !
Reecy Ree: Gorgeous love it nice work
Candace Brown: Thank you for this video. Can’t wait to see your future videos
geoff martin: Very helpful and expert advice, thasnk you!
Angelica Garcia Saavedra: Thank you for your video, my question is about the length. I usually wear 12 inch wigs. So would I buy a bundle of 10 inches for when I sew the tracks on the nape and a 12 inch bundle for the tracks that go higher up? Your help would be greatly appreciated. Thank you.
Tanneisha Mc Taggart: Can't wait for me to make mines and it come out looking like yours da
purity mfune: Very helpful tutorial
Tola Revamps: love it great video
King Milly: Very good and clear video yassssss !
Beauty By Shaee: This is the best “ how to make a wig unit “ EVER i cannot wait to get home from work and finish my clients wig the only thing i did was double the wefts on the bottom.
Lisa Jarvis: This is pure perfection!! ~ You got a brand new subscriber!!
Kersha Beaver: Beautiful
Vanessa Haskins: Look so natural .I need you to make me one
Es Mes: Quick question: If I wanted to leave the cap intact under the wig could I? Because let’s say I don’t have no edges or any hair in the front would it be okay to not cut out the front of the cap?
Marvina Parker: Very helpful
Sammy boo: How to sew on the elastic band is missing. BUT I LOVEEEEEEEEEEEEE IT.❤❤❤❤.Thank you
shade salami: Hello sis are you on Instagram please? Thanks for this tutorial very detailed!!!
Iyata Flawless Melvin: Thank you for sharing
FLEUR ROSE: Hi I am francophone woman and live in France. Thank for your vidéo, but I don’t understand if you measure your head before cuting your lace frontal, have you cut both sides or only one side? Have a good day.
Chasity: Flawless
rita mcfarlane: Did you have to pluck it when you cut the ear tabs and I love your hair videos so much ❤️❤️❤️
FutureRN 93: You killed this
Paulette Sangster: How did u measure ur frontal before u start making ur wig
ZERO TO MEXICO: The wigs that say On Sale on your wig site...are they all currently available for purchase?
darsha: Is that a mesh cap on your braids before you put the wig on?
Diandra Hewitt: How did u add the elastic band at the back?
Towonda Grant: Since you cut both of the ear tabs on the frontal. Where do you sew the elastic band?
silvakisses: Did I miss it... when did you attach the band?
Gillian Hunte: Very nice but do you ever make any using the sewing machine? Also you did not show the elastic band placement to make it glueless. What are you plans for your business after this?
Starr Jae: Finally you’re back yay you were definitely missed
Shay Amour: Hey Luvs!! Make sure you check out the tutorial!! This video will show you everything you need to make the perfect glueless lace frontal wig. Hope you enjoy the tips + techniques I included in the video!!
Cathy Wood: You are the BEST!
Patrice Carr: Why did you sew down the sides of the frontal?
Tricia Montgomery: Yes, u it did
Arlene Richmond: How did you add the band to keep the wig on the head? You didn't show that band
StarGazing:
Shay Amour: If you need instructions on how to take your head measurements, check out my video tutorials below. https://www.youtube.com/watch?v=fG_MGgxjnY8 https://www.youtube.com/watch?v=vvbcFXFF5fo
Ari_Aesthetics: But what about now when wig artist sew the tracks to the cap on a sewing machine, seems like they go through the elastic band then
Tanneisha Mc Taggart: WOW WHY MINES DONT COME OUT LIKE THAT
christabella201: What kind of vids will you make goin forward? Happy ur back...
Tanneisha Mc Taggart: New subscriber I'm having a hard time my canvas head is blue I don't know how to do ear to ear and the fold over
Princess L.D.G's Kingdom: How did you get the frontal in position from 4:01 to 4:04? I need help. :( I cut my frontal to 11.50" because that is my ear to ear across hairline measurement. I don't know how to position my frontal as you did. I wish you had been more specific. :(
daniel leon: Antonio Aguilar yo creo que sí yo creo que sí le gusta la peluca me gustó cómo se hace la peluca ya sabe cómo coser la peluca y como pegar la peluca en mi cabeza
Beverley: You said make the hair doesn't get pacaran. The word pacaran means to go out, have sex.