How To Glue The Front And Back Of Your Lace Front Wig | Lace Melt Adhesive |
- Posted on 06 April, 2020
- Lace Front Wig
- By Anonymous
Welcome to IAmBeautifulHustler Channel
Be sure to SUBSCRIBE & TURN ON YOUR ALERTS
CONNECT WITH ME✨
Personal IG: Iambeautifulhustler
Business Instagram:_Beautifulhustler & @thebeautifulhustlerbrand
Twitter:_Beautifulhustl
YouTube: IAmBeautifulHustlerTV
✨SLAY WITH BEAUTIFULHUSTLER✨
TO PURCHASE MY PRODUCTS :
WWW.iBhSlays.com✨
Lace Melt Adhesive,
Melts Belts,
GLAMWAX
and more ❤️
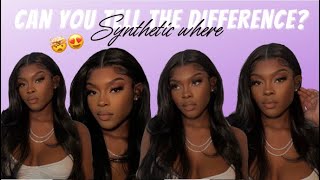
Hey beauties are welcome that time, husband teeny. I am back with a new tutorial today and today I'll be installing this lace wig and I will be blowing the front and the back of this wig today and we'll show you that on camera and just doing some, you know baby hair is you know from Side to side, and just don't like a no part, type of style, just kind of laughs flip over, have a look now today, I'm not sure who this hair is from. She purchased this wig from someone or a company, and I totally forgot to ask what company it was from. So I'm just going to you know, just show you how I do stalled it, and I know you guys always ask um. How do you install the back and I usually start on the back of the wigs, but today I'm going to glue it simply because she will be doing a photo shoot and she will be doing some down looks as well as some updo look. So I decided well it's best that you just you know glue it down for that purpose, but yeah um. I hope you guys enjoy today's tutorial and we're gon na jump straight until then so off camera. I will ahead and I'll bring her down and I'm just showing you how I did the Bach method here on camera. I did a recent ball cap video, where I did the one layer of glue first, and they did this start to be spring, but for today I did not use that layer of glue for the cap. I just went ahead and use the holding spray by itself and it still gave me those great results, because I did use the stockings like the leg, stockings versus using a stocking cap, and this is my new method of doing that because, with the penny whole stockings, It is way way thinner than actual wig cap, which will give you that really really bald cap effect like it will really be something that you will not want to use the cap everdene plucked it, and I went ahead and bleached a nice and everything like that. Unless I do get a details on where she got the wig, I would just go ahead like in pin it in the captions. Well, you know pinning down in the comments, so you guys know where she ordered it from and wanting it. You know what Linda isn't anything like that, but right now the first thing I'm doing: she's cutting off their back lace, part and I'm just going to slide like the teeth of the comb underneath the braids and everything like that and just pull the bag onto her Head just kind of get a visual of where you know the week delay and how the hairline is looking at the flogging and everything like that. My dad, I'm just gon na go ahead. Pull that way back and I'm going in with level ten of the Ruby kisses creme foundation and I'm using the lightest shade in that level. Ten palette and just applying that foundation on the inside of the lace, and I will do it on the top of delays. As well and once I do that, I will go ahead and begin to add my ladies of Lakes, mini he stuff, I'm going to show you one layer on camera and I will do the other three layers of camera. I did use four layers for today's installment, so yeah stay tuned. I want you out of your layers and it is, I don't want you play, you can go ahead and pull on that lace down run until their glue and as you pulling it down. Just add a little bit of pressure with your fingertips, it's kind of like lay that glue in it that way it holds into place and just have them assist you and hold. You know keep the sides held down, as you continue to play place, the rest of that lace, where it needs to be, and I'm just taking my little wound out cute home and just combing that lace, one bag having them firmly hold it, and just taking that Teeth and applying that pressure, and now I'm just taking my fingertips and just kind of pushing that lace in just to make sure it is nice tight and it's laid in there and then I'm going to take my blow-dryer on their heat setting and just comb their Hair back with that heat from the blow-dryer to really get that lace melted on man before I began to raise all the extra layers sat down. Whatever else is left now when cutting off the extra layers. What I like to do it just make like little slits in between the laces cutting straight up. That way, I can work with the section at a time and just going over, my eyebrow raised they're getting as close to where everything is glued down as possible in this close to the hairline as possible. Just raise it off that extra lace and just go in a zigzag motion, and I will help you get a more natural-looking result versus just taking your scissors and cutting a lay straight across I'm going to now Jack. The motion will give you that more natural appearance and once you get everything tucked down or cut off, you just want to go ahead and make sure you get any extra. Ladies in caps, from around the ear, because, if you leave it on top, is going to be very, very itchy and uncomfortable and it could cause. You know like that tender pain behind the ear area so make sure you cut it where it fits comfortably around the ears without causing any pain. There is, you know, irritation and then, once you do that you can continue to raise off the rest of the lace and begin to tack down wherever else is still lifting, and now I'm just gon na go ahead and take my edge brush with the rat tail End and just begin to you know, put that glue in those sort of places that say: lift it up and just using the teeth part of the edge brush to push that lace. Right into that gloom - and I would do that all around the hairline until everything has been tacked down and completed in glue. So now that everything is touchdown, I'm just going to go ahead and comb all of your hair from the hairline back and I'm gon na go in with my holding spray and I'm going to spray that holding spray all over the hair lines from left to right And I like to ask to spray the hair in line. Take my comb and comb. The hair back away from the hairline, just like it'd, be nice and smooth, and once I place the melt belt on there and give me that really really nice hold um, and just you know to let you guys know, I will be restocking within the next two Weeks just know, everything is so slow with this whole thing on a virus mess. So all my shipments is taking longer than usual, but everything will be back in stop stone and that on the side to be purchased, so yes get ready for that. You know that launch again, but, however, I'm just going to go ahead and home everything back and place. The milk bail right went through their hairline and have them hold this. They can give it a nice tight, firm press, but I'm just gon na take a little goofy break and then we're gon na get back to the sleigh. I did let her sit with them at bed on for about 10 minutes and now before we move it. I just did a little firm press with my um, your tips and I'm just gon na pop up a hairline, because we do applied that holding spray does make it like firm and tight, and I just still not being allowed to be soft, especially because I'm going To be musei me and using a hugging spray baby here, so I did go ahead and just calm all of that out and then I'm gon na begin to pull out of the hair is what my baby hairs will be. Now I just kind of first had a baby yesterday, I'm just doing different baby hair looks because everybody likes different look, so you don't want to always do everything exactly the same. You do want to do things differently. Sometimes that way people don't get bored with the same look because, as always, you know the same styles over and over. But if you can, you know kind of mix up the way you do the baby hair is every now and again some people might want the baby hair might want that same style, but, like the way you did, the baby hair is on a different way. You know on a different time: you did it versus the other person. You may do with that same hair style. You did basic baby hairs if you kind of get what I mean without being confusing. I just like to do everything differently, but before we even get into the baby hairs, what I do need to show you guys how I glue down the bag. So first things. First, I'm going to go in give that lace, prep and I just got a little paper towel and I'm just painting the back of being hair line and everything like that and I'm just blow-drying in so it's nice and dry. Then I'm gon na take some holding spray and just spray up. You know the little kitchen Peas back there in an area and it is cold. So that's why she was laughing, but I'm just gon na comb. All of that hair up and just you know spray. It up so none of Asia's hanging down and then once I do that I am going to use two layers of my before insulation out for the back area and honestly, most people do not go down the back area because it's very, very itchy. Personally me. I hate it slowing down the back of my wig, so I'm never doing and most people just you know pretty much. 98 % of my clients just sew down the back, and then it might be that two person in that room. I wanted down for special reasons. So yeah - and this is one of those cases where they doing a photo shoot with some up doom. So of course we need the back loop down, but you guys seen your face on my channel many times before so um, but yeah she's doing a photo shoot. So we need the back boom down today, so I just wan na show you guys how I do that. Like I mentioned, I will be using two layers and one sometimes like mostly clear. I will go ahead and just pull that lace down right until they move and using the blow-dryer once again on that heat setting and just blow-dry everything until it has been tucked down and if necessary, you can go back in and just add little places where it's Not tacked down in the same way, you can do it twist the front of that lease. So now that has tagged down, I'm gon na go ahead and remove the ponytail and get right back into where I was supposed to be the baby ears and I'm just gon na have her go ahead. Turn around I'm not in my hair chair. So we have to adjust the chair, but now I'm gon na get back into what I was you know I was supposed to be explaining to you guys, but I totally forgot to go down to that. But now in another section for the baby hair, is you just want to pull out a nice little thin section, so I'm just pulling out a really really really thin section and just moving here or adding hair as needed for the type of things I want to Do and I'm just gon na get all the hairs down for where I want the baby has to lay, and then I will go ahead and raise them and then go on in with my moves and my holding spray, I will begin to scoop and style them. I just did like a freestyle baby hair. Look today, I'm just like I said I just do things you know. Do things a little bit differently? I don't want to be the stylist that says everything is sad lyrics. I think it's boring, so I just switch it up a lot. But yes, so I'm just gon na pretty much just let you guys see how about did the baby hairs. I'M not gon na go too much like in depth in there, but I did show a lot of the process with me. Standing the baby hairs and you know how I did it so I'm just gon na. Let you guys watch that and I'll be back to explain more in a few and just to clarify what I use for the baby. Has ideas holding sway the Tresemme holding spray and also use other moves to. You know get my desired looking style and now that I did everything I'm just gon na go ahead and spray the holding spurt on top of all of the baby here and once again and taking my mousse and just top now across the baby, hands again to Still give it that nice soft look and I'm going to just take my black wrapping paper and wrap down the baby hair and let it drive some more just to make sure all the hair is nice and sleep down. And while I'm doing that, I'm just going to go in with the water bottle and begin to spray the hair, I did not want the hair to be like soaking soaking wet to where the hair is like being and not fluffy and everything like this. So I just wet it enough to get the pearls to fine and I'm just going to add my bigtooth filling up home inches. You know kind of like coming through it and everything like that and once I finish doing that I would blow dry our hair line. A little bit and that black paper and then get into like that finish style, look and as I mentioned, it is an old car. So we're not gon na do any parting, hot combing or anything like that. We'Re just going to play with the hair, and I don't want to make it too too straight because I don't know one ski style for the photoshoot. Still I don't want to do too much. Not knowing you know, half the person in the photo shoot is going to have them looking, so I'm just removing that paper still using heat to blow dry and just blow dry, my hair line making sure everything is diamond shaped it could sneak and make everything as Neat and the hair is gon na fall towards the right side of her face. So my focus to get me here on the right side when I'm detangle pull me some more, you know just making sure everything is nice and cute, and I'm just gon na call me until you get like a good final desired. Look just coming. Mostly all the hair to the right side of the face, as I mentioned, and then I'm just wanting to to comb and just play the bit until we get that desired, look, and I would pretty much sum up this tutorial. I'M just gon na pull this smooth play with the hair, get a final look and then I will drop the finishing look of the hair at the end of this tutorial. So stay tuned guys and thank you for watching.


Comments
Sabrina_ Bella: I’ve been looking for a video where they tack down the back and you explained everything perfectly. I’m buying a knot less braided wig and want to pull it up into a high bun. Thank you!
Certainly Cee Caldwell: Thumbs Up Shay!!!!!!The install is soooooo beautiful.
Juss Redd: The voice over is legit.! I actually learned some shit.! You broke this down so well.! Took me all of like 2 mins to be hooked on watchin you work and listening to you talk. you savage
Amber Baker: Super cute an looks so natural!!
Jamilla Worsley: Omg!!! This style is so freaking bomb.. i absolutely love ❤️ love ❤️ love ❤️ it!!!! You are the bomb boo
LaMila Rosemin: great video! did you ever find out the name of the unit for this installation?
Ron Gomes: How long does the whole process takes, how long can you keep it in for and finally is it costly???
Destiny Green: Do you prefer making custom wigs or wigs that are premade? I always feel like premade wigs lack density and I use 3-4 in my custom made wigs
Shallando Shallan: Thank you so much for sharing ❤️
Brittany Davis: How do you keep the glue from mixing with the makeup? After a week mine look a lil nasty?
Michelle: Hi and thank u so much for this video, u have gave me so much hope now and it was easy to watch nor did I get bored I have one question can u tell me what did u use at the end in the blue can plz and thank u… oh also where can I find it?
Tyrena Dixon: Now that look damn good
Les and Marie: My wig isn’t gluing down in the back my neck is just super sticky lol
Aysiah Bouldin: Pretty
Lenetta Cooper: Was this a full lace because I noticed that you cut lace from the back in the beginning. Btw I love your work!
Rodnisha Dan’yell: What stocking cap?
Lynelle:
Chante Bri: So is this a 13x4 wig?
Juss Redd: &the model fine asf. Smh. This video rly is a mfkn gem in a net full of bs. New fan right here luv
Shandell kute: ♥️♥️♥️
Kia: And i cnt wait till you restock so i can get urs..thts wht I REALLLLLY want..lol
Jamil Powell: she was tearin up that bottom lips lmaoooooooo
Deidre Lewis: So this is not a 360 wig but its a lace front rite ?
Deelkas Jones: As much as i want to continue making money as A stylist myself, being self employed I get it, but however we gotta stay socially distance until this is over WITH SiS!.. God will provide, I promise
Yvonne Hunter: she act like she in pain