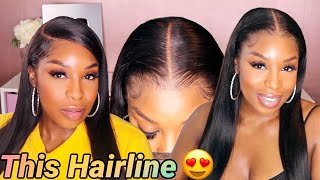
How I Pluck My Lace Wigs / Frontals - Super Easy To Follow Ft Yolissa 13 X 6 Lace Wig
- Posted on 03 July, 2020
- Lace Front Wig
- By Anonymous
Email: [email protected]
●▬▬▬▬▬▬▬▬▬♛#yolissahair♛▬▬▬▬▬▬▬▬●
Hair Info: Straight Hair 13*6 lace frontal wig 26inches 200%density
Same hair in the video:➤https://bit.ly/301QbZh
❤Yolissa Hair Official Website: ➤https://bit.ly/2TQZwiA
24’’ to 40’’long lace wig of all textures:➤https://bit.ly/3gDT87S
Top1 #yolissawaterwave Lace Wig:➤https://bit.ly/2ZRFDM2
►Use discount code “yolissawig” , wig order Get 6%OFF
Use discount code “yolissabundles” , unit order Get 5%OFF
Follow @yolissa_hair on Instagram:➤https://bit.ly/2XCP3IA
More Fun?Be Friends on TikTok @yolissa_hair
Hot Selling Hair Hair ★ ★ ★ ★ ★
Must have #yolissa613 blonde hair hair:➤https://bit.ly/3ewVkfB
Superfull Body Wave Lace Frontal Wig:➤https://bit.ly/2ZRAwM2
Honey # 27 Blonde Water Wave Hair:➤https://bit.ly/2zKiKPR
Affordable Loose Deep Wave 6*6 closure unit:➤https://bit.ly/3ccHFZP
Email: [email protected]
Tel: 0086 15803834514 (WhatsApp, iMessage all available)
Subscribe us on Youtube➤https://bit.ly/2ZOjnm7
Facebook, Twitter, Pinterest, Snapchat: yolissa hair
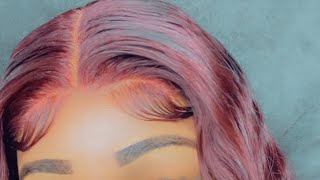
Hi guys welcome back to my channel, so today i'm gon na be showing you guys how i pluck my lace, wigs um, to make them look natural, as you can see here. So i'm going to be using hair from yo little hair, everything's gon na be down below, so let's just get into it. Okay right, so i tried my hardest to make this tutorial as easy and as simple as possible. I already have a plucking tutorial, but this is kind of just like an updated one. So what i do differently now is i don't really pluck on my canvas head. I actually pluck on my lap, so i will use like a white towel or white cloth. Put it underneath the lace front or - and you need really good tweezers if you can get new tweezers um the sharper, the better and literally i'm just going to start by just tweezing the very front hairline just to separate those knots that you can see. Also, if i didn't already mention you need to make sure that you have already um not plucked bleach your knots, because it's much easier to see what you're doing and also the knots are much easier to pluck so once you've plucked like a few hairs from the Front the very front you're gon na make a line. It doesn't have to be super straight and you're gon na pluck behind that line. Um you don't want to hack the tweezers at the front of the hairline, because then your front was gon na. Be bold and it's just not gon na look cute, so we're trying to make a gradient and, like i said in my previous video, i like to work in thirds. So i'm first plucking a third of the front wall um. This just makes it easier to see what you're doing it's not as overwhelming, and i will say for a beginner after, like 10 plucks, i would say: definitely comb out the hair. So then you can make sure you're not over plucking um, it's better to under. Pluck than overclock, because you can always fix on, you can always fix under plucking, but that's just my opinion. Okay, so once you're done plucking that make sure you comb through and then we're going to make another line, try making it as jagged as you can um. This just helps with the hair density, so it's not too uniform, so it actually looks like a hairline and we're going to literally do the same thing again. If i didn't already mention um, i like to use a spray bottle, while i'm tweezing, because i feel like it really separates the hairs, helps you see what you're doing um i either tweeze my hair when it's damp or even if it's dry, i just you, know, Use a spray bottle just to help me see what i'm doing so, as you can see um when you don't just pluck the very front and leave it, it creates a nice density. It makes sense that you can see like because the very front of your hairline is much of a lower density and then nicer gradient effect, or i mean so. I am going to hot comb it just so that you guys can really really see. Hopefully, you can see the difference like. I don't do this for no reason, if you know what i mean so yeah um, i'm literally just hot combing it now, so you guys can see. So hopefully you can see that by plucking it it has sheared it out. A bit and does make it look more natural, so i'm literally gon na repeat the same steps that i've done on the second and third thirds of the frontal um yeah, literally just pluck to your own discretion like everyone's hairline's different everyone's taste is different. So just do what you like um, if you're big enough go slow, i didn't speed up the clip too too much. It sped up a little bit, but i would probably say it takes me about 15 minutes to pluck a full front or um seven minutes. If i'm going really fast but just set aside an hour just to really take your time, you know make love to the front wall like create that hairline that you want that you need in your life and yeah. I feel like i'm talking, there's now, i'm just gon na. Let you guys watch me do what i do, and hopefully it makes sense. If you guys have any questions. Please please please comment. I will help you and yes, like i ain't, you call it stephanie. I call it yeah really going on these haters on my body. Shake them all these on. My body is: oh, don't know if you got a girl, don't mean see you all around my this than is a silly crush god. Next time this is just wan na. Be your just god uh, oh, is with me. We don't talk too much.


Comments
Catarina Neves: Thank you for this. Finally an actual video focusing on plucking the frontal super easy to follow. Easiest video by far thanks girly.
Yolissa Hair: Professional and Detailed! Thank you so much for choosing Yolissa Hair.
Londy Cox: They have bomb wigs yes Yolissa hair