Watch Me: Turn Old Bundles Into Frontal Wig | Install Included
- Posted on 14 December, 2020
- Lace Front Wig
- By Anonymous
Hey Subs and Any New Watchers Welcome In ✨ If you guys would like wig styling videos please comment below and let me know otherwise I will be posting a passion braid tutorial very soon hopefully Let me know what you guys would like to see in the future !
My Socials:
IG: @KinkyCurlyDes
Twitter: @KinkyCurlyDes
Tik Tok: @KinkyCurlyDes_
Products Used:
Curved hair Sewing Needle
Black Hair Thread
Dome Wig Cap (Mesh Style)
Light Beige/Brown Wig Caps
Edge Boost Conditioning Gel
Got2B Spray
Got2B Black Gel
Scarf
Wig brush/comb
**I will include hair information when I find it online
UPDATE: http://www.ebonyline.com/shake-n-go-vi...
Music Credits:
Secret Sauce by Jeff Kaale
For Love by Jeff Kaale
Pancakes by Jeff Kaale
Kumasi by Jeff Kaale
**All found on InShot Editing App
About Me:
Name - Destiny
Where are you from? - PHL
Currently Live In: ATL
Age: 21
Camera Used: IPhone XR camera
Apps Used: InShot & IMovie
***IF YOU ARE READING THIS COMMENT WHERE YOU ARE FROM? HOW OLD YOU ARE? OR YOUR FAVORITE VIDEO OF MINE? ****
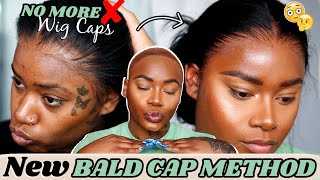
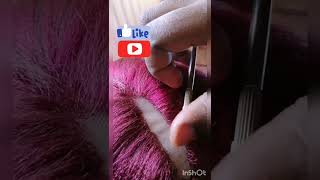
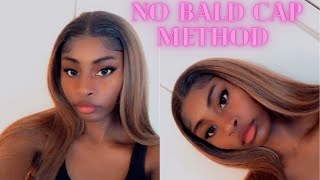
Hey youtube, so i'm back, it's been a really long time, but we're gon na be making this frontal wig that i remade out of some old bundles. I had from the sew-in, and it came out like this. So yes, let's get into it. So first things. First always is to sew down your front sole, and this is really gon na. Be a watch me. Do it video, because i'm still learning myself, but i decided to you know, try to explain as you guys watch so. Basically, i put the leg cap on my head and i laid my frontal down on to where i would want it to be pulled down onto my head and get laid down. So i marked it in the back in the middle and i marked the wig tattoo. So that middle t-pin had like some glitter highlighter on it and my wig cap had some glitter highlighter on it and i pinned it down so that it would lay flat exactly where i needed it to now. In regards to sewing for the frontal, i go through the front hole through the wig cap and then pull through and the needle's coming towards me. However, for the bundles, i go the opposite way and that's the best way to sew to get the flattest stitching now professionally. There'S a little back line like on how closures had that ring around the lace that you're supposed to sew to the ends, but my front tool was playing with me and i sewed down the pieces. I felt like i needed to be sewed, but you do have to be very careful because you can rip your lace when you cut the end of a thread separate it and untwist it from being tangled, so that when you tie it - and i tie it three To ten times, depending on where it is make sure you do that and untangle it so that it ties flat. So i just went ahead and put the wig cap back on to make sure that when i cut it off, my frontal laid exactly where i wanted. It to - and it did so - i went ahead and started putting the bundles in the back, make sure you take a t-pin and stick it at the bottom of the wig cap so that it stays flat while you're sewing here's how the hair came out all clean And ready to be soaked in and yeah, i told you guys this is going to be a watch me video um. I did not want to cut my bundle, so i did double back on the stitching, which i do show you later in the video. I do have some close-ups of you know me sewing and me flipping my tracks over and how i keep them flat. So stay tuned and watch the entire video. But i do not just you know, i don't know, i'm still learning how to film making my wig. So my clips aren't always the best. So here's what i mentioned in the beginning by iso the bundles down the opposite way, so your needle should be going towards your frontal, because this is the best way to get your bundles to lay down flat. So yes, towards the frontal wig cap pull through, so here's the close-up of me flipping my track over now. My slow self didn't realize it was all the way at the top of the screen, but i hold it with my other hand, like with the left and yeah, i just make the little. You know puncture into the left and the wig cap and i pull it through and i make sure the thread is literally like laying across that piece of left. So i'm about to zoom in make sure it's laying there so that's holding it down flat, and then i just keep going as normal and yeah. I have no problems, no lumps no bumps, no, nothing yeah! That'S how i uh flip them back and forth, and once you get to the top you're at your holy grail, anchor piece that you sew across. Basically the front tool like you want to make sure you get the weft and the wig cap and the front tool. Now i'm not perfect, and i know i didn't get it for everywhere, but that's what you want to aim for you tie that bad boy up, like you see me doing right now, and it's basically ready to go once you cut that um extra wig cap off In the front make sure you clip it off as close as you can get it, but do not cut that front so girl, i'm not going to last. Sometimes i play it safe and leave me a little like half a centimeter call it a day, but this is how she came out and i'm about to get ready to install her so yeah. My girlfriend did these rough breeds on my head. Don'T judge me, don't judge us, we tried they were good enough to lay up under this wig because i still got it going. So i take the huge ecoboost conditioning gel, not their pommy. I mean you can use either one and i'll lay down the fronts of my hair. To make sure my wigs and the glues are not snatching up my edges because y'all know i need those. I will cry, and i'm just gon na, do my ball cap method and let you guys watch definitely was struggling. Please do not cut you guys. Ears in this process is once it feels dry. Take hair scissors. I repeat, hair scissors do not use little kids scissors. You need hair scissors because they're very sharp and they're going to get exactly to that close mark that you need them to get to. I like to peel back my wig cap a little and get it to as close to my hairline as possible, because people say i lay my wig edges down too low and it's because i got this little three heads so yeah. I don't know what i'm signaling y'all to do, but i'm assuming to apply your makeup so that your wig cap matches your forehead but yeah we're just gon na go ahead and add this wig onto my head now. The way i put it on in this video i was trying to do it with just the got to be spraying and shaboom. I did not like that at all, so i went and reverted it back to my old way of doing it. When i mix the black got to be gel with the spray, like you put some of the gel and a little tube on a little wig cap, the little cardboard piece that comes with it, that's what i usually do ghetto right, but i don't care spray. The spray on it and mix it up, and then i lay it down like that yeah i tried this way it laid down for this little video y'all, but i was not feeling it so with just the free spray. This is the best i can get it to do. For me, i did the little edges the best that i could do and i just wrapped it up with a scarf, but i definitely took it off and redid my redid my install process with the other way. My results came out much better and it ended up looking like this. I hope you guys enjoyed this video like comment subscribe all that good stuff bye, youtube.
Comments
liu丽: Hello, dear, I really like the video content you made. We want to cooperate with you to make braided hair, ok?