Bad Quality Lace ?? How To Install/ Frontal Wig Install !
- Posted on 29 March, 2019
- Lace Front Wig
- By Anonymous
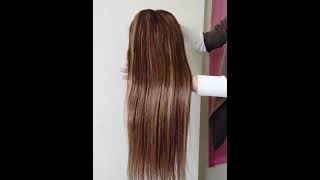
Hey guys so it's not always the perfect situation where you have a good quality lace. But you have to do your best to make it do what it do lol. My beautiful model is laceybrix!! She has a youtube as well.
I forgot to add that i put powder on top to blend the lace better agter the mousse dried !
Hi guys welcome back to my channel, so today, I'm gon na show you guys how I installed this lace. Frontal wig, the hair is from you layer, hair. This is not a sponsored video. She did purchase this wig on her own with her own money. I think was about 160 or 170, so I'm going to prep her edges with the gaud to be glue spray, as well as the guys to be glue gel. I'M sure a lot of you guys are familiar with these products, I'm going to spray the spray first and then apply this gel just a thin layer, and then I'm going to use an edge control brush and just brush that into her edges and then dry. Her edges with heat. Now I'm going to go ahead and give a disclaimer. This lace was grey. It was not good quality lace. I did my best when it comes to you know, working with what I have and that's just the disclaimer for all the hair stylist. When you're installing a lace frontal make sure that the lace is soft, make sure that the lace is transparent and make sure that the lace is like, I said transparent. So it's not a color, it's not gray and the lace that the lace is soft and it's thin and it's flexible. If it's not those three things, your lace will not look. Natural and you're gon na have a really hard time trying to blend it. I think I did pretty good, but a lot of people would really really struggle with this. Next, I'm going to clean her hairline with 91 % alcohol and I'm going to repeat this step about three to four times in the video, and you will be able to see that next, I'm just gon na get a nude stocking cap, no color, just the lightest. I can get it and I'm going to use the same products. I use two judges, which is the got to be goo gel, as well as the spray use some heat and cut out her ear tabs hurt your holes, so that way is allowed to lay a little flatter on the sides and then I'm going to dry. It again with some heat, with a little bit of cool air with a little bit of heat, I'm going to go back and forth, and so it's all dry. I took about a good 10 minutes to fully fully dry when you're, installing a wig you're not going to cut off the just the front part of the new cap, like you, do with an install you're going to leave the whole cap on and then you're going To just fill the back in the sides of the cap, okay, so after I Drive the front of her head with the blow dryer from the gel, then I'm going to place the wig onto her head used, uh clips to hold the baby hairs bag, or also You can put some a little bit of spritz or a little bit of free spray and comb it back after that, I'm going to get a little bit of powder, that's similar to the color head skin. I'M not gon na get any cream. I'M gon na get powder because it's lightweight and it's not cakey or anything like that. I want to put some of her cap and someone the lace that helps the lace blend better. Now, usually, don't have to do this when it comes to patience and start patience to me when it comes to clients that are very, very light. But again I told you that the release is great, so it will not match if I did not cook anything onto the leaf. So, after that, I am going to start to mold the cap down and fully mesh the cap into skin, using the ghost fine extreme cream. So the first two layers I use the ghost line: extreme cream and then the third layer. I use Walker, Leafs tape and I'm going to explain to you guys why I use it and why I use it like that, just from trial and error, whenever you're using extreme creams and creams, they send to allow the legs to lift up a lot of times. Whenever you applying the mousse for the baby hairs and the mousse to lay the hair down, when you apply the Walker lace page is a different type of adhesive. It does not let whenever you apply the Moot, so that's a really really good trick for you guys for you. If you don't already know, I do use a wooden spatula to spread it in thin layers. The first layer is thinner than a second. The second layer is thinner than the third and the third layer is the Walker leaf tape, and I use the application that comes with it in the bottle. It'S a very stringy product that has a little bit of a smell to it, which is why I protect the skin already with the with the ghost bond that way it doesn't, you know, get into the skin, it's already protecting it with the other layer of the Glue and it's like that - the Walker leaf paper - also it takes about three to five minutes to dry. So after you plug the first two layers, you'll plaza Walker length tape drive with a blow-dryer as it was once it gets really really tacky. Then you're going to apply the leaf okay. So after you finish drying the Walker lace tape until it got really really tacky, then you're going to press the listen to the skin, be very careful because the Walker lace tape is very sticky, so make sure that the lace is not touching the glue whatsoever. If you're not ready to lie it down, so I after I apply the lace, then I'm going to press the lace into the skin. You think the extra lace that it's in front of the hairline and you're gon na do that on both sides and keep pressing pressing once you're done. Pressing you're going to use the heat again and fully fully dry is the glue onto the lace. And now I'm going to cut the lace in four different parts and then cut the extra lace off close to the hairline after I do that, I'm just going to fill in the missing spots that are not completely loaded down with the ghost bun. I'M not gon na go back with the Walker lace tape. I'M not gon na do that. I'M just gon na use the ghost bun and then I'm going to do about two layers for those and then tap that into the skin and just repeat the same process. When it comes to drying and then I'm just going to pull some parts out with the baby here, it's cut it and mold it with the mousse. Now I'm gon na give you guys a little bit of tips because, as you can see, this is a very the hairline. It wasn't did not come pre plucked, so I actually did a lot of plucking, even though it doesn't look like I did. I got a lot of plucking when it comes to this wig, but again the wig is very dense, especially in the front. So this is how you handle a very dense wig. So for this week I had to bleach that nuts twice I bleached it. Let it sit on the hair for like 30 minutes and it only got it to a dark brown, so I had to turn around and bleach it again and then it still I got to like a medium brown, but it was just like some spots. A lot of spots actually we're still black. That'S how you know you got a sweet frontal or something because it won't bleach or it takes so long to bleach or it's hard to bleach and also when you don't have a pre pluck frontal our pre pug wig. The hair tends to be bunched up together, so it's hard to bleach all the night, so a lot of times a block and then not end up being black. Some Brown some blonde all over the place, kind of like splotchy like like it turned out to be so you're gon na, do a lot of plucking plucking before plucking. When you put the wig on plucking before you do the baby. Here it's plucking some of the baby hairs out like it's a lot of plucking when you don't have a pre plucked wig. So yes guys, you see I'm plucking right here. You just got to keep going in with the plucking man like you, just got ta overdo it with the plucking almost because, if not you're gon na have a lot of black dots that shows through and you're gon na have a lot of dense spots. That shows through, and it makes it look really wigging so right here. I'M just gon na go ahead and do the baby hairs we're going to cut some some hair and I'm going to make the baby hairs with the Iphigenia mousse and, as you can see, the hair. The lace is not going to live for anything like that, because I use a walker at least take, and that is it guys. I hope you enjoyed this video. I just wanted to show where there is a very difficult frontal to work with, so that people can relate and understand, because I see all these youtubers, they have these nice old, pre, plucked frontals and a lot of people just do not bring you proof upfront. So those are a good front tool, so you have to kind of know how to work with everything and have it to make habits to look as best as you can so hope. You guys enjoyed this video and comment below if you like this video, and I will talk to you guys later bye, guys wha, you


Comments
Kae Johnson: I usually skip through lace frontal videos but yours!!! I watched the whole thing lol. This was very informative, detailed and highly appreciated! Thank you for sharing sis ❤️
Niccy Nicole: You did a great job! Did your client know it was bad lace before she bought it? I hope the hair was good quality at least.
Abundance131: This is interesting... My frontal has baby hair sitting on a lot of spare lace. I like that you have cut off the baby hairs to remove some of that lace. I might try this. Only thing, it might make my wig too small...
Cessi12: Good job laying that wig boo. I love how you explain. Keep it up ❤❤❤
Butterfly susu: This was very helpful ♥️♥️
J. Elixir: I need this video bad! Lml. My lace is wayyy to dark and I was scammed! On the mannequin head it was nice but in the box, it was cardboardish and stank. But the hairline is nice. Now I'm stuck with this expensive piece of trash
Mykela Brown: Is it just me or does she look like Halle Berry you laid that lace boo!
Mary Nkafu: I loved this video!! you saved me
Carley Brewster: it looks awesome!! just a question to girls who get wigs, how can you keep wigs on and stuff because of ur natural hair underneath?? how u gonna wash and clean ur real hair?
Bri Castellanos: She look like Holie Berry. I love the technique, except the edges they are not natural lookingto me.
Butterfly susu: What’s that white thing you’re applying ?
jade foshee: too much baby hair it looks fake.
Taty Nicole: Halle!!!