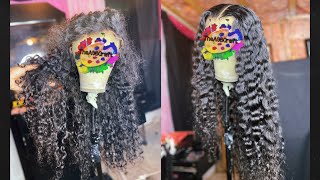
*Live *Burgundy Quickweave Leave Out On Natural Hair | Hairstore Hair
- Posted on 01 March, 2022
- Lace Front Wig
- By Anonymous
Welcome to IAmBeautifulHustlerTV .
Be sure to SUBSCRIBE & TURN ON YOUR ALERTS
——————————————————
MY PERSONAL YOUTUBE CHANNEL : In The Life Of A BeautifulHustler https://www.youtube.com/channel/UCB9xX...
——————————————————
Follow My Socials:
Instagram:_Beautifulhustler
@thebhslay
@iambeautifulhustler
@girlsniteoutapparel
Twitter:_Beautifulhustl
YouTube :IAmBeautifulHustlerTV
✨For Sponsorships ,Reviews,& Questions
Email:[email protected]
786-571-1313
To Purchase Hair & Products Www.ibhslays.com
Allow 3-14 Business Days For All Orders
Over here, um, hey y'all check in it's been a minute since i've been on the live, hey, hey, hey! So today guys i decided to do a live, quick, weave, install using big sis as y'all know. This is my birth birthday month, so i'm gon na be in and out of vacation per usual. Just came back from jamaica will be in texas this weekend. So, if you're in texas - and you want to hang out i'll, be in um texas this weekend in houston and then next week, i'll be in mexico. So what i decided to do is a quick um bonding video for you guys and i wanted to do this live because i know i hate editing but um today i'll be using two packs. Yes, i'm a pisces i'll be using two packs of some glow up human hair, honestly y'all. I never heard this brand before, but i heard of the brand sensational, so i decided to just give them a try and i got two packs of burgundy 14 inch and these two packs only came up to 40. and y'all know we love some forty dollars. So i'm gon na be using nika, hey india, hey all my mods okay. So let me tell y'all a little bit about this braid then, okay, this is how old braids these was the braids for a regular um wig install. But what i did was just took out the middle braids and i just washed her braids and leave out areas. So i went ahead and just parted out this section braided these two forward, i'm leaving her edges out, so we don't put no tension on the edges. The rest of the brace is going straight back but honestly it's a whole different, braid pattern. When i really do like quickly quick weaves like this, so the back is just like you know. It'S old braids, like i said, but i kind of like you know: uh spritzed, up hello, beauty, bees in the back, so we're just gon na go ahead and start with number one: oiling her scalp and we'll be using, of course, the beautiful hustler growth oil. Sorry, i won't be able to read all the questions or comments or whatever, but hey everybody. So, yes, i will be using a growth oil. That'S first things. First, like i said we just washed her hair with the braids in it. So i'm just going to take some of the oil and just all her braids down just make sure we keeping the hair growing underneath the install and nothing i want to say when you are oiling. The scalp be very mindful, do not put any oil in that leave out area because you don't want your leave out to be greasy when you flat iron it. So i'm not going to put any in the leave out area. Like i mentioned, i'm just going to go everywhere else between the braids. This is going to be really quick. It'S called a quick win because it's supposed to be a fast installation and yes y'all. If you haven't noticed, that's my dress, is inside out um yeah. I got dressed too fast today and i honestly just didn't feel like flipping it, so we're just gon na have a backwards dress inside that way, okay, so, but it is what it is. I just came to ship our orders anyway, but i just decided to do this. Quick video for y'all so went ahead and used the growth oil, which i know y'all can purchase on the website and listen. Yes, i know beauties glue is sold out, but the restock will be here next week just in time for spring break. So i will have um blue next week, like by next monday, when i get back from texas uploaded on the site, so y'all can order. Just in time for spring break but um other than the glue being sold out, we still have edge control moves um. The gel wax sticks, of course, um edge control, whatever whatever we'll be using this today, but to all my pisces happy birthday. If your birthday just passed, happy belated birthday, your birthday coming up, happy birthday, okay, y'all know it's big pisces season, and then i guess you know i like aries. You know so you know shout out to the aries as well shout out to all the march babies period. Okay, so y'all already know the stocking cap we'll be using. Is the beautiful hustle stuck account duh, so we'll be using two stocking caps? Now i know some people like to um use the little tissue paper. I'Ve never honestly been a fan of the tissue paper, but if you prefer to use you know one cap and tissue paper underneath that's up to you. Some people use two caps and a tissue paper. Honestly, i'm not heavy on glue, so i don't have to worry about any glue damaging her natural hair hold the cap from the front you can yeah pull. So i just like to use two stocking caps because, honestly, like i said, i'm not heavy when it complete, though i'm not heavy when it comes to the glue and because i did leave her edges out in the front. As you can see, i'm gon na bring the cap behind the edges. Okay, so, as you can see her edges out. Okay, like that, so i'm gon na do this with both caps hold mccomb fail. You spray it with some alcohol, okay cleaning, it 99 killing germs. So yeah let that dry but um, that's the first [ __ ] cap and then we're gon na use the second stocking cap. Do it the same exact way, put it right on top line it up the same exact way, leaving the edges out. It'S tight, huh, yeah, okay: let's do it all right so leaving it out, leaving the edges out three times so y'all can see, leaving the edges out on both sides. Okay, get that little get that little loop out. You know stretch the cap out, so it's laying all the way flat. I know i got these still got my valentine's day. Nails they've been last me a long time. Oh no. I don't put both caps down all right, all right, just right behind the edges on both sides. Stick up in here bring that forward and try to get the caps to lay very flat around the edges, okay, so yeah. I know i got these nails. Don'T try to give me a second. I usually try to keep my nails short, but y'all know it was valentine's day and i had your little valentine coming so so yeah. Let me flatten this out, make sure it's very flat. So it's very seamless, okay, cool, look at that. So next, i'm gon na take some needle and thread, and i'm gon na sew around the perimeter here. So it stays. You know in place this needle was short. I know it's gon na stop. So what i'm gon na do is just go ahead and cut it and thread me a longer one. That way i could just keep going and flowing. So what i'm gon na do is sew around the perimeter here. Bring it back up. Put your head down. I'M gon na bring it around and leave out as well, because you know when you be cutting that cap and the cap start to spread all out, and now you blowing hair on the actual hair to avoid all of that make sure you're having like a nice Small perimeter braid around the leave out area. That way you can bring your sewing all the way around, so we're gon na. Do that? Hey, y'all, hey y'all, hey everybody! That'S checking in, like i mentioned, if you just tuned in, we are doing a quick week today, based on the title, hey y'all, i miss y'all. I know i haven't been live in a long time but um. I need you guys to follow my personal youtube, which is life for beautiful hustler, because i am dropping um the trip to jamaica vlog on there i told y'all. You know i was gon na get into my personal channel, so i will be dropping no jamaica vlog on there and then i will also be the one with the texas as well and of course, for mexico, for my birthday, so y'all tune in tune in make Sure y'all subscribe to life and beautiful hustler. The link is always in my description because there's no videos posted on there. So if you type it in the search bar, it's not going to come up yet, but always check the description of my videos and all of my socials is there as well. That'S the personal page, okay, a personal youtube thank y'all to the ones who follow both. Okay, so all right now that we have, i like to use the big needles by the way, but now that we have a long thread, i love y'all too i'ma just start from here and go all the way around. Be careful not to you know, sew their head and honestly do i have it. You know what actually wait pause. I'M gon na just cut this. What i'm i'm gon na do, instead of using my black thread, i'm gon na use my blonde thread. I'M gon na be in houston, texas, um from friday to sunday, but i'm instead of using my black thread, you guys i'm just going to go ahead and switch. It over to my blonde thread and the reason why i'm going to use my blonde thread so is that when she's taking out her install, she can see the thread and don't have to worry about cutting her real hair or anything like that. So i'm just gon na give you one. Second, i'm gon na uh re-thread by using the blonde thread and that's where it's so much easier when you're removing the install - and you can see it, you know see the thread in that way. You don't got ta. Have no issues about cutting it out, so real quick? How long can i take out a thread on needles, because i know some people have a hard time be getting a thread in the little needle hole. But yes, i on. Let me make that thing. Even do my little knot, one, i bring it in about three times and then i pull it. Then i cut off the extra all right so now, let's do this thing, but this time we're going to use the blonde. So i'm going to start from the top and just go in leaving her edges out um. If you missed it, because i know some people join, this live afterwards, just go back and rewind and i will keep the live up. That'S why i'm doing it here in the shop where there's no distractions, no extra sounds or anything like that cause. Y'All know i usually go live home or whatever, but i decided to do it in the shop today. So i'm just going to sew around the perimeter. Just beep in and out i'm going to spin her around as we go around and just sew through those braids. So it's very secure. Okay and don't forget all my mods, don't forget to have everyone like the video. You know like comment: where are you based? I'M in uh miami florida, my shop is in north miami florida, so um. If you're in coming in from miami international, i would say about what it ain't that far from my international, probably like 15, maybe 20 minutes. But if you're coming from fort lauderdale airport, probably about like 30 minutes or so depending if it's traffic or not so either way, it goes it's pretty local. But yes, i live in miami, so i'm just going to keep going around. I just wrap the red around the neighbor twice and i pull sorry i'm going around and honestly y'all uh. We have 214 burgundy uh pax, so i asked her what name she wanted to do, but she wanted to keep it pretty long, so we're probably gon na. Do like a long middle part, blunt ends, you know, so that's going to be the style that we do today. So, as y'all said, you know my mama jeans yeah. This is my oldest sister, my mama jeans. She got you know we get all the extra down. The neck inside you know on the side of the face, so i just spritzed all that up. Okay, but we're just gon na continue to sew around. I think i made this one long enough if y'all ever pay attention to. When i do my mama installs y'all see she got the extra long side burns and the hair coming all down the neck and everything so we're just going to keep going around and, like i mentioned once we get back to the top we're going to go around The perimeter of the leave out thank y'all can y'all see me my head kind of cut off, but i was trying to focus on yeah. I really want y'all to get this install more in my head. Maybe if i bring the light up a little bit hold on y'all. Give me a second all right that might wear all right. That'S a little bit better! Sorry y'all but um going back around and come back to the top and be careful because i always be pricking myself in a finger with these needles, but i don't got used to it over 10 years. I'Ve been doing this y'all, so i know y'all can see, but i want y'all to see me too all right. So you know the two perimeter braces here. Obviously, is they hanging down so, like i said i did a perimeter braid going around, so i'm just going to feel for that perimeter braid and just take that needle with that thread all the way up there. We add it now. So what i'm going to do now is start sewing around like feel for the braid and go underneath the braid and back on top. That way, you really um have that perimeter. Braid will have the cap sold down to that perimeter braid. So when you do come in here, you cut this off, it's not unraveling, all at the top, so i'm just going all the way around looking and feeling for that perimeter braid and i'm just going to keep on going going across here and honestly y'all. She wanted me to do an invisible part. I don't know if y'all remember that the little fusion part is the invisible part, but i was like no since we're not doing it. I haven't done that in like 10 years literally, even though i know i can still do it, but would y'all want to see something like that me bringing like? No, i don't really like the invisible part, i'm gon na say the fusion part. That'S when you cut the hair off the track and you you know you glue it to close up so a person don't have to wear a leave out. They don't want to. I was real big for that deck of things you, okay, missy, okay and it's the last stitch all right boom. So that's done! I don't know. I see some crowning laughing emojis. Give me a second i'm gon na read it so y'all see that you see why i said i wanted to use the blonde thread. Instead, you see how it makes some more of a big difference, so you can really see what i'm doing right. Let me check on the comments: real, quick, invisible part hell, no, exactly all right. So the edges is out next step. We got a pump pump pump it up. We gon na go back with a throwback, go back with a throwback pump. It up. Sprints, don't like y'all, don't i like y'all with some crunchy all right now i don't want to cuss i'm trying to keep professional, but y'all haven't been crunchy before so we gon na. Take it back to the basics. You just i'll pump it up spritz, and you just want to spray that cap everywhere around. Do not spray where your leave out is, but you spray everything in the inside. It'S a fresh bottle. Let me get it pumping all right: jesus, okay! There we go, though, and i hate honestly - this is the part that i hate about quick weaves, the spray in the sprint. Don'T you hate it? It just feels so nasty, but just want to go around that leave out the cap and you really got to get it in there. But honestly some people like to lay the track and then spray it and later track and spray. Usually, when i do this spray down, i already touch it no more. I don't really touch it. No more so now that we spray that we're just going to go in with the blow dryer excuse the noise, but i'm going high heat. We made this really quick. I'M gon na make it up and i'm gon na just go back and do one more round y'all just to make sure the cap is not going to move. I'M gon na check the comments. Y'All do one second, i'm having nika log in on this phone, so she can read the comments. Now. That'S the youtube studio go to um. Okay, so i smell the spritz through the screen: crying hey, y'all, hey y'all, so right so now. Oh, i hate that spring snail too. You ain't lying. Oh, it's a little wet right here, all right, so the bunny glue and i hate the way bonded blue smell y'all. I really do, but we will be using the 30 second pro. This is a fresh bottle. So let me take a little thingy out yeah. I know it comes with a little white thing in there. Let me pull that out hold on there. We go all right. Look at that, so we got our bonding glue. That says this sleepy she got ta get ready to go to work. So that's why we really like trying to get that out. 30. Second, pro we're gon na go in, like i said, we're using two packs of hair store, hair um. I know y'all so used to seeing us youtubers use, bundles bundle, bundles, but we're going back to the basics and i always purchase these two packs for forty dollars, the hot 40, and it's by, like i mentioned glow up by sensational, less sensational. So we gon na see how this go. I don't even i believe it's human hair though, but it's a very nice burgundy shade and don't worry. Yes, i know how to leave out this black, but we do got uh some burgundy spray. Okay y'all know i don't play now. It ain't gon na give her the exact burgundy, but it's gon na give her like a little. You know a little tint to it so originally y'all. I was supposed to do this bob on myself, but i just love my wig so much yes, i'm gon na be doing a wig class in april, so y'all please stay tuned. For that i will post it. I will have two options for the class. I will tell you all about that so um here we go, the hair is very pretty very nice. It'S flowy and soft, so y'all already know when i do quick weaves i like to double weft, okay and that's basically that actually makes the process much faster. If you didn't know that some people don't double weft, but i love to and i'mma show you exactly what that is if you are not familiar, but first let me unravel this okay, so i'm just unraveling. It keep all the tracks facing the same way because you know, as you unravel we do this little twisty thing here: um child, please all right! So here we go! You interested! You want to do hell when you get older, you think so. Yeah i'll teach you that's my niece y'all that i'm talking to all right. So all right, this is double wefting when you take both tracks and you put them on top of each other like that. So when you cut and measure you see how i'm placing one track on top of the other, this is how you will measure it. Just like this, you go from, let's say: go from here to here: you'll cut it and you'll place the glue on both tracks and then lay it down, but i'm gon na show you guys exactly what i mean so put your head down real quick, a little Bit nico y'all see i i switched all that up there, so usually what bob's y'all one thing about me: i don't never place the tracks on nobody's, got them neck. I just i'm just not that kind of girl. So i like to just first that up - and i started from like right behind under the ears, because nobody only know damn tracks glue way down here like let's be for real, like that. I just know that's uncomfortable, but yeah back to the double wefts we're gon na take it measure, bring it around the other side measure where your thumb stop. You want to take your scissors, of course, you're going to cut no, you don't rip it baby, you're, going to cut that and then of course, you're going to take your bonding glue and y'all can see what i'm doing right. I'M putting the glue on the first on the front, i'm about to say the first chip chow the first track, placing the glue on that second track, and i don't really squeeze the glue out. I just kind of let it drop out, because if you squeeze too much can come out and then you got to kind of like clean it up, so i just let it just drag across the track. So once i do that, like i said y'all, i don't go back in and um spritz every time i lay a track, and this is 30 seconds, so it should drive pretty fast. Make sure one track is on top of the other, and you just go back and you place it in that same spot where you measure, and you just want to apply pressure. Okay, put a little firmness into it. I didn't say: push the pressure points or nothing but just add a little firmness to it and boom. It'S stuck just like that. You want to get fancy with it, grab a blow dryer blow dry, like i said it's 30 seconds and it dries fast and it's going to keep drying as you go along anyway. So i'm just going to continue to do that. Let me get my wefts together. So uh next one i'm starting from the same place pretty much. I come right on top of here, bring it there can y'all see that okay and then so. We'Re gon na put the glue here. The next line just drag it and repeat the same exact steps. So place and push the ear down out of the way, bring it round and do the other side and press. So this is all this right here is just repetition going all the way up, so i'm gon na turn it to the side. It'S all repetition blow dry. So oh wait a minute! Wait! A damn minute! You just blow dry! Okay! Thank you all right, so i'll be moving right along y'all could go ahead and ask some questions. If you need some, because this part here is just going to be repetition, so i'm just going to keep doing this, let me tell y'all some more. Oh, let me bring it here because someone we're going to come up like towards the edges, so i'm going to start here, i'm gon na bring it around and i'm gon na stop here. You don't have to bring it all the way up there, especially leaving the edges out. You just want to bring it a little bit past that cap we're going to do that. You measure that cut paste, cut a cut blue paste, so y'all see me almost fall. Chill on them damn cords i swear to god. I would have gotten mad into the whole video now longer today. Y'All know me, i would have just got up and laughed and kept it going. That would have been a good memory in this video but yeah place. The glue it just easily drags along, i'm not i'm, barely i'm not even really squeezing honestly, it's a new bottle, so the blue, just gon na kind of pour out anyway. Take it one side of the head, bring it around honestly some people glue they track. So close together and it's really not necessary honestly y'all, that's how you end up running out of hair too fast, so i'm bringing the other track and i'm going to lay that down hold on and then you want to lay that down from side to side. Just like that and honestly, i don't bring the tracks completely straight. I like to give it a nice little curve, i'm going to show y'all about that. So like the first three or so, i might keep it straight and i'm gon na start the curve, because i don't like the hair just here. I like it to come a little forward, especially like when you're doing a bob look or whatever so yeah. As you read the comments or you see, let me see how much space in between, i would say, not even an inch like half an inch because the inches about this much about half an inch because they don't have to be on top of each other. Y'All. Honestly, they really don't it's still going to give you the same look and if you like, i mentioned if you glue too close together and then, when you run out of hair, what you're going to do and honestly, i only like two packs for a ball, like Pet hair um some people do three, i guess, depending if they're doing like an asymmetrical cut or something but bobs should never be. They don't they're not supposed to be thin, but they're not supposed to be thick as hell either. You don't want you like. You don't want to like a hammer head. Basically, you don't want no helmet head bob, so you can make your bob nice and full, but don't make it look like a helmet head, basically, okay, because that is not cute: a helmet hair ball being cute and there's a thin one. So, let's just make it just right right, don't want it too thick exactly so you want to make it just right, so i always recommend trying to get all two packs in maybe even two and a half, but all that threefold packs from all ooh. Lord chow, good luck, good luck, baby and trust me! I haven't seen it so i i don't see somebody with an extra thick bob and the cut won't, even even so, just imagine what that looked like. So yes, i'm gluing it and i'm bringing it back around pressing it by two. Yes, i'm doing two at a time, and you see i'm almost pretty much at half the head, i'm going with the blow dryer and blow dry and turn around okay. So now this is the last track from that first pack, so because it's thin already or short or short track. Sometimes i still double it like this and i'll just lay it in the middle hold on. Let me show you what i mean i'll. Take it like this still put it in half and i'll just bring it across the middle just to kind of bring the tracks up some. You see how it's down here, but if i bring it here, it kind of you know so. I'M gon na just take that still cut it in half, because it's really like doing a puzzle like you just got ta put it together to make it flow. But you do have to lay your tracks a certain way, because you don't want your bonding to look crazy and what i really want to get into detail with is a frontal bonding because a lot of times i see a lot of scholars made the mistake of Laying the tracks wrong when it's trying to when they're trying to close up that top area for the frontal bonding. So i definitely want to do a video on that. But y'all know people don't even really get frontal bonding as much no more. It'S like everybody. Just straight to wigs now, but we're gon na see if we could just shake the internet a little bit and bring it back so we're going to go ahead and just place that track right across the middle. Fine press like that nice pretty color good time to go good all right boom. So now it's time for the second pack here we go, we open it up. You know, like i said if you just tuning in blow up sensational hair pack, hair from the hair store. These two packs of 14 inch. Burgundy was only 40., i'm not saying it's gon na be 40 in your city, but in mine in miami at this hair store over here by my house. It was only forty dollars, but you know any pack hair would do um. I used to my favorite pack, hair that i used to use was visto. I don't know if i ever heard of visto hair about bobby boss, um sensation was always good. Uh sensual was always good. Even premium now was like a love hate with premium now like. Sometimes it was good, and sometimes it wasn't all that so you know it. I guess it depends. I don't have good batches of pack hair bad batches of pack, hair um people used to use eye remy, it's just so many. You know once they drop once one thing become popular, so many people come out with those things, so you just never know, but that's just the name of you, you have any of those in your city. You can definitely use that and also you can always still use bundle hair for your bobs as well, so bundle, hair or pack hair will work. But now here we go. Second pack 14 inch be back to the double wefting. So what i'm gon na do now with this next set of tracks, is i'm going to curve it a little bit. I'M a curve in here i'm taking about an inch in curve hold on line this up right, okay, i'm taking that, i'm just going to turn! So you have a cc curving it here about an inch up, i'm gon na curve that up and bring that all the way around and curve it back up on the other side. Okay, because you wan na you wan na bring some hair forward. You don't just want it straight paste, because i don't know i just you don't want to do it so i like to bring you know curve some of the tr the top tracks up, so it can really like fall into the face and not just like straight Sideways so i'm gon na re-go ahead and remeasure it again curve it up, bring it around curve it on the other side and cut it. This is y'all y'all liking this video. So far, you feel, like you learned something any comments all right. Yes, please thumbs up. The video y'all thank you to my mods, always showing love always on point, so we just dragging that glue down the first track and then the second track y'all my niece over here, paying attention she getting a down pack. She might be like me, you know, with the same sign anyway, her birthday was yesterday. She just turned six, but i know her and kai is the same age but she's just a couple months older. So yes, she, a visual learner like me, clearly so now we're taking that curvedness we're going to paste it we're going to hold it firm because you still want to keep that curve in it. You want to hold it into place. You want to bring it around. The back i'm turning the chair with my leg, because y'all can see, got it firm over there, bringing it around and curving it right back up on this side. So now it's curved on both sides. Sorry, i know i'm kind of pressing okay boom. So there we go we're starting to curve to the front. Now you want to do the same thing curve it up some more curve, it up, some more, not all the way to the leave out, but about a few centimeters off from the leave out, because i always like to bring my last track right around the leave Out to just give it like that clean, you know what i'm saying what you want to call that clean little blend or whatsoever. So i'm gon na bring this part up again a little bit higher from the last track. Bring it around come to the other side. Bring that around higher and cut and what i like to do also i'm gon na show y'all when we get to that part though, but let me just do this add the glue now if y'all haven't noticed after i did my uh my two rounds of spritz. Now i haven't put my my spritz bottle back up yet, and i usually don't try to get to the very very last track. Because, honestly, even though you blow-dry that spritz, it's still kind of wet a little bit, it's not completely completely dry, but it's wet enough and then like i said this is 30 second glue. So it's easy for you to um it's easy for it to dry. So i'm bringing it around we're gon na bring it around pushing it in pressing it, bringing it around and bringing it up. Just like that and press put your head down real, quick yeah. This is how much we got left just this little section here around the leave out all right now. What i'm going to do now is to relieve some of the pressure that is putting i'm going to take my scissors and this area here, i'm going to open that up, so you want to be very careful because you don't want to cut the person's hair or Leave out so i'm going to start with the first cap, just nip it and just take smaller nips and i'm just gon na cut that open. That'S the first cap, i'm gon na, come right here, cut that put all that in the inside of that first cap, and this is the importance of sewing down the cap around the perimeter, because now my cap is not going to move okay. So that's the first cap now lifting it up, quick, nip, pull it up, dip it in go slow, y'all! You don't want to put nobody's stuff on now. Here we go yeah. I have a seat. Okay, all right now we're gon na continue to cut the extra cap off. So now our um leave out area is exposed. Okay, head down boom open exposed done with that. So now we can go back in with the tracks so now on. Let me see hold on what i like to do sometimes to y'all is get my before i glue anything else. I take my last track and i kind of measure it out around the perimeter of the leave out. So i can, i can have it cut and out of the way and put to the side so put your head down. I went and i measured that last track around i'm just going to cut that and put that out of the way just so i i know no matter what i got that last track that i'm gon na need and it's been situations y'all completely normal. It has been situations where people run out of hair and if you are ever doing a client's hair and you run out of tracks for the top, you start grabbing them tracks from the back. Okay, you go right in the back, you pull it up. You them! Bottom tracks, you grab your one or two of them and you fill in your top. Your top is most important. The back is not going to be seen. So if you ever run out of hair for the back the top of your head, you pull those tracks from the back. Okay, all right! That'S that's just what you do in an emergency situation. That is definitely what you do so now we don't curve our tracks. Hey you kicking my thing: just it's: okay, baby, just leave it i'ma start coming back around now, i'm coming back straight, i'm coming back around measuring i'm going to cut hold on hold on cut and glue. All right and y'all also know that the braid down is also important and a quick weave install because how about go, go sit. Thank you. You put the glue on here. I forgot what i was saying. I mean it was my damn train of thought. I'Ll. Give me a second: it's gon na come back. All right, put your head up nico, replacing that track straight, no more curve bringing it around one track. On top of the oh i'll talk about the braid down, you want to make sure the braid down is nice and flat, because if not you don't want no humpy head or bobs. You know like same thing with a wig. If you do humpy braids, your wig install will come out very humpy. So keep that in mind, especially when you're doing a quick weave the flatter the braids, the flatter the install. I don't put a little bit on this tip bar here. There we go all right. We blow dry that little piece so next track same thing, i'm a single one this time, because i want to make sure the top is really flat, so i'm getting close to where that last track supposed to lay and i'm single weft in this track. Since i got this little extra right here, i'm gon na add that in the back piece just to make sure all the tracks is covered completely. So for the last two tracks, i'm going to single left to close up the ball, but i'm gon na take this smaller piece. Like i mentioned before, let me show y'all. Well, i'm gon na make it put your hand back a little bit. I'M gon na just lay it like from here to here. I get all them tracks in that baby. I don't play. I told y'all, there's only two. You want to make sure you try to get all two in there. I know some situations. People had always smaller than others, you know, but this is what i do take that little track every little track. Gon na count, hey y'all, hey y'all. What'S up all my beauties checking in new if you knew go ahead and click that subscribe button, give the video a thumbs up? Okay, so now we're gon na take the second to last track and we're going to bring it all the way up to where the edge leave our part is and bring it around we're going to bring that around hold it in place. It'S a little a little piece off, but what i'm gon na do is just glue it and leave a little piece of that little piece on glue. And if i need it, then i will go ahead and um what you call. It can't be sleep girl in front of all these people. I never remember that video when that girl was on her cousin. I was going viral, so i don't bring a little track, bring it around and make sure as you bring it around like i mentioned y'all that you're pushing it down so make sure it's nice and tight, oh yeah, that last track gon na fit so perfect to Close this ball off. Okay, you got that extra cut. It off make sure you move the red hat away. I'M gon na cut another extra piece off that we don't need and just making sure that end is tight down. Move the hat away, apply the glue, push it down and blow dry, and then we got one whole track. Yeah, it's going to be a straight line cut for those who are not sure what we're doing i haven't even come to hell. Yeah. Let me give the hair a nice little tone and we got to add our last track. Okay, so, and be careful because i know her real hair, the real edges is out - and this is how long the hair is as a 14. moving it down. So i can see: okay, that's how long the hair is as a let's see how it is, and i'm just combing through it and we're going to keep the length we're just going to clean up the cut. You know what i'm saying so now everybody go ahead and add that last track. But you see what i mean when you, when you curve down a few tracks in the front it makes it fall in the face more versus just falling directly to the side. But now we're going to take the very last track and i place it right on the scalp part like right where the um scalp is so you know how you pry up the section and that clean little uh scalp part i'll, lay that very last track. Let me go up somewhere. I can see right up there now bring it around. I just always like to double check all right. It'S perfect and you're doing the very last track goes on all right in the last track, going around right in the parting area, where it's nice and clean to get it to lay super flat. Both sides add pressure. Is that too tight? I mean not too tight, but did that hurt all right? You just really want to firmly press that in okay i apply some pressure, make sure it's laying down around the leave out perfectly fine spritz lightly. You don't want to get none on the leave out part. So make sure you just put it on the track. Only that's why i'm going slow like that and blow dry, but now i'm going ahead and turn off my uh okay, so i turned on a hot comb and a flat iron. Okay, i'm just gon na blow dry, this out really good. Okay! So now we're gon na um popcorn all of the leave out area and press it out. Okay, my hop on heats up pretty quickly so yeah, it's on about 375 degrees right now, so i'm just going to go ahead and comb that out and y'all see these edges we're going to have the flat iron hot comb. These edges out on both sides yeah. I know i left the edges out, i'm probably just going to swoosh push them just straight back, i'm not going to do no little exotic baby hairs and you know um all that extra stuff hold on. Let me turn bring a little closer all right. So that's down get a nice little sperm depressed first thing: i'm gon na do, though, i'm gon na take my hot comb and hot comb hold on. Let me make sure y'all hot comb around this area, just to make sure that it's super flat and it's neat. Okay, because flatness is definitely important when it comes to above and because it's flat i mean you know, the braid down is good, so i'm just going around i'm gon na go around that talk track. Sorry, that's my nail sure my baby, my baby going around and my jaw remember. I told y'all before we did this. We just washed her leave out area, so i haven't put any oil or anything in it. I do not like oily leave-outs, because then i can't add the product that i want to add to it to give it that you know that nice pressed look so yeah. I prefer people to not come with their hair already oily just i'd. Rather, you leave it dry and i oil it for you because y'all know sometimes y'all be getting carried away. Y'All been trying to put the whole bottle of grease in your head and oils and everything y'all bought on amazon and ebay and everything else. So just take it easy all right boom. So leave our time. When i do the leave out, i like to work on one side at a time i get one side pressed out, then i repeat the same steps to the other side. Yes, nika is completely natural. Look, she got a lot of the dead hair. Okay, let me get a watercolor hold on all right. This is as wide as it gon na get y'all. Sorry, hey beautiful disaster! All right now you playing when i get that heart come on that thing's gon. Na wake you up, so i'm detangling it as i'm coming it out. Okay, so i'm pulling the uh plant part out. Detangling, like i said, the hair is a little dry because i haven't added anything to it because i like to add my own product to it and y'all already know what we're going to be using to blend this thing. Of course, the beautiful hustler wax stick. So i'm just going to detangle all this out. Am i hurting you because you know there's always going to be somebody dang she being rude. Are you hurting? Are you in any pain? Okay, y'all heard that little slammer she's not any pain. She is not hurting. Okay - and i wash my shampoo with tresemme - i love tresemme, natural hair and on wigs or whatever. So that's what i use to wash out her leave out. I'M gon na go ahead and finish on doing this part here already all righty we're almost to the back, and i try to make her part about four to five inches deep. Okay, let me go ahead and start detangling that out there we go all righty. So all the tangles are out all right boom y'all see that turn to the side. A hundred percent natural, a hundred percent and y'all know me for the use boom. Lord give [ __ ] the strength to get through this day amen. This is tired. So, yes, we are using the beautiful hustler, glam wet, stick per use. Y'All know i love my wear. Stick you screw off the top like this. It come with a little protector. You can take it off and put it back on after every time. You use your wax stick and to move it up and down you twist it up you twist it down. Okay, so first things i like to do, i take the leave out. I split that in two so i'll work with like that, i do it like that. I take the wax stick. I apply it to the ends and i'll apply a little to the root you don't want to over. Do the wax, because you can overdo your wax and it will make the hair too greasy like i said you don't never want it to be too greasy. So i take my small tooth comb and i comb that wax into the hair and i'm going to take just a little dab more in the front here. Okay, because i need to hit the roots - and i comb that through, like i said, we're working in two sections. So the same thing i do to one section i'm gon na do to the other. So i take my comb. I place it about one inch down. Let me grab my iron hold on hold on. Let me get my glasses on, so i can see it and i go right in and i press that out and i drag the comb down. Okay, i usually do two about two or three strokes. Honestly, y'all saw all that old heat damage and whatever okay. This is what i do you do is work best for you. I do what works best for me, but this is what the hair looks like after the first pass. Okay, mostly straight, but we got to get that thing straight straight, so put your head to the side to the side like this. Yes, you know i'm sure and i'm using a bigger iron. If i was using a smaller iron, it would have been way easier to really get those roots. Okay and i go back in get to the root, and i do the chase method called then iron and i go all the way down to the end. All the way down all the way down, just like that hold on. Let me turn so y'all can see it. I go all the way down, just like that. Just like that, wouldn't look like i'm gon na have to get my smaller. You know what mama's stupid self, you know what i'm talking about. My edge is flat iron, whatever the baby um, and i just thought about it, because if i would have used my um y'all know the little real skinny skinny flat iron that we'll be using to do the baby hairs with that we curl it with for the Uh leave out, i mean we curl for the baby hairs that would have been perfect. That would have been so pretty. Okay, let me see which one is the hot phone cord follow forward. I'M just a blunt. I don't need the blow dryer right now, so plug that yes and we would have had if you would have had that on edge flat iron. That would have worked perfect, but i'm gon na just go in with my hot comb. Oh my back itch. I'Ma go in with my hot comb and hot comb them roots cause. I really need my that iron is too big to get to the roots like i want to so i'm gon na take my hot cone and press that out just like that. Now put your head forward: now: it's really straight from the root! So i'm going to show you another way: we're going to take the hot comb first, then i'm going to press it out because we got to get the roots so waxed, stick back roots, bring it down to the end front roots just like that comb it through, Like that, i'm a hot comb at first this time right, um, the other um flat iron heat up, my heart, coming through i'm pulling the hair as i hot comb it through. They got to kind of straighten it out the same way. A flat iron would and look how straight that iron got the hot comb got it just for that. One pass. So you know when we go back in with that fly iron. It'S gon na really give it that perfect sweetness. So now comb that food, my hot comb i mean my iron - is hot, using my babyliss pro get to the root and i drag it down, drag it down all the way down. Okay - and let me comb that through, oh, you missed a little spot right here. We gon na get that i'm gon na grab that there samia. What did i tell you? I'M gon na grab that little piece that i missed go back through it. Somebody was peeking at my window just now, and i'm gon na grab that front piece. One more time oh hey i was like who is that i in my window and i'm gon na flat iron that piece right there. You can sit on that side for me because i'm gon na um i'm doing a video okay, you can lock it for me. Yeah and we go on flat iron man, okay, y'all see how straight that is all right. Now we're gon na do the other side. Oh wait! Let me do the edges first hold on. Let me pull this back in hot pump, her edges just so they can be nice and straight, but we gon na, like i said without those two boys, didn't want to put any tension on them, so we just gon na screw that into the rest of the Hair, so i'm just hot comb, those out be very careful and i'm people scared of the hot comb behind you little sideburns all right and now it's just to put no tension on her real hair. So now we're going to do the other side just like watch your foot from this angle, so y'all can see more close and personal. Let me see yeah yo wig, already clean right, jack, yeah, okay, calm this out, you want to put spritz at the top when you want to leave this off just a little bit all right, so we're going to make it mostly soft, but you want to add A little holding spray to the top to um keep it firm into place. So yes unravel this braid that thing's straight though i'm too scared of that hot home. How comes ain't? No joke baby! I don't burn my phone here many times as long as my lace is laid. I ain't tripping. Yes, i'm saving this live. Y'All, don't worry. I usually. I know i always take my lives down, but i'm gon na keep this one up. Oh no. We almost there all right, i'm gon na go ahead and detangle like i said we don't watch the condition to leave out all right. Like i said, i work in two sections: pull that one to the back, i'm probably gon na work. I'M gon na work with the back one first, this time. Thank you. I'M gon na work with the back section first, this time so wax stick back route, drag it down to the ends so that wax to get all up in through there. First, i'm gon na. Take the hot comb and i'm a hot comb it out, and i'm gon na stretch the hair as i'm hot combing. It y'all see how straight that's getting boom. You see how straight it got with that. First, one just take my rat tail pick all the hair back up comb through it put the hot comb at the root who the hell give me a second heat back up, i'm going to just leave this piece here and just leave hot comb. This piece up. So back room ends front row and i actually got this hot comb down here. Miami from another hairstylist named bill lou, i think her instagram is touched by belle and it's only like sixty dollars to get to 500 degrees. I know y'all used to see me with my pink one that i got from chemical tea and honestly, it's the same hot comb, just different person selling it and it's 60 bells, sell hers for like sixty dollars. So now that my flat iron is no, i know it ain't plugged out again if you're serious - oh this. Oh this guy ain't trying to piss me off, because i know dang on bill home time. I'M thinking it's ready, don't pull it out again hold on y'all! Give me a second: it usually heats up pretty fast, but in the meantime, since we're gon na try this again, i'm gon na just hot comb, the edges out, while we wait for the hot comb to get hot for the third time, so i'm just hot combing. The edges that i left out, like i said, not to put no tensions on it. No tension on it hold this back real quick, put your other hand. With your other hand, yeah yeah be careful hold on. Let me get get up in there stretch that so now that the hot comb is finally ready, i mean the hot flat iron is finally ready. Now we can finish our second pass with the hot cone. You know what i mean, keep saying get up in there get to the root, and i drag it down for that. Nice, perfect, sleekness, okay, y'all see that nice sleek straight, don't even look like she was ever natural, nice sleek straight now. We'Re going to see the second part - and we remember i said we're not doing those two baby hairs. Nothing like that. We just didn't want to put no glue on the edges. So that's how we left that piece out grab the flat iron again, comb get to the roof, drag it nice, sleek and straight, and you just want to comb and smooth that down all around okay back tracks. Smooth this side here home is smooth, bring it back around calm and smooth into the front i'll mess with you. I see a little frizz all right so now that that leave out is pressed. We can focus on making this part super straight so hold on. Let me get right down the middle, always look at. I look from the bridge of the nose and i just work my way through with the comb, because we do not want no cricket parts so we're going to make sure it's not nice and straight. Look in the middle of the nose straight through and just pull whatever moves. Okay, just triple check! Quite a bit all right! I'M just going to pull this down right here, because we're going to use edge control on that piece here: okay, and the reason why i do the edge control lasts because you don't want to mix edge control with any other product. So you want to keep this just at the moment. You never mix control with another product, because then it's not going to work as good as the wood, if you just use it by itself or non oily and non greasy hair. Okay. So now i'm gon na take some pump. It up. Is it and y'all do know where i freshly permed y'all here when y'all wash your hair and the spritz might stop a little bit is burning yeah, it's gon na burn a little bit because the horse is open comb that in then we're going to take blow


Comments
lneal2800: You did a awsome job sis! Your work never goes unnoticed! Best tourtial!❤
SlayedBy Jordan: I love a quick affordable slay ❤️
Konfident Kayy: That leave out blended really good
Certainly Cee Caldwell: Too bad I missed the live. Three hours later. I totally enjoyed the video. Thank you Shae.
CiCi La’Beth: I just love burgundy hair on us brown skinned girlies ❤️❤️
Selena Davis: I love your energy. U slayed as usual!!!!
Sharon Young: Love what you do to the hair you can take a long time
Laria carpenter: Flawless as usual ✨️
Life With Kamari.💖💗: It look so cute ❤️
Elite Hair Collection: Y’all done been crunchy before….LOL we sure have OMG thinking about those days
JoySorandom M: Hello, what hot comb do use? Where can we purchase?
SEXXY N LOYAL: Pump It Up Spritz is the G.O.A.T. I keep it handy Fruck whatcha heard
Kenishacadel : Can you do a tutorial on how to install a wig on a personne who has a lower hairline cuz I struggle with my wig installation
Shell Shell Beyond Beauty: Today is my birthday heyyy twin lol love you boo
Stephanie Smith:
Dee Tv: What kind of hair was used?