Ombré Highlighted Wig Install With Body Curls |Bestlacewigs
- Posted on 19 August, 2021
- Lace Front Wig
- By Anonymous
This wig is from https://www.bestlacewigs.com/
Wig Details in this video:
6in Part Ombre Color with Highlights Slight Wavy Wig Transparent Lace [GSW312]
https://www.bestlacewigs.com/hair/6in-...
Hair Texture: Wavy
Hair Color: Ombre hair with highlights
Hair Length: 22inches
Cap Construction: 5.5”-6” parting lace front wig
Cap size: Average (22/22.5in)
Lace Color: Transparent Lace
Wig Density: 150%
Hairline: Pre-plucked
More Affordable Colored Lace Front Wigs:
https://www.bestlacewigs.com/c/Best-Co...
Keep Up with Bestlacewigs:
Instagram: http://www.instagram.com/bestlacewigs
YouTube Channel: https://www.youtube.com/user/bestlacew...
Welcome to IAmBeautifulHustlerTV .
Be sure to SUBSCRIBE & TURN ON YOUR ALERTS
Follow My Socials:
Instagram:_Beautifulhustler
@thebhslay
@iambeautifulhustler
Twitter:_Beautifulhustl
YouTube :IAmBeautifulHustlerTV
✨For Sponsorships ,Reviews,& Questions
Email:[email protected]
Contact : 786-571-1313
——————————————————
To BOOK APPTS
TEXT 786-571-1313
To Purchase Hair & Products Www.ibhslays.com
Allow 3-14 Business Days For All Orders
——————————————————
#Youtuber #YoutubeVlogger #YoutubeReviews #Hairtutorials #Miamihairstylist #Miamihair #Duluthhairstylist #TravelingHairstylist #YoutubeTutorials #GeorgiaHair #GeorgiaHairstylist
#Atlantahair #Atlantahairstylist #Celebrityhair #CelebrityHairstylist #SouthCarolinaHairstylist
#thebeautifulhustlerbrand #thebhslay
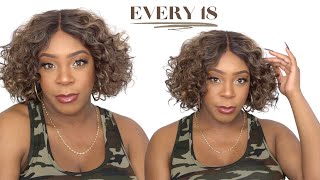
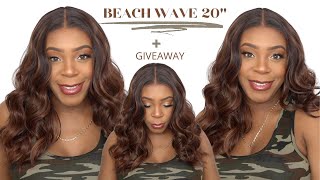
Hey guys and welcome back to my channel today, we are back with a new video and today's hair is provided by best lace. Wigs now they sent me over uh this, like body wave, ombre, uh kind of like a body wave loose, curly type of wig, and i will be installing it today. Uh and the style will be like a side part with somebody curls, but for starters, i'm just showing you everything that came inside of the box. You know it always comes with some goodies and you know some useful uh products and tools and then, of course you would get the wig itself, and this is what the wig look fresh. You know look like fresh out of the bag. It is like a highlight. A highlighted, ombre effect type of wig and it does have like the highlighted strips in the front. So that's why i decided that with this color and the fact that it's already like a you, know, curl type of wig, that i was going to create a side part with some body curls, so jumping straight into the video. We already have the ball cap laying down, so i'm just going to go ahead and begin to start the installation process. The ball cap is already on, so the skin is already clean. So what i'm going to do after um? You know adding the foundation to the inside, on top of the lace. Is that i'm going to take my skin protectant, spread across the hairline blow dry that really quickly and begin to apply my layers. So for this install, i use a total of four layers, but i'm not gon na show all four layers completely on this um install because it's just repetition over and over. So i'm just gon na go ahead and show you guys, like maybe the first two layers on camera and then the rest. I just did off video, but i will come back on and show you guys how i melted the lace. So, once your lace glue, go ahead and turns clear, you'll be uh, you can go ahead and pull your lace down into your glue and, as you place the lace down into the glue, you want to make sure that you are placing it um, make sure you Placing the wig hairline past the cap and a little bit past the glue that way you do not have glue on the outside of your hairline, so you want to just take it just a few centimeters uh past your hairline. In that way, like i said, you can make sure that you don't have any glue outside your hairline and um just also apply pressure comb that lace in you can use your finger tips to apply pressure or you can just comb it in as well, and then, Once you have it in place and you apply that pressure with your fingertips in your cone, you can go ahead and take your blow dryer on the heat setting and just blow dry that lace in some more to help with the melting process and then, of course, After that step, i'm going to go ahead and take that melt belt and tie down that lace for 10 minutes. So now i'm gon na go ahead, um! Well! I went ahead and removed the actual mailbelt. So before i go ahead and begin to cut off the extra lace, i'm just pulling the hair that is not needed for the install like pretty much when you actually melt the lace thing correctly, you can see what part of the lace is melted and one part Is not, and also if you don't need the lace um like some of that extra lace in the middle simply because um it doesn't match. Do you know the person's natural flow of the hairline? You could just go right in with a nice fresh razor and just razor all of that extra lace right off, and i prefer to do the razor method versus the scissors method, because the razor method gives you more of a natural appearance and not so straight across. But when people tend to use scissors, they cut straight across and that's what makes the wig look more wiggy. So i highly remem uh highly recommend that you guys use a jagged motion um with your razor or just using a razor period. But if you do have to use scissors, just try using your scissors in a jagged motion and not straight across so now, i'm going to just go ahead once again and blow dry that lace um and then once i finish doing that, i will go ahead and Pull down the section for the baby hairs, i will be doing like a side part. As i mentioned in the beginning, i will be doing a side part and adding some body curls, so right now, um well for actually for this style. I didn't want to do baby hairs across the hairline. I just wanted to do like the baby hair swoops on the side, so i'm just parting off the section on the sides of the hairline. I'M gon na leave the center open. Where will be no baby hairs and just complete? My swoops on um well complete my prep for my baby hairs on both sides, but i'm gon na show you guys how i achieve uh the baby hairs for this look just on one side, though, because it was repetition. So i'm just going to show you on one side in detail how i created the baby hairs and then the other side. I will do off camera, but um. Once i finish um parting off my baby hairs, i will add more foundation to the top of the frontal wig, just to make sure it is super super blended, and then i would uh you know spray some holding spray and then tie it down once again with That meltdown so before i actually tied on the melt belt. I just went ahead and began to prep like the parting area for the style. So i went ahead and created my curved part and now i'm taking uh my wax stick and applying it around that parting area space and then i'm gon na go in with my hot comb and just you know neatly press that out um. I don't really like my wigs to be all puffy looking like, we need our wheels to be on flat. You know what i'm saying so: um, i'm just going to hot comb. All of that out around the top area, just really focus on like the root part. Um, because that's what's going to get you that flatness that neatness, you know i'm saying so, i'm just going to you know finish hot combing, that area on out and then i'll go ahead and do the you know um. What'S the thing called, oh spraying down the hairline and tying around that nail belt? So so i just went ahead and hot comb some more around the hairline, while the milk that was sitting, but now i'm going to go ahead and remove that uh that melt belt and show you guys how i achieved the baby hairs um on the side. So here we go um, i'm going to go ahead and just like i mentioned, i showed you i'm going to show you one side on camera and just do the other one off camera, but i'm just going to go ahead and um un plait, the hair that I planted and i'm just going to uh. You know comb that out and i'm going to take my scissors and you know, cut it down not too short, because i kind of want to like the bigger um soups of baby hairs. So i'm going to go ahead and um just cut that like more so an inch, you know, usually i say, cut the baby hairs uh shorter than an inch, but i uh just cut it down. You know cut it to about an inch and right now, i'm using um our newest product, which is the baby hair gel the um beautiful hustler. You know glueless and baby hair gel, and this is what i'm, using to swoop and um secure my baby hairs into place. So i just took that gel put some on the back of my hand and i'm taking the edge brush and just creating a nice big swoop and just make sure that you comb the hair and you smooth it out with your fingers. So you can get a very neat baby hair and you know curve it in a c motion that way it just flows nicely back into the rest of the hairline and once you have a desired look, you can go ahead and blow dry, it um. So it you know dries faster or you can just naturally let it dry on its own, but make sure you take your time, you swoop it and you don't have any like wrinkles in the baby hairs. I hate like wrinkly hairs in the baby hairs that are made me just pluck that whole entire hair off like out of my baby hair, but i'm just going to use that gel. Like i mentioned swoop me a nice little sea motion and just comb, it neatly back into the hairline now as far as the sideburn um i cut it, you know, like i said i cut it longer. That way, i was able to swoop into a little curved um like the curved and baby hair. If you want to just swoop it out like that and just leave it out, you can but me i just like to sometimes you know, sweep the little curves baby hairs um, you know just curve it all the way and just be really really cute like that. So you want to focus on getting the main part of the baby hair into place, which is the main part of the swoop, because once you have that part secured and have it into place, just curving in the tail all you have to really just you know, Really, do is just add some product on top of the end of the hair and just um curve it in, and i like to just use the back of my rat tail comb and just curve it right on in into place, and then, like i mentioned, you Can blow dry that on the heat setting to uh, you know help it dry or you can let it air dry, but usually i just blow dry into place. So you know kind of speed up the process and that's how you get your nice perfect little sweet, baby hair. So i did decide on camera and i went ahead and did the other side off camera and i didn't do too much with the baby hairs. I just kept it pretty simple and now i'm taking my uh babyliss um curling iron, it's like a flat iron and a curling iron at the same time, but i am using that tool and i'm going to curl up this hair. But, however, right now i'm just taking um the lace glider and i'm just cutting. You know some little layers in the hair. That way it can. You know just have some type of. I don't know what the word i'm looking for, but it's just gon na have that thing you know, so i'm just going to cut some little layers and then um and then i'm just going to go ahead and begin to curl this hair up. So, as you can see, as far as like the curling technique, when it came to the um left side of the face, i curl everything backwards and then i asked her if she wanted to curl everything um on the other side, away from the face as well Or towards the face, but she ended up staying towards the face and then after we finished she wanted to actually go the other way so right here, i'm going to actually curl it towards the face, but the final final look will actually be away from the face. So i know you guys are going to be like wait, but you created a different way. How did it you know? How did the finish look look different, but so if you do want to curl it towards your face um, if that's like your style, then you would do it like this. But if you are, you know if you prefer to have all of your curls um facing away from the face and you would just continue to curl the opposite direction, so um yeah, so um anywho. Once i finish cutting all this stuff, i will go ahead and comb the curls out and you know kind of like shape the style into place. So you guys can see the finishing look with the curls going forward, but at the very very end of this video you will see that the curls will be facing the opposite direction. My so - and this is what the hair looking you know, it looks like as i'm you know, combing the curls out and you know styling it from it to the face. It'S super super, pretty the color on this wig were super nice. Like i really love the highlights and the low lights - and you know the brown shade, you know the dark blonde. All of that was really pretty, and then i went ahead and combed out the other side and started as well but um what we end up doing the very next day after she did her makeup and everything was. I ended up curling the hair to the opposite direction, um as far as the side that's going forward, but nevertheless um. What i'm going to do is, you know, conceal the part and yeah get to basically like once. I conceal the part. That would be the finishing touch for this video, so i hope you guys still enjoyed this video overall um. This is the last video uh pretty much that i had to post for a while. Remember i told you guys when i was on live like i had one more video that i was supposed to post a while ago, like before, i even had my surgery, but i still decided to drop it anyways because you know you just might pick up. You might learn something in this video that you didn't really. You know, learn from another video, so i'm just gon na still drop the content, but um yeah. Once i conceal that part up. That will finish the look that will complete the look so just stay tuned for the finishing look, and let me know what you guys think about this video down below and stay tuned for the new series we're doing y'all know i'm doing the um kind of like The what did i call it kind of like paying homage to you know the rap queens and legends before you know our time from back in the days up to you know paying homage to the artist that's out now and all that just a little bit of Everything, r b artist and rap artist - i just want to do like a little tribute to those uh queens, so um stay tuned, make sure you guys have notifications turned on um. This next series will be popping, it will be fun, it will be colors. You know what i'm saying, i'm so over the simple basic colors and styles, so it's time to get creative, it's time to get fun and it's time to show off the new body y'all. So thank you guys for watching. I hope you enjoyed this video once again. This hair is from best lace, wigs. Thank you for watching and i'll see you guys in the next video you


Comments
lneal2800: Its the Thumbnail for me! Moma Hustler you look so beautiful!♥️
Z Azakytu: Oh yesssss... the ending results away from the face was gorgeous!!!!
Student0fLyfe: Yassssssss chile, u slayed!!!!! 10s 10s 10s across the mf board I love the fact that u cut layers into this beautiful unit, it added body & definition, and the color of the hair looks phenomenal with mama hustle’s gorgeous skin tone ❤️ Keep up the great work
Dej Marie: You stay killing these looks girl !!!
Emily Steve: So perfect good job well done
Stephanie Smith: Your the reason my installs are on a whole another level appreciate your videos ❤️❤️❤️❤️
Michelle Junior: Beautiful as always!!!
MsKneshaC: Yes Momma beautiful!!! I love how you explain in detail during the process.... Boss vibes
Tracie Schultz: Best wig install I've seen great work !! Love it wish you could do my hair. Praying You have much success
ADoseOfKiyaa: Love it !
Christine Zapata: You have to do the mamma hustler looks when you do your remake hairstyles!!!! Another slay per usual
Laurynnn XOX: Definitely learned something! Thanks for the video as alwaysss
Jamaican pum pum: When I see a install with mama hustler I know it's about to be lit beautiful install as always mrs hustler
Brianna Brown: Love this install on your mommy ❤
Arlana Lashea: She so pretty I totally love this color on her
Menaa: Can you do a video on how you price your hair, glue, installations ect? And also do you think family and or friends should receive a discount?
Melleii's Pretty Nails: Definitely saving this I will do do exactly as u thought me ☺
Princess Toyia: Mama hustler!!!! My girl! Looking beautiful as always. ❤❤❤❤❤❤❤
tenice0526: Moma hustler looks so gorgeous with this color you always give what’s needed to be gave
Valerie Naylor: I love honey blonde you did an amazing job on your mother your mother is so beautiful
Julia Shaw: Love it
A Daniels: Momma look good as always but this wig & her skin tone
Yummiie Barb: enjoyed the process !!! You know you IT
Mishy: Hello. I was wondering if you ship your products internationally?? Thank you. I live in Australia. I'm intrested in your glues
Valorie Plan: Slayed momma dukes as usual ❤️
Jaames Higgins: I just love your craft and your hustle sus, momma hustler got going on with her bad self
Meggans POETICAL Breeze: Luv''n the color and style on your mom......
O'Shea Brown: Guess who's backwith the slay per usual
aayliah2: Wow moma Hustler you are absolutely beautiful, now this style is defo you, its taken years off you "guys look out there is a stunning beauty in town" now we no where your daughter gets her beauty from. Love love this look.
Melicia Destyl Dumas: You look so beautiful
Imari Row: Hey sis❤ love your work, but why I swear I be doing the same shit but my hair never comes out this good
Chiomytata: Love your work and love your product the only glue I use. @beautifulhustler
J Gurl Luvs Me: Gull u did dat Ma dukeshair stay slayed you got some blessed hands luv
octavia little: Yassss Shae I’ve been waiting❤️
MrsQueen LadyRed: Very Beautiful Mamacita Another Slay
demitri: What's the name of the glue?
monique Garvey: Yes Mama Hustler it looks fab on u
stephine brown: ❤️❤️❤️
deseraymiles87:
Dawn Davis: Amazing why are good stylist underated sad sh...
IMBOUJEEEE🥶🥶: HUSTLE HUSTLE HUSTLE BABBBBYYYY❤️❤️
lilSanq: She Smilling
Imari Row: Shari is your momma twinn