Honey Blonde Ombre Wig Install | 4X4 Lace Front Wig Ft. Uwigs (Beginner Friendly)
- Posted on 06 March, 2021
- Lace Front Wig
- By Anonymous
#wiginstall #lacefrontwig #howto
Hey guys i hope enjoyed this wig install video! I am DEFINITELY a beginner on installing wigs lol! Anyways I still wanted to show you guys how I install my wigs on this honey blonde ombré wig from AliExpress. Links to this wig will be down below I hope you enjoyed love you all! God bless
LINK TO WIG: https://m.aliexpress.com/item/40000269...
FAQ about me:
Birthday: September 6
What am i? Haitian American
New York girl!
Instagram: @trinit__
Follow me i follow back!
Camera: Cannon EOS M50 https://www.bestbuy.com/site/canon-eos...
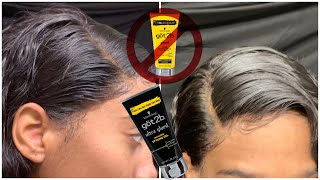
What'S up guys and welcome back to another video on my channel, as you can tell by the title of this video, this is going to be a how i lay my wig video, the wig that is featured in this video is by you wigs. I got it from aliexpress i this is not sponsored or anything. I bought this one because i seen a girl buy it from tik tok and i was like oh there's got to be cap, so let me get it and she was like. I was so good and all that stuff, so i was like okay, let me get it um. I will say, though, the customer service for this wig was bomb. The lady that helped me with this wig. She was a bomb um. It came in like four days or three days. I don't really lay wigs like that, like i lay wigs okay, but i'm just gon na be laying this way down and recording it to see how it goes. Um, don't forget to give this video a big thumbs up, also don't forget to comment any video suggestions and subscribe to my channel if you're new and let's just get right into the video okay guys. So first i'm going to be putting on the wig cap. I just snapped it on my face and i'm gon na be taking some got to be glue spray and spraying it around the hairline of the wig cap, because i am going to be doing the bald cap method. Now i'm taking a blow dryer and blow drying the glue. Well, the got to be glue spray on the cap of the hairline. Now i'm going to be cutting the wig cap to the hairline with the got to be spray. If you have hair scissors, i really recommend using that or those razor things, because this was really a struggle for me to cut it with these, like home scissors crazy. Once i'm done, cutting i'm going to be taking some fit me powder to try and make the bald cap, like the color of my skin tone, the color of my scalp, because it was way too light crazy, crazy, crazy, crazy. So this is the wig. I'M not going to be using the curls, i'm actually going to be straightening. It you'll see later in the video um. But when i put the wig on it was a little snug, because my head is pretty big. But if you have a normal sized head, you won't have any problems with it. Now i'm just placing the lace, as you can see, there's some like wig cap showing because the wig was like pretty small for my head, but all i had to do was just pull it up and hide the wig cap. This is me with a side part. I was debating if i wanted a middle part or a side part. I ended up going with the side part. So uh you see that i use the side part in the video. Now i added some wig glue. You can use any wig glue and i'm blow drying it to where i want the wig to stop. Once i got the wig, where i wanted, i'm going to be cutting off the excess lace again, if you have hair scissors use those because i struggled again to cut the lace with these like home scissors. Okay, now i'm taking some alcohol and removing any excess glue. That is on my forehead from the god to be into wig glue. Now i'm getting ready to straighten the wig, but you'll see later on the video that i actually don't use this flat iron because it didn't work. Well, i'm also taking some concealer to put on the part because it was kind of just too light um and it just didn't look like a part. So i kind of just used some concealer to enhance the color of the part. Once i'm done, you'll see that i'm going to section off some part to try and flat iron it, but, like i said, i won't be using the flat iron throughout this. You can see like once. It lets go, it's still curly and i promise y'all. It was on but yeah. This is me just over it and i'm gon na be using this other hair straightener. That works really well, i'm putting it on the setting 410. This is just it going down. It also comes with gloves to stop it from burning your hand. Now, as you can see, i'm using it on this one section you'll see throughout that i just get lazy and just stop doing one sections breezy crazy. It'S crazy crazy! Once i'm done straightening it. I cut the ends because they were just looking brittle. I guess you can kind of say and split. So i cut the ends. I didn't go in the highest setting of the straightener, so that's why the hair isn't going straight, but this is me trying to figure out. If i like it or not, talking to myself, we all do it anyways guys. This is the end of the video and the end of how the wig came out. I feel like the wig handled everything pretty well like. I said this is an aliexpress wig, so it's not going to be like the bombest wig ever, but i feel like for the price that i paid for it isn't too bad at all, um i'll, definitely link in the description box. This wig below, as you saw, i cut the ends and i straightened it because i just i just didn't like the way the curls look and the ends were kind of like split, and i just didn't like the way the ends look. So i did cut the ends. Um, the color is brighter than what it is in the picture, but i feel like the color just still goes well with my skin tone um. I really hope you guys enjoyed this video um. Let me know in the comments what you guys think also forget to give this video a big thumbs up and subscribe to my channel, for you know also don't forget to check out my other videos and i'll see you guys in my next one bye, crazy,
Comments
Free Goddess: More wig installs please!
Vanessa Willis:
Maamserwaa Ameyaw: How many inches and what density was this hair ?
BestStard Desir: I like watching your video
folashayo: Update on this hair?
Brianna Crawford: Was it some good hair did it shed