Curly Wig Install With Ali Anabelle
- Posted on 28 April, 2022
- Lace Front Wig
- By Anonymous
Hey Loves
I hope you all enjoy this video and please do subscribe.
●▬▬▬▬▬▬▬▬▬♛Ali Annabelle♛▬▬▬▬▬▬▬▬●
Best Quality,Affordable Price
Extra 5% discount Code: CG5
Hair Detail: Ali Annabelle 22 inch Brazilian Water Wave13x4 Lace Front Human Hair Wigs 250%
★Direct Link➤https://bit.ly/3vnSFA9
Bouncy Smooth Hair with Affordable Price
Ali Annabelle Hair Official Website: ➤https://bit.ly/3LoRXbG
Highly Recommend:
Ali Annabelle Body Wave Lace Front Human Hair Wigs Pre Plucked Peruvian Remy Lace Wig→https://bit.ly/3EYlxT2
Ali Annabelle Ombre Highlight Brown Honey Blonde Premade Straight Lace Front Human Hair Wigs→https://bit.ly/3vnK6W3
#aliannabellehair #aliannabellehairwig #aliannabellelacefrontwig#bodywavewigs
TikTok @aliannabellehair_01: https://www.tiktok.com/@aliannabelleha...
Instagram @aliannabellehair_01: https://bit.ly/36wpGgy
Youtube @Ali Annabelle Hair: https://bit.ly/3AKNGdw
Facebook @Ali Annabelle Hair: https://bit.ly/3wzHMc2
Wholesale Whatsapp: +8615617255695 E-mail: [email protected]
-------------------------------------------------------------------------------------------------------------------
SOCIAL MEDIA
INSTAGRAM - https://www.instagram.com/christinetin...
For any business related inquiries please email at [email protected]
-----------------------------------------------------------------------------------------------------------------------
EQUIPMENT
VLOGGING CAMERA - Canon EOS M6 Mark ii
EDITING SOFTWARE - Final Cut
PHONE - iPhone 11 pro max
-----------------------------------------------------------------------------------------------------------------------
MUSIC
The music in my videos is from epidemic sound, a royalty free music sharing site which you have to pay a monthly fee to be able to access.
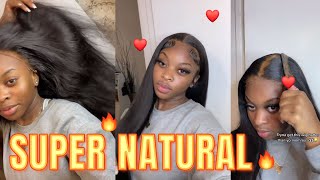
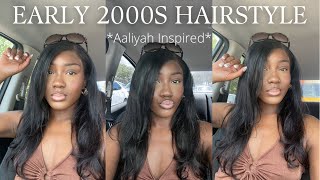
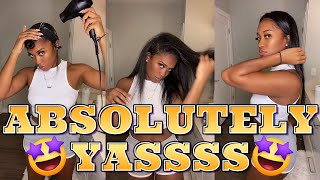
Hey guys welcome back to my channel and today we have yet another hair review, so today's hair is from ali annabelle just going to look down on my phone quickly, just to give you guys the specs of the hair. So this is a 22 inch water wave. It is a 13 by 4 lace, front human hair, and it is 250 density, so um in this video. I do show you guys how i install the hair um. Unfortunately, the makeup is not part of it, but yeah. I do show you guys how i install the hair and um managed to get it looking this beautiful. It is um 22 inches, as i mentioned it's just by my bust area. So if you guys can see over there so far um i do like the hair, but i just feel it is a little bit dry. So i'm gon na try um wash it with conditioner again just to make sure that it is a little bit more moisturized. But i just feel like: i will really need to walk around with like a water bottle um when i do wear the hair just to avoid it getting very dry, as you guys can see like the curls start to um really become very loose and i'm guessing It will like become very bigger if you don't tame it with water, so you can use like a water and conditioner mix just to make sure that it doesn't become too wild for you, but yeah in the video. I show you guys how i lay the wig, how i cut the lace. This is what it looks like. I managed to blend it in with my foundation, because the lace color was a little bit lighter, but so far i do like it. I have missed having a curly, wig and yeah. This is a quick and easy look, because you don't really have to stress about straightening or blow drying your hair. I did try to just um use a hot comb at the top, just to get it a little bit more flat, but apart from that, all i did was wash it. I did bleach the knots a little bit myself because they were not bleached. So if you are thinking of getting the hair, i would advise that you get it bleached and yeah. Basically, that was it. It was fairly an easy install. It'S just. I need to cut it on the sides here to make sure that it fits my hair properly, but yeah i will be leaving the details of the hair in the description box. In case, you guys are interested in purchasing the hair um so yeah. If you're interested to see how we achieved this late wig, then please stay tuned and don't forget to hit that subscribe button down below. If you are new - and i will see you guys in my next hey guys - so i just thought i'd show you guys how the hair comes packaged. It comes in this beautiful, pink satin bag, which i extremely love, because you can store your wigs in there and um yeah. It just avoids you having to find a place to store your wig, so this is what the wig came. Looking like, as soon as i took it out of the bag, the curls went very tight and, as you can see, i had to wash it just to get it to look a little more presentable and then on the inside. It did come with the clips um. So three at the top well two on the sides, one at the top one at the bottom also comes with a wig cap, which was very nice because it was more of a brownie color, more um than those light ones. And then it does come with a brochure from ali annabelle that gives you details about their hair, so um to start off with, as i mentioned, i bleached the knots just to get it to be more natural. Looking now that i look back, i think i should have actually put a little bit of foundation onto the lace. As you can see, the lace is very white. It'S not very similar to our skin tone, so i just went ahead and cut off the lace and, as i've mentioned previously, i usually leave a little more lace just to make sure that when i glue it down, it is able to like melt into your skin And it's not very close to the hairline, so i just went ahead and cut the other side as well. As you can see, it's perfectly fine to cut in sections if it makes it easier for you. So after cutting it off, i went ahead and put some glue on my head. I tried to keep it away from my hairline just so that when i am removing the wig, you know it doesn't um damage my hairline. So that's how i place it. I move it a little back and then just wait for it to air dry. A little bit then go in with the got to be spray. The freeze spray. This just helps get it more tacky and when you glue the wig, it's it sticks better. So when gluing this, it wasn't very easy. I had to keep going back and forth. As you can see, the lace is a little bit wide, but i managed to fix this with my makeup, which i then later did, but i would definitely say you should stick your wig in sections, which is what i should have done from the beginning. Rather than trying to glue the entire thing at once, i then went in with a headband just to make sure that everything is glued down and that the lace actually melts with the glue. And then i just went ahead and sprayed the wig with a leave-in conditioner and some water just to try get the curls to be a little more defined than they were um yeah, the hair isn't very full. So i would say you spray it and give it enough time to dry off. As you can see when i removed the lace was still white, but i went over it with the got to be free spray and that kind of helped. I did struggle a bit with the sides, which are always a struggle, but that was okay. The three spray did the job, and then i was just trying to get my middle part a little more straight, which i struggled with and yeah. This is basically the hair and i hope you guys enjoyed this video. I will see you guys in the next one

Comments
Simphiwe Iminathi: The curls are the bomb..perfect for the winter season ❤❤
ayanda mtyebi: That curls and lenght Tina❤
tholakele NKELE: Give me curls everyday
Sheilla Sibanda: Looking cute as always ❤❤❤❤❤❤
Chifundo Ng’oma: Wow.. I love the hair and the makeup… And ooooh I like how you edit your video’s, what editing app do you use?
Ncumisa Uzoukwu: Love the curls yhoo ❤️❤️
Anga Nazo: Gang gang am here 1st to mark the register, that hair is bomb ❤️
Anesi T: ❤️❤️❤️
Anesi T: ❤️❤️❤️
Chriselda Makhura: Waze wa ba umuhle honestly o pila babe ♥️
Luloo Moropa: