Beginner Friendly✨|U-Part Body Wave Wig Install On Natural Hair Blending ❤️|Luvme Hair
- Posted on 21 June, 2020
- U Part Wig
- By Anonymous
Wig Details ✨
U Part Wig Link: https://bit.ly/37Q4fXj
Luvme Hair Website: https://bit.ly/2NedAyZ
Instagram:https://www.instagram.com/luvmehair
Facebook:https://www.facebook.com/luvmehair
Snapchat: Luvme Hair
✨Welcome to IAmBeautifulHustler TV
Be sure to SUBSCRIBE & Turn ON Your Bells✨
TO PURCHASE MY HAIR & PRODUCTS FROM MY BRAND: (TheBeautifulHustlerBrand )
Use Link Below ⤵️
WWW.iBhSlays.com✨
We Ship Internationally ✈️
TO CONNECT WITH ME ✨
Personal IG: Iambeautifulhustler
Business Instagram:_Beautifulhustler & @thebeautifulhustlerbrand
Twitter:_Beautifulhustl
YouTube: IAmBeautifulHustlerTV
CONTACT ME✨
☎️ 786-571-1313
Email : [email protected]
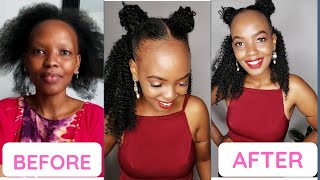
Hey beauties and welcome back to iron, beautiful hosta TV today, we'll be doing a! U part, wig install with some leave out, and this is something different I haven't done, leave out and so long. So this is gon na, be so quick, so simple and so easy, and I'm gon na show you how you can go from this leave it out with this braided look to a full head of weave and ten freakin minutes like it is unbelievable. How fast you can do this, and this is from love me hair. This is a body wave, u part wig and I'm just going to quickly show you how to install it, and I will be using my sister today as my model. Now, of course, love me. Hair gives you a nice, you know little treats or whatever in your box, and this is the? U part wig fresh out of the box. It does come up the little a stick in the front, but you just clip that off before you put the wig on and I'm just showing you how just did her. You know her braids. I just you know, didn't leave out you section and I just braided everything, I'm going down towards the side and back and before I even clip her we're going. It does have three clips towards the top and clips at the bottom as well. That'S the little stretchy! You know the little stretching bands and tight in your wig. So for starters, I'm just gon na go ahead and slide that comb right underneath her braids and I'm gon na start by clicking that Center clip and then I'm gon na work. My way to the side and clip that clip on and it's the type of clip that you been in words to open and then you snap in the opposite direction to lock it, and it is really just that simple and, like I said just that quick. She has a full weave on her head and all we have to do now is her leave out now. If you paid attention to my last previous um leave out video, then you would know that she is natural, but before I get into that, as you can see this week, it's very secure with those clips actually shake it for you. So you see it does not go anywhere and it does have those little straps on the bottom, like I mentioned, or that you can go ahead and tighten it so for the leave out today, I will be using just some heat protectant from Fantasia's he protected and I will be using my beautiful hustler, a Glenn wet stick and her leave out is natural, as you can see, so I'm gon na show you guys quickly how I just go ahead and press that leave out out and get it nice and bone straight. So first things: first, I'm gon na take that he protects. Then I'm just gon na spray along the hair on to prevent any heat damage and then I'm gon na take my glam wax stick and apply that wax all over that leave out area in the inside and on the bottom as well, and I'm gon na repeat That step on both sides and then I'm going to go ahead and take my I like to use my heat protectant, a small tooth comb and I take my flat iron. I just a little one-inch flat iron and I get really close up on that root and use that chase method with the flat iron scuse me guys with the flat iron in the comb, and I just passed through each section of that leave out at least two Times um and I like to take smaller sections cuz, the smaller section, the more you can really get into straightening their hair out as straight as possible. So I'm just gon na go ahead and make my second pass on it and with that wax stick, it does give it that nice little healthy shine to it and, as you can see it straightened out. Just that simple and just say easy and I'm gon na go ahead and repeat this step until all of her leave out has been pressed out. So now that I have all of that, leave our press out. I'M gon na go ahead and just you know straighten out the part, and I did want to keep pretty much this natural looking look as far as like the curl pattern and everything, so I'm not gon na do too much as far as styling, and I know That she, you know this is just something quick and easy for right now, there's never to step out, and I just you know, let's just go ahead and throw this tutorial in there, so it really really took no time to get this done, but I did go Ahead and you know straighten up that part and I add a little more wax to the root because I'm gon na go now in with that hot comb and really comb those roots out cuz. I really like to get every single kink out of the hair. When I am doing leave out and some people don't complain about heat damage and it's an edit too many passes, it's like hey. If you want your head, a little crunchy at the top, that's between you and God and it's your business. But when I do my little box on my just as my friends my clients, they want day hair bone to the street and I do have growing hands. So you know it's just like to each his own pretty much, but my clients do like their leave out to be pressed. That'S the purpose of having a leave out. It'S supposed to look good, so I just went in with that hot comb and you know just hit them roots, some more and I'm just gon na. Take my comb and just comb and blend everything right on in and then I'm just gon na go in with my wand cutter just a little bit and just add some loose curl to blend her natural hair. With that leave out and like I mention I'm not gon na do too too too much when it comes to the styling, because it's just something quick things getting ready to go somewhere and we just wanted something: that's cute, presentable and simple. So this is very like beginner friendly, like you, don't have to be an expert at you know doing installs to do this. You part look, but I'm just gon na quickly. Take that wand, curling and just wrap it round not hold it for too long is. I don't want to be too too tight and I'm just gon na go ahead and curl some of those pieces in and I'm gon na go back over this section in the front because I feel like it was too too loose. So I'm going to go back in on that part, but what I do to this side, I will do to the other side as well, and then I would get into the finishing touches. So I went ahead and edit all of that curl in there and I'm just combing through it, because I still wanted to look like that. Natural baby look and I'm working on my relaunch of my edge control again. So I'm just showing you, you know a little sample. I am using my beautiful hustlers to Emory's edges. It wasn't released about two years ago and I just wanted to rebrand everything and it's just a timing for everything so now that my products are always sold out. I first need to go ahead and release the edge control, because new part, wigs are coming back out and leave out will be back in style, so, of course, with natural hair. You need to be able to maintain it as well. So I'm just going to use my glamorous edges edge control, and this is my brain that I will be releasing once again and I'm just applying it in that front area there. I don't want to do too much like baby hair. You know, like they're, crazy, like the way I would do on a lace wig I didn't want to you know do all of that. I just wanted to keep it as simple and low maintenance as possible, so I just took the edge controller, just kind of swooped. Those edges right there in the front going into the part, and I'm still going to take my black spray and just spray it around that parting area, just leaving placing their rat tail comb in that part, and if you do get a little extra now just go Ahead and clean it up and I'm just taking some Tresemme holding spray and spring on the top, and I'm just going to comb everything down, make sure. There'S no fly ways make sure everything is nice and neat and also blow-dry they're on the warm setting and that we're pretty much finished as quick and easy. You part week install yeah. It was very, very simple, as you can see, you can do this on your cell. It'S very very easy, so I hope you guys enjoyed this quick little video and thank you guys for tuning into our beautiful house. Can see TV see you next time.


Comments
Leilani’s Love: I never tried a U Part wig before! You definitely just made me want one!
A G: Finally someone without hella leave out! This is the best u-part video I’ve seen.
Amber Skye: I need more of these . I’m going back to Uparts but I’m natural now, I can’t seem to get my hair straight anymore
Alexis Maxwell: Omg love it.. I been watching you from the beginning girl you so underrated.. keep hustling girly God got you...
fatema sine: Your so underrated you deserve WAYYYY more subscribers !!!!
jahzmin gibbs: Yes this is the video I needed thank you ☺️
Lacey Ann: Looks beautiful, I have the same one from eseewigs two months ago.
Naya Alexis:
Robert Lindsey: Thank you for sharing this great video, I purchased the same product from newigstyle..com last month
Kendra Harer: Bone to the straight #newsubbie
Jazmin Igbineweka: When are you going to restock your website? Im ready to order
Sassy Moi: Oh man! Talk about heat damage That was over kill. Looks good tho
Elisa Johnson: Aren't the clips super uncomfortable
PANDEMONIUM: Nice!! video
PANDEMONIUM: Nice!! video
Shandell kute: Hey Mami