Nadula Hair U Part Wig Install! Ft. Nadula Hair
- Posted on 22 March, 2021
- U Part Wig
- By Anonymous
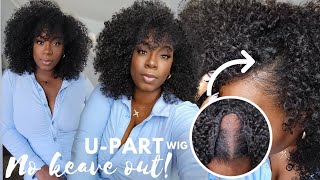
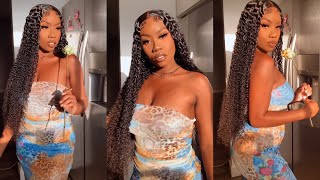
What’s uppppp family! For my maternity shoot I did my own hair!! I bought a u part wig from nadula (22”) hair and lovedddd it! I used a crimper to make the curls! Links to both below.
Link to hair:
https://m.nadula.com/nadula-u-part-wig...
Link to crimper:
Bed Head Wave Artist Ceramic Deep... https://www.amazon.com/dp/B07CSZBWGQ?r...
_________________________________
SHOP MY AMAZON STORE (For other great finds):
https://www.amazon.com/shop/kaicherise...
_________________________________
CHECK OUT MY OTHER UPLOADS:
IM PREGNANT! Pregnancy Q&A
https://www.youtube.com/watch?v=Z51b4J...
How to shop on #PrettyLittleThing
https://www.youtube.com/watch?v=lVvSVC...
Husband tag
https://m.youtube.com/watch?v=80fquUyb...
Blood clot during pregnancy diagnosis
https://m.youtube.com/watch?v=od-lIiLb...
Basic makeup routine for beginners!
https://m.youtube.com/watch?v=DAQhFeCS...
My Depression Story
Perm Rod Tutorial
How I got my curls back!
Wand Curl Tutorial ft. Amazon Clip ins - https://www.youtube.com/watch?v=_SGSsL...
Two Ponytail w/weave Tutorial - https://www.youtube.com/watch?v=hN1x44...
$15 Half Wig Tutorial - https://www.youtube.com/watch?v=tNK3xG...
Curly to Straight Hair Routine - https://www.youtube.com/watch?v=n8quOc...
15 Minute Weave with Bangs Install - https://www.youtube.com/watch?v=8bQfub...
_________________________________
▷RECORDING DETAILS IN THIS VIDEO:
Camera: Sony A6400
Lens: Canon Sigma 30mm lens
Microphone: None (Audio from Camera)
Lighting: https://www.amazon.com/Neewer-Ring-Lig...
_________________________________
▷FAQs:
➥Ethnicity:
Black mixed with Black
➥Hair Type:
3C/4A & low porosity
➥Place of Residency:
New York
_________________________________
FYI: This video is NOT SPONSORED :)
_________________________________
C O N N E C T W I T H M E:
Instagram - https://www.instagram.com/kaicherise_/...
Email - [email protected]
#upartwig #naturalhair #nadulahair
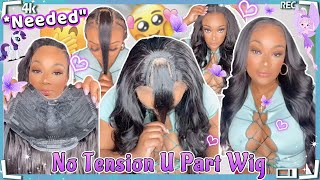
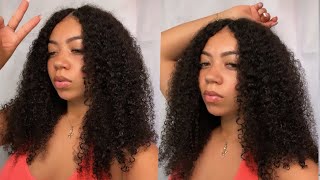
What is up youtube? It has been a minute, but here i am, and i had a lot of technical difficulties trying to film this video. It was about to not happen again, but here i am. We gon na do this because, if i waste another week trying to film this video, it ain't never gon na get done. So, let's just get into it. I'M gon na be showing you guys how i install my u-part wig from nadula hair. I will link everything down below exactly what i got, but it is a blow dried. It came blow dried, i already wore it, so i had some of the curls in it already, but the wig was extremely blow dryer. When i first got it kind of like your natural hair, when it's first blow dried, it is a u-part wig. It did come with two bands and i just cut them off in the middle um, so long story short. What i'm going to be doing is braiding, like the perimeters of my hair inside i'm going to leave some leave out and then i'm going to crimp this wig um, to give it this curl curls are kind of you know a little messed up. So i'm going to go through again to show you how i got my crimped hairstyle for my maternity shoe, which a lot of you saw if you haven't i'll, probably insert some pictures, and you can also follow me on instagram to see them. But without further ado. Honestly, let's just get into it um this is the crimper i'm going to be using. I bought this right off of amazon, it's from bedhead and it is called wave artist um. So without further ado, let's get into it. I'M going to start off by parting, my hair, with this wig you can, you could wear it, however part you want, you could do a middle part or side part. I like side parts on me better. So, that's why i'm going to go ahead and do a side part, but it will be the same thing if you wanted a middle part, i'm also not going to like detail braid every single part of my head this. When i put on your part wigs. I don't like to have hair all the time in my head um, so i usually take them out right away anyway. So there's no reason for my braids to be like crisp to a tee as long as i can braid it down to get it in there. That'S all that matters to me that rhymed, so i'm gon na go through first and i'm gon na part, my hair down the center, where i want it to be where i want my part to be like so like that. That'S where i want my part to be and long story short, i'm going to leave out like the perimeter of my hair. So, like my baby hairs, this got to stay out and i'm just going to twist that up. So it's not in the way - and i'm going to do that for right here as well around my perimeter and i'm going to section apart right here and this is going to go over the tracks and then everything else is going to get braided up and put To the back, so this is what this part of the video will be all right, so these three parts are going to be my leave out. This will be like my edges, part, and this is what's going to go over the tracks. So now what i'm going to do is do three one, two, three four, four tiny braids and i'm gon na do those around where my leave out is so i'm gon na do one going down right here. One going down right here, one going down right here and then one going down right here and the reason why is this? U part, wig is not a clip, so you know how some wood you get. You put it down and you could clip it in if um it was a clip wig. I would literally just put all my hair back in some dookie braids and just clip it in, but because it's not it's hard for the comb to really stick in your hair and start sliding. So when you create the little braids you get to stick it into the little braids and i'm going to show you what that looks like all right. So i went ahead and braided all of the little braids. You can see them right here this one right here. Going around one right here and then one right here and again we're doing that, so we can clamp the wig down. So when i put the wig down, you see the combs right here, i'm literally going to put them like on the braid here and then on the braid here, but we'll get to that. So now what i'm going to do is braid the rest of my hair into big dookie braids. So that way, it's back like this and i'm going to include the tiny braids in with that um. So yeah, let i'm just fast forward. This part, i'm gon na. Just do four doogie braids going back okay, so i went ahead and did some braids there's actually three. If you see them right here: big tuki, big, dookie, big dookie. So now we have our leave out, which is these three sections right here and we have our perimeter braids and we have our big dookie. So now we are ready to place the wig. What i'm going to do with my back braids again. I do not keep hair in for a long time. That'S halfway, i'll, probably wear it and then whip it off at nighttime and do something else. The next day or i will wear it it is. Human hair is actually really good hair um. I would definitely order from this company again, but i'm just gon na take my scrunchie and ball my braids up in the back into like a little tight bun and we're gon na call it a day. If you wanted to sew your braids down. If you want to get more intricate with your braids by all means, please please do bummy. I got time so i'm gon na just take it boil it up in the back and put it into a bun like so like that and yes, it will fit underneath the wig okay. Now we're going to take the wig and i'm going to place it right on top of again the perimeter brace that i created. So this is the first side. You see the comb right here. I'M gon na dig it in make sure the track is like you know the same length as where you ended it. That one looks good, there's also a comb right here in the middle. So i'm going to place that right here and then this is the last comb for the top, and i'm going to comb that in right here and now. What you're, just gon na do with the rest of the wig is pull it across your head. There'S another comb right here again, i'm going to pull this to the perimeter braid that i made and comb it into my perimeter braid like so like that and that's what i'm going to do with the rest of it, i'm going to pull it down and comb. It in tuck my braids in comb it in and then you keep fixing it until you like how it looks. So this looks a little lumpy right here. Okay, i pushed it down so voila. This is the wig. So now what i'm going to do is you? Can unravel your leave out and your leave out should be covering um the tracks. So, as you can see, it covers the front right. It covers this side. Well, i got ta. Do i got ta? Do the part down the middle again, all right, so literally the tracks are covered. When this, when i first got the wig again, it was blow dry, just like my natural hair um. So now what i'm going to do after i got my parts, the wig is secured, i'm going to go through my crimper and i'm going to go through every single row and i'm going to curl it um. I like the crimp curls. You can use a wand um any other way that you usually curl your hair will work on this hair actually takes really well um. So now i'm just going to go through and crimp. My hair stay tuned all right. So now i'm at the last lap, as you guys can see this is what it looks like crimped. So i'm just going to do these last two parts so voila this is the finished result. So this is the look that i did for my maternity shoe um. What i would do, after this is going with some gel slick this down, if you like, if not, you could leave it just like this, you know set your little baby hairs. I ain't got no gel right now for this i have to do, and this is literally the look. I 100 recommend this wig. It literally feels like my hair, everyone who's seen me in person, said it looks like my hair again when you do the perimeter, you won't see any of the tracks, so i am here for this. You part wig, i hope y'all like it. Let me know what you think down below. Let me know if you'll be trying this um and remember down below. You can also find the link directly to the hair. So this isn't a sponsored video, but you know i would love to work with um the doula in the future, so make sure if y'all, by the way, you leave a comment and let them know that it was your girl, kai that brought you there. So this is the look um. Thank you guys so much for watching. I hope you enjoy peace out.
Comments
Seiji: I just subbed, I love the nodule hair u part wig install video idea! Keep making the nadula hair videos for sure, can I get the sub back btw?
Eyes: Just ordered my kinky straight u part
catbirdi3: Did it hold curls?