Versatile U Part Wig Tutorial
- Posted on 14 January, 2017
- U Part Wig
- By Anonymous
Hey Dolls, Here is another hair tutorial of a wig that I will be doing an installation video on. I hope it was extremely informative and something new you learned. Don't Forget to THUMBS UP AND SHARE If you guys have any questions, comments, or concern just ask below.
Don't Forget to Like Comment & SUBSCRIBE !
Business Inquires ONLY (email)
_______________________________________________________________
LET BE FRIENDS:
IG: http://instagram.com/ellaabaddie/
Twitter: https://twitter.com/ellaabaddie
SC: ellaabaddie
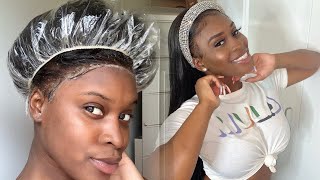
I I if you guys, are interested on how to make a versatile u-part wig. Please keep on watching now without further ado, let's jump right into the video. So to begin, you want to start off with multiple need, needle threaded or spandex. Don'T caps also with your le girl, concealer or maybe a white pencil that you may have some tea nails and also your hair, so I'm just going to begin by taking our cap out of the package, placing it on our dome head. Not our dome head are wicked. I'M going to take two fingers and I'm going to place it on the dough mat, as you guys could see, and I'm going to outline it and trace it, and that is where I want my leave out to be, and I'm just sectioning it off, because obviously You don't want to just wing it. You want to make sure you have a guideline now, I'm just going to go ahead and pick up the cup flip it inside out and take the concealer and Mark where it is on the top front, because I'm going to show a truck underneath. So you are able to place it into a ponytail if you want to mark it up. So you know where to end and where the served. So I'm going to start off with the longest bundle, of course, and here I'm just going to demonstrate, where you're going to put it along the bottom and then you're going to bring it all the way around okay. So you guys in this video I did make a little letter. Little teeny mistake that I don't want you guys to follow. You guys see where I'm placing it through on the cap go about half an inch up more. Why do I say, go half an inch up more and don't go exactly exactly on the rim? It'S because you don't want the rest of you falling down from it as you, when you put in the ponytail, you don't want to see the weather. You want to make sure you see nothing but hair going backwards. You don't want to see a little bit of the web. I don't have much of an issue, but you know so you guys don't run into that at all. Just go ahead and bring it up a little bit. Half an inch and you'll be fine, and here I'm just finishing it up, do my last couple of threads and now I'm going to do a knot. You guys know I love my knives. I love knots mainly because and make sure that it's secure and it's not coming out so once I cut it, I'm going to cut it, I'm not going to cut it, I'm going to tie it two to three times and then cut it again to make it Short and then I'm going to comb it out a little bit and then we're going to go ahead and flip the cap right sides out. So this is pretty much the easy part you guys that was the only life. You know part that you maybe have difficulty with and yes, you did have to go under a lesson for that part. Trust me, you guys, I know I said, do not sew on the elastic which you don't want to, but for the sake of doing it, when it's inside out, you cannot sew on the fabric inside out, because there is no fabric, it's only elastic. So by that part you do have to sew on the Elector, but other than that. Please make sure you don't, and this is just pretty self-explanatory. You'Re just sewing you're going to go ahead so and then once you get to the end, you're going to flip the track. So again, once you get to the answer pit to go the fold-over method going on back and forth back and forth back and forth. Oh and here I'm just showing you guys on what I'm doing I'm pretty much halfway through and I'm just showing you guys how I do it and then I'm going to curve it once we get about to the end of your eyebrow, and I kind of have This in my head, because I kind of know how this works, but if you want to you, can take it off and you want to sew until you get about to the end of your eyebrow, then that's when, when you get to the top, you want to Start curving the track and words so just carving it as like a slight little C, as you guys could feel what I just did on camera. You just want to carve it a little bit and then flip the back of course, and just keep on going, and here is the other side. You guys can see that it went down from an angle, but you can see. I turned it just a tiny bit to make it go into like a slight little little seat, and I hope you guys understand that I mean more in depth in explanation. Please let me know so now that I'm done and I got majority of it and I went right outside of our lines and it's time to close the inner part, I'm going to take drugs that I had from the previous. It saw that I use with this hair, but it wasn't blue. Of course, I'm just going to take the short track and I'm going to go ahead and sew it just close at all. So I'm going to stop talking and let you guys see what I'm doing. Rather than just talking away now that we got our closing finish, we're going to go ahead and put our last track and, as you can see where my hands, I was showing you what the track is going to cover. It'S going cover each side in the back. So this truck right here is actually perfect if it's riding where we need to finish closing it off and that's the last truck we're going to go and just make sure you do that, because you don't want to place your wave without covering that last track. That stripe just helps when it's time to place your hair, you don't have to do extra blowing and covering the tracks that are folded back and forth, and once you're complete you go ahead and comb out your hair and then you're going to want to go ahead And take off your cap because you can't put on a wig with some of the chapter there. You know you have to cut it out, so you set off the little foam and bone pieces that you know got caught and then you want to take a sharp scissor a little bit sharper than mine, but mine's still just a job, and you just want to Go ahead and cut in the middle and just cut as close as possible, but not close to where you're cutting the thread. You want to just cut as close as possible of this fabric, because you don't want to have too much of that as excess fabric there. It'S not needed, and that is the finished product of your versus tile u-part wig. It can go to a left side, part it can go to a middle part, it can go to our right part and it can even go into a ponytail. I really really hope you guys enjoyed this video if you guys have any comments, questions or concerns. Please put that down in the comment area. Don'T forget to like this video and subscribe and stay tuned, but when I show you guys on how to install this week, I'll talk to you guys in my next video bye dogs.
Comments
Tammy Lee: Great tutorial! You've helped me so much! Why do some ppl cut the elastic band and some leave it on. I'm so confused about the part...
kayla: Beautifulthank you so much!!!
rackeisha hunter: great job boo that underneath sew of the first track was genius
Dashannii Carr: You did a very well job omg
Carolina Gardener: I love it thanks for sharing
Shez E: thank u! great tips best upart video I've seen....you got yourself a new subbie :)
Gabby H: Where did you purchase the hair and what inches?
mrzJenkins42213: You did a wonderful job. I'm doing mine now. Thanks
Andraya B: Honestly this was the most easiest one I've seen...everyone else was all over the place lol
tamara gabriella: Love your videos new subbie here this blue is popping
the1theonly _princesseri: thank you!
Riche Adjoa Candis: Please can you put the mannequin head on a table ?
Kayla Irving: Did you use blue thread???
Mz_MarMar: Anytime I use a dome cap my uparts end up too big, what am I doing wrong? *I am asking before the videos over *
patrick johnson: when you put the wig on should the band lay on your forehead . I tried and the fitting was terrible. I think my head is a bit small.
Natty Lover: I don't think I understand the wig anymore lol. So what the heck is going on with the space? Like I don't understand how it's worn missing the hair. See what I mean?
Shai Vanen: what color and brand is that and how long did u leave it on the hair????