How To Make A U-Part Wig Tutorial
- Posted on 19 February, 2018
- U Part Wig
- By Anonymous
Instagram: @seunokimi
https://www.instagram.com/seunokimi/
This is a shortened reupload of my u-part wig tutorial.
How to make your own u part wig, easy, fast, simple, and perfect for beginners.
https://www.instagram.com/seunokimi/
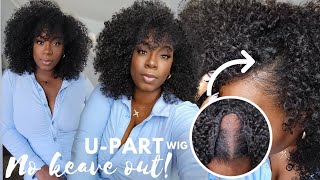
Step by step tutorial on how to make a upart wig. This is a side part u part wig with leave out. The way I demonstrate ensures that your upart wig will not be too big or too small because I use clear packaging tape and cotton balls to make the foam mannequin head the right size. You do not need a measuring tape to measure your head to make sure that your u-part wig fits. All I use was a piece of string and it worked well. I do not have a clamp or stand for my styrofoam mannequin head, so I just taped it down to a stool to work on and it made sewing on to the net weaving cap very easy. This how to tutorial is perfect for beginners, and I mostly used simple materials that I already had laying around the house to make this custom u part wig for myself, so its very possible for anyone to be able to make a upart wig yourself. You can use the same techniques on to swe any hair onto the weaving cap, whether its long, short, in a middle, or a side part. I did not use a spandex dome cap because I wanted my hair to be able to breathe underneath which is important if you want to know how to take care of your hair under a upart wig. I also used needle and thread instead of the hot glue gun method to attach the weft just to make the wig last long. This works with any style, including a bob, a lob, a deep side swoop, long, wavy, curly or straight hair. Styling a part wig is easy. You can also choose to do this style with little leave out or no leave out if you use a lace front closure.
Techniques Shown:
-How to customize a Styrofoam head/ how to make a styrofoam head bigger
-How to work with needle and thread to sew onto a mesh weaving cap
-The Fold Over Method: How to fold the weft over instead of cutting the weft at each row
-How to braid your hair down under a wig
-How to prep hair for a upart wig
-how to blend hair with a wig
-How to install a upart wig - how to sew a upart wig onto your hair
Hair info:
Website: https://www.queen-weave.com/
Body Wave 4 bundle 18/20/22/24
link: https://www.queen-weave.com/brazilianv...
Body Wave Closure Link: https://www.queen-weave.com/brazilianv...
Body Wave Frontal Link: https://www.queen-weave.com/brazilianv...
IG: queenweavebeauty910088
FB: https://www.facebook.com/queenweavebea...
Email: [email protected]
Hair Tools Kit:
https://www.coralbeautysolutions.com/
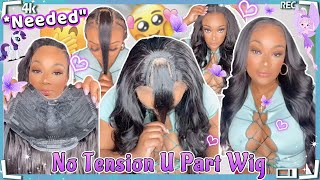
Hey guys, it's today's tutorial I'll, be showing you guys how I make my you part with a new part with a nice alternative to sew ins, because they're reusable so yeah, I'm just going to show you how I did it to start off. I so I'm gon na be using a star from head, but before I start using it to make my wig, I measured my head and the styrofoam head with a piece of string to see if they're about the same size, and I find out that my head Is a lot bigger than the Styrofoam head? So, to fix this, I wrapped the star from head with cotton balls and some tape, and I ended up having to use quite a bit of cotton balls and tape to make the head bigger either because my head is really big or this styrofoam head is really Small but anyways, once I was done, I just measured it again to make sure it's the right size. This is the cap that I am using for the u-part wig. I like it because it's kind of flimsy and flexible, but still sturdy and even has straps to begin. I start by threading, my needle and I section off where I want to have leave out, since this is a u-part wig and they leave out section will be shaped as au and after I put the needle through the edge of the weft. I start sewing right where I have marked, I want my leave out to start before pulling it all the way back up, I'm going to pull the thread back out from the other side of the weft, like that, you can see I'm going to open up with The red from here I'm going to open it up, and then I'm gon na put this through this loop so that a knot will form and it will hold it up, going to put it in like that and then just pull it up. And then there you go it stays in place then, as I continue to so I just go under the weft and through that little thick, black and of weaving net, and then I loop the thread once and then I just repeat so: I go not through the Left under the left and then through that black band on the edge of the cap, and then I loop it and then I repeat and then once I start to run out of string. What I do is I just loop: it a few extra times to make sure that it's really nice and sturdy, and then I cut it off cut off the excess string and the needle with a pair of scissors. And then I tie it an additional knot with the string left over and cut off that excess string afterwards, and I move on to continuing with the rest of the head. So I had to start by literally just shooting the same exact process wreath. Reading a needle and sewing in the exact same way that I showed you earlier the only time I do something different is when I get to the end, and I'm just about done with that row so before I flip over the hair, because I'm not cutting the West I like to loop it a few extra times just to make sure everything lays flat, and there aren't lumps every time you fold it over and then now that I'm not sewing onto the edge of the cap, you can see I'm just showing on to the Actual net right here, and sometimes I use my finger under there to help me prop it up and make sure that I'm sewing onto the net. It'S pretty simple as far as like spacing, and I'm also not sewing directly onto the straps. I didn't end up using the straps, but just in case you want to use them, it's just nice to not so directly onto the straps and just sew onto the net on top of it. As far as spacing of the actual webs, I spaced the wefts, pretty close together at the bottom and and actually throughout the whole. U part wig, just because I'm using four bundles and I had enough hair to use if you're say using like three bundles or something you can space out the West a little bit more. But as for me, I literally just put them like directly without really giving much room all the way up until I got to the top and I'm left with just a u part section, and for this UART section, where I'm going to have my leave out. I basically just eyeballed how big I wanted it to be, but I would definitely recommend that you measure it out yourself now, I'm just cutting off that, actually being careful not to cut like the string that I used to sew and now I'm showing you guys how I'M preparing my own head to install this. U part wig to start off. The most important thing is the two anchor braids that you have around to leave out and when you're braiding, these anchor braids it's important to keep in mind and constantly measure that they are the right size. So that's why I was just putting the? U part wig back on to make sure that it would fit correctly, and so you also want braids going along the perimeter of your hair because you will also be sewing around the perimeter. So the two most important braids are the braids on the top along your leave out and around the perimeter. The rest of the braids really don't matter at all, and you just want to get your hair down and out of the way. So now what I'm doing is, I am sewing the actual wig onto the braid, starting with the anchor braids that I have at the top, and so first I put the needle through the edge of the wig, and then I just sew onto my braids. The same way like just going through my braids and looping in the same exact way, you would so I was showing you how I sew whenever I sold them left onto the actual wig. So I continue doing that along the top of my head, and so I only sew along the top to anchor braids and along the perimeter and installation, for this literally takes like 10 minutes and same thing with take down is really really simple but take down. You have to be a little bit more careful to make sure not to cut the string that you have used to actually sew the wig together, but other than that take down. Installation is very fast, and so the hard part is making actually making the wig. But once you make it, you can reuse it and reuse it multiple times. So once I'm done sewing it down, I'm just pulling out my leave out and show you guys how it looks, and this honestly looks exactly like so it like. You can't really tell at all like it lays everything lays really super flat. I really really like this hair from aliexpress off of Pinos beauty. I really like the long hair, wavy hair. This is me just smiling so much my cheeks hurting, because I really just like making these videos for you guys so much so. Thank you guys so much for watching them too, and I'll see you in the next one.


Comments
sunnysideup: I'm literally sitting here with this wig dome in my lap following along. Thank you sis lol
Cherease Andrews: OMG!!!! You do such an amazing and detailed job!!! Thanks so much!
AC Caballero: Great video! Simple, sweet, and to the point! Love it!
Tanya Jones: Excellent job! Love it
Nadir Conceição: Só perfeita up upart
Lashaunta Shanese: This was great!!
Ayanna Henry Solomon: Omg your natural hair is lovely. Am trying to regrow my hair and it's such a hassle to do so. I make a lot of u-part wigs and use sewins to give it a break. But am tired of it. Hated the fact that I cut my hair now. It let someone braided it and after that, that was it. It started to break up and I got tired and cut it into a short style and I regret it now. Anyways you did an excellent job. I would try sewing my hair right at the top and see how that works.
Carol N Kate: grest job. i LOVE u-part wigs. they are so natural looking
sarah adesanya: I so so❤ it!,would try it.
kate amankwaa: do you self relax your hair?? if yes Pls make a tutorial on it
Nezha Jouhar: bravo
Rose Zada: Nice texture of wig lovveeett
Korede Afolabi:
Reena Ada: Lovely
mariaj985: That Styrofoam head is small lol
Raya Bahat Mulungi: OMG
sandra ebalu: Please do a video on how to relax virgin hair naturally and permanently cause I am a Nigerian too
crystal n: hi ! At 6:39 was that the natural State of the hair after being washed ? And does the curl Patten come back after being curled and straighten ?