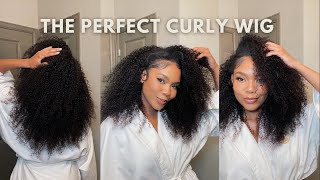
Kinky Curly U-Part Wig Install And Blending | Curls Queen | Tiny Braid Out Method
- Posted on 17 May, 2021
- U Part Wig
- By Anonymous
Hey guys! This video will be how I install my kinky curly u-part wig and blend my natural hair for a natural look! My natural hair texture at the top of my head is a really loose wave and almost straight - so this has always made it super difficult to blend with kinky/curly textures. In this video, I'll show you the method I used to achieve that perfect kinky curly texture that blends seamlessly with the wig.
ENJOY!
♥♥♥♥♥♥ CURLSQUEEN HAIR INFORMATION ♥♥♥♥♥♥
#curlsqueen #halfwig #headbandwig #sewinweave #naturalhairwig #upartwig
Extra 10% Off Discount Code: YT10
Hair I am wearing in this video is from https://www.curlsqueen.com/
Direct Item Link :
https://www.curlsqueen.com/158-all-in-...
Hair Code : CQW016
Hair Length : 20 inches
Hair Texture : Kinky Curly ( 3c-4a )
Hair Color : Natural Black
Hair Type :Premium Brazilian Virgin Hair (could last at least 6 months or even longer if you take good care of it )
CURLSQUEEN All-In-One Upgrade U Part Wig is an reinvention of regular u part wig and sew-in weave which allows you to wear it as a u part wig and other half wig looks such as headband wig and sew-in weave as half up half down look .There are also more hairstyles you could explore with this one wig.
Giveaway+Free Try On+Discounts+More Benefits On Instagram
https://www.instagram.com/curlsqueenof...
Feel free to contact us if you have any questions :
Email: [email protected] / [email protected]
♥♥♥♥♥♥ CURLSQUEEN HAIR INFORMATION ♥♥♥♥♥♥
Welcome back to my channel guys today, i'm gon na be reviewing a wig from curls queen just showing you, the unboxing. You get a wig cap. They sent me a headband, even though it's not a headband wig, and then you also get uh some care instructions for the hair as well, and this is the way the wig looks when you first get it. This is their u-part wig in 20, inches kinky curly. Four types: three seed for a kind of hair, and when i got the wig i washed and conditioned it as i always do, using the silicone mix shampoo and the argan oil conditioner all right guys. So this is what the wig looks like after it's been washed and air dried. I think the texture is really cute. The texture didn't really change after washing it, but i still recommend washing it when you get it. This is what the inside of the wig looks. Like it is a breathable wig, so you can actually stick your fingers right through and you can actually see the tracks here. So that's good, especially for the summer, if you're natural - and you know it's hot and sweaty, you want to make sure your scalp can breathe. Um you get four, you get five clips at the top of the u-part, you get two clips on the side and then you get the clip in the back and then you also have an adjustable strap for if you need to pull it even tighter, if the Wig cap is a little bit big for you, so this is it here, 20 inches pinky curly. So this is like my third time trying to fill this film, this video, because, no matter what i did, i couldn't get my natural hair to kind of blend. In with this, the way i wanted to, i got it to blend one time using the flexi rods. It was okay, but it just still wasn't blending. So i'm trying this method because the crinkles on these are pretty tight, yeah they're, very, very tight, so i did some small braids. I put some gel. So i put this on my hair first and then used a detangling brush just to make sure it's defined. Then i went in with the cantu define and shine custard, and then i did these pretty skinny plaits um, but i didn't braid them down all the way to the end, because i still want the end to be curly and that's my problem. My roots will be really really puffy and just not blending while the ends are fine, so we're gon na see how this um blends, but i'm gon na, apply the wig now and let's see how it turns out. The first two clips are just your standard clips, but then the clips after that are these clips that snap, open and close. I actually wish the wig had these snap closed clips at the very top just for more security, but you can always sew it on or use bobby pins to make sure it's attached to your head and not gon na move. So let's take these down and see if they worked uh - oh oh wow, so i would say: that's a pretty good match pretty good match. Okay, just make sure you find your three pieces for your braid and try to unravel it. Just by pulling it don't. Separ keep each of the strands separate, don't let them separate even more so you should only have three strands. Take your time and take it down. I don't know how this one's going to look, because the curl pattern on this is all jacked up. So the ends. Look kind of straight, but we'll see found it. Okay, look at that like that is a really good crinkle and that's gon na blend pretty nicely we're going to take each of these so like this one, and i just want to intertwine the ends with a braid. So what i'm going to do is take a braid from the wig open it up like this halfway, i'm not opening the end, i'm just opening it up up here and then i'm just gon na well well! This is too far out. Let me get my thumb back here, yeah again from back here, open it like that, and just do a really loose twist, keep that in there all right. So all i'm doing is taking my hair opening up a twist from the wig and loosely twisting it together. Okay, guys, this is the end of the video i hope you guys enjoyed. I hope you found it helpful, especially if you were looking for a wig of this texture and of this style with the. U part, um. I could definitely recommend this one from curls queen, based on my initial review. I think it is a beautiful, beautiful, wig um. The only con that i'm going to mention is when i was giving it its initial, shampoo and conditioner when i first opened it up. I did get a chunk of hair that came out like i was getting a lot of shedding in that first initial wash um, but, like i said i did try to film this video two times before, because i couldn't get my hair to um. I couldn't get my leave out to blend, but um the second time that i gave it just like a quick co-wash just to get it back in its original form. I didn't get any shedding that time, so i don't know if it was just maybe like a loose track or something like that and the hairs were coming off. But since then i haven't had any issues with the shedding, but i did want to make a point to mention it to you guys um about the wig. This is the hair in its natural state. I have not cut the hair, i have not shaped it. I probably will cut it to give it some shape at some point, but i just wanted to show you guys what the hair looks like when you first get it. So let me know if you guys have any questions on anything that i did in today's video. It'S pretty basic, pretty straightforward. I just wanted to show you guys the wig um, but if you have any questions, um leave a comment down below. I will link the hair in the description bar if you are interested in purchasing it and yeah. So that's it. I hope you enjoyed thank you so much for watching. Don'T forget to give this video a thumbs up and hit that subscribe button and i'll see you guys on the next one. Bye


Comments
sty ns: Its totally blending!!!
Shanae Evans: Beautiful
Shanae Evans: Beautiful
Lynne McMonagle: Maybe you should look for fortified shampoo for fast hair growth.
TheSpicyK: Beautiful all around! Next time try a quick wash & go on your leave out and see if that helps with quicker blending. Saturate the hair with water, rake eco styler gel with a denman brush. The website said it can be worn without leave out. Were you able to test that out as well ?