How to Make a U Part Wig For Beginners?
- Posted on 05 November, 2021
- U Part Wig
- By Anonymous
If you're new to wigs and are concerned with the difficulty of wearing one, there's actually no need to worry—it's easy!
If you haven't ever worn a wig before and require some extra guidance choosing and discussing the process of styling before you put on your wig; then please read our beginners guide to wearing a wig.
With these reasons in mind, you can make a fabulous U-part wig at home using the steps and the tools below:
Things you will need
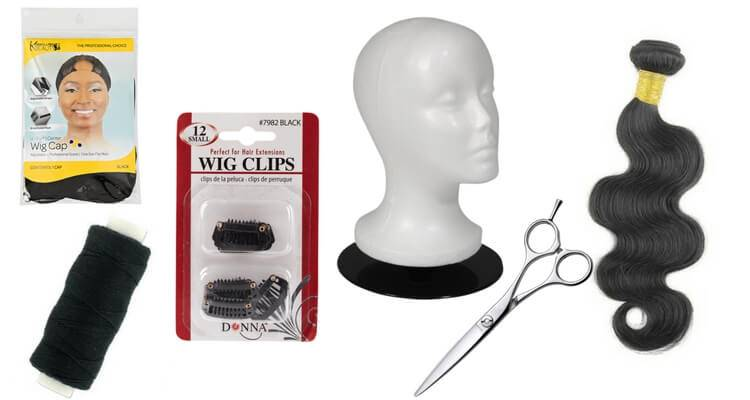
- Wig Cap or U-Part Wig Cap
- Foam Head
- 2 to 3 Bundles of bundles depending on your preferred density.
- Wig Clips
- Hair Needle and Thread
- Scissors
- Pins (optional)
- Glue Gun & Hot Glue Sticks (Depending on the method)
- Hair Glue & Blow Dryer (Depending on the method)
- Hair Weave
How To Make U-Part Wig?
Step 1: Wear a wig cap
1.hey guys so as you can see we're gonna go ahead and start with a spandex dome wig cap, go ahead and mark out your parting area and then add a double track to the perimeter of the head, this is just going to help the wig lay flat when you pull it back it's going to hide all the tracks laying behind it, and you'll see what I'm talking about later on in the video.
Step 2: Sew in bundles on the cap
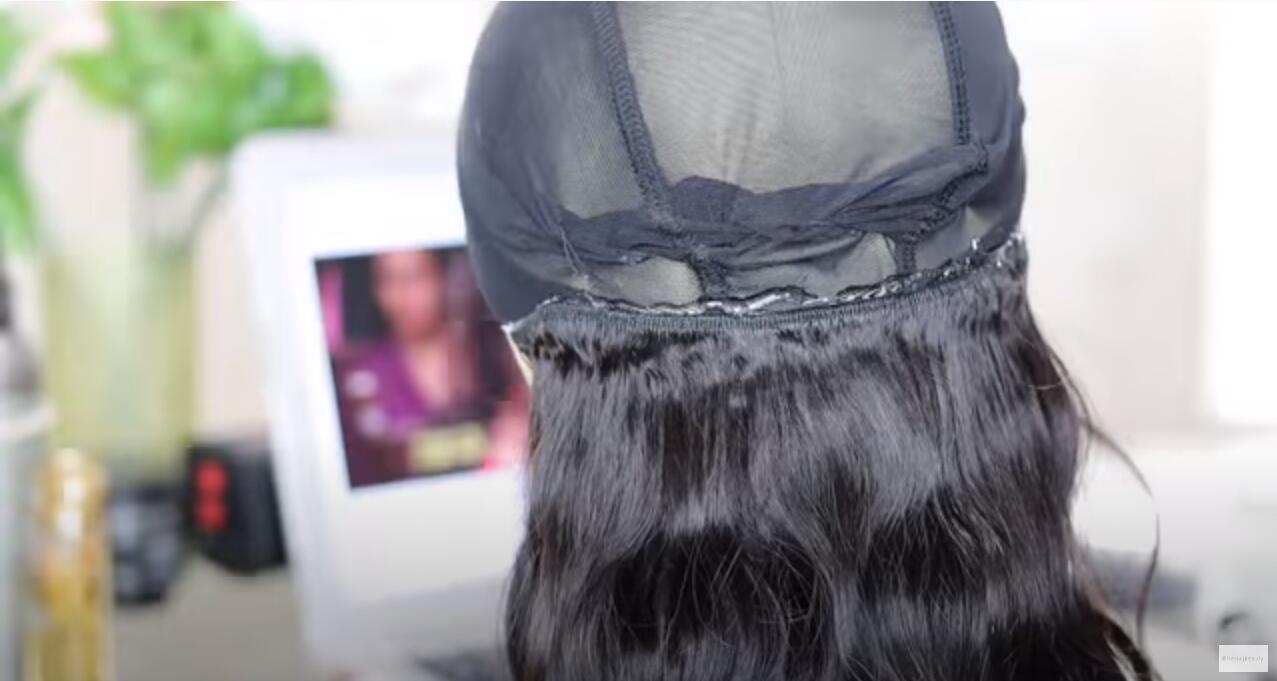
2.start off by stitching both tracks together and then attach it to the cap, you should go through the spandex cap and then through both webs and then tie a knot about (maybe two to three times),it's up to you the more the better.
Then you go ahead and just stitch the rest of the track as you normally, which is just in and out in and out through the spandex cap and underneath both tracks through Hispanics cap and underneath both tracks, but you would make sure that you avoid sewing through the elastic band ,because if you do that then your wig won't have much stretch to it at all,so be sure not to sew through the elastic band.
3.Make the u part
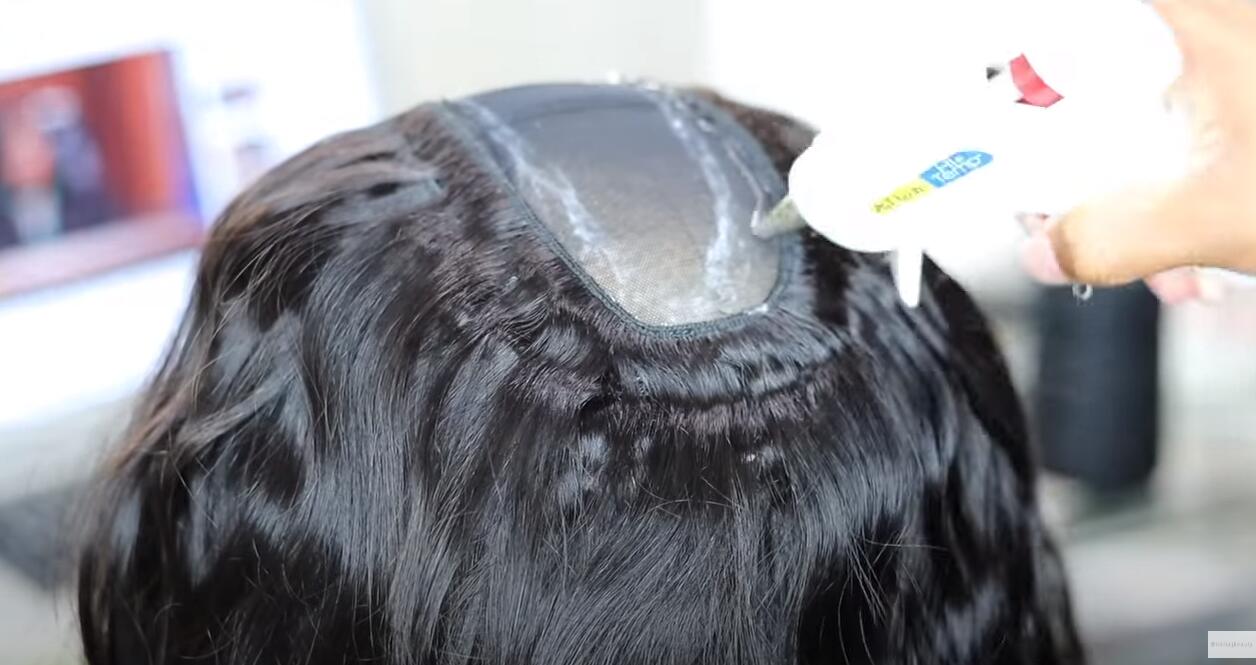
I was just showing you how it lays flat when you pull it back but yeah so I left it plastic on my canvas head because it's going to protect it's going to protect it from any build-up water or a dirt .The plastic is just to protect it help keep it clean and I really highly advise you to get a canvas block wig head instead of a styrofoam mannequin head.
Here I'm showing you how flat it lays as you can see and that's just going to hide all the tracks behind it ,so you can pull it back of the ponytail half-up half-down,and you're going to see me demonstrate all these hairstyles later on in the video.
4 .Cut off the excess cap
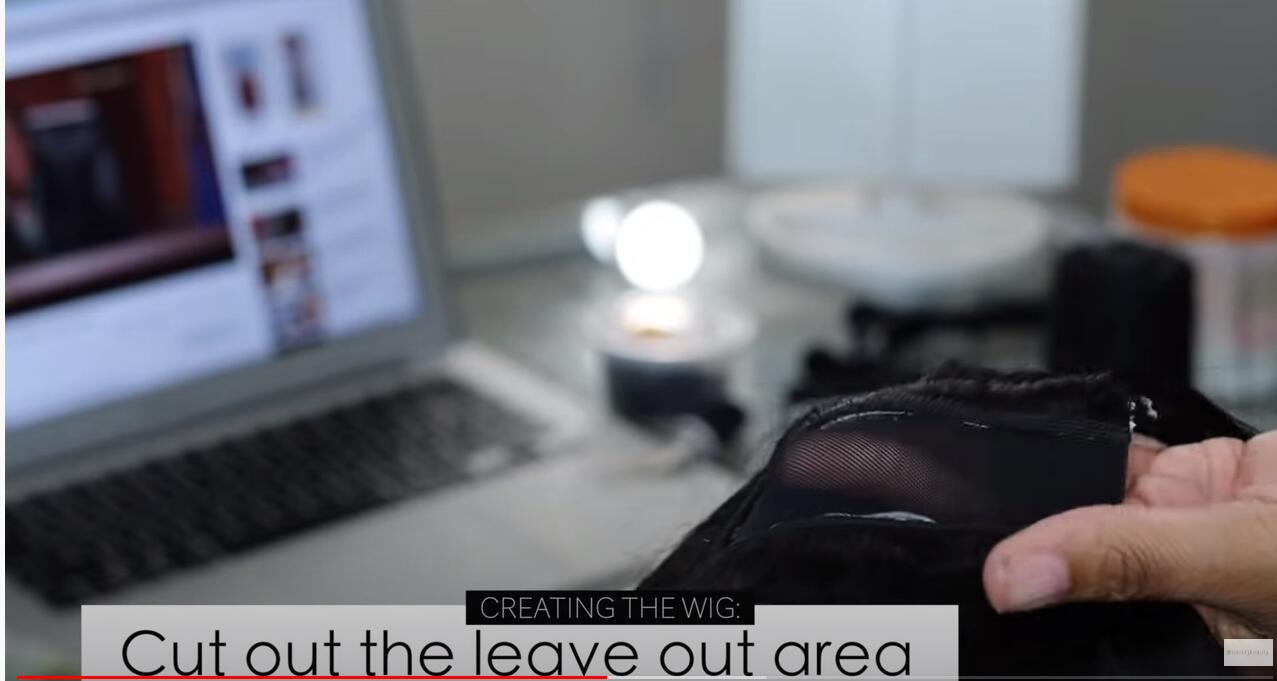
After you glue your tracks down from the bottom up using either a hot glue gun or weave glue and a blow dryer to secure the hair to your cap.You should cut the excess fabric creating the U-part.
Cut and remove the excess part of the U-part portion of the wig. Do not cut too close to the top tracks. (Avoid cutting any threads so that you don't detach the tracks at the top of the wig cap and around the opening of the U-part.)
So here you see me starting the left the exact same way, start with the weft first ,and then attach it to the cap, be sure to avoid the elastic band ,and you see me pulling the West, because it makes it easier for me to sew through just the cap and not the elastic band ,so I mean if you want to just make it easier for you.
Then you can sew through the cap, you can see that I'm pulling the thread that way it's pulling the cap out, so that I make sure I'm sewing through the cap and not the band ..hopefully that makes sense right here .we're coming to an end.
Conclusion:How to make a u part wig by yourself?
First of all about two or three times then fold it over, and keep in mind we're gonna do every single track the exact same way we're doing in here the exact same way, securing the fold so it lays nice and flat and then just go ahead and continue sewing the rest of the track .
it's just super easy guys, so I hope you guys see this in our motivated and excited to make your own wig because it's really not hard at all.
U-Part Wig Making Tips!
Whether gluing or sewing the tracks down to your cap, try the fold-over method.
Instead of cutting the weft of the track when you get to the border of your wig cap, fold the track over and secure it to the wig cap. This process may take a little longer, but this will decrease shedding.
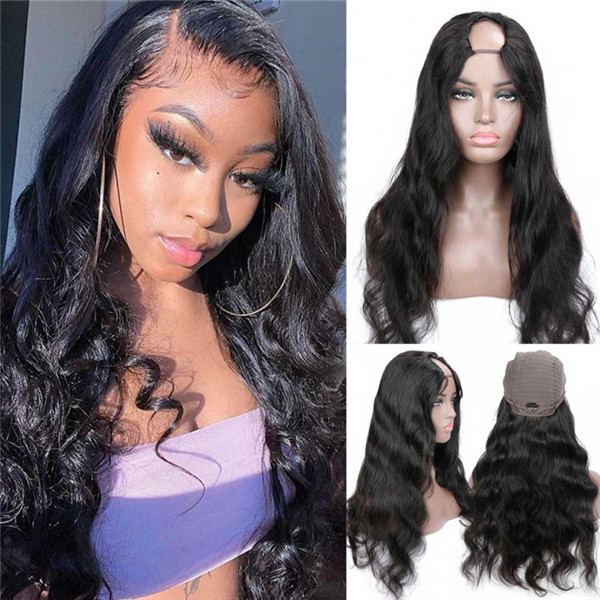
When opting to create your U-part wig, you can customize your look and create a hairstyle that only you can pull off!
The part you can put middle or side by yourself,it allows you to blend your own hair through a specific u-shaped opening at the top of the wig; thus this opening gives you the chance to blend your own part exposing the scalp for a better natural looking hairline.
Besides,u part human hair wigs are easy to wear hair extensions that blend perfectly with your hair.
If you want to get a natural hair looking,we recommends you choosing human hair U part wig because it is made from 100% raw hair. The hair is so strong and natural as well. You can create bending, dyeing or styling without worrying about damages.
If you want to buy cheap u part wig,i’d like to recommend HairURL top selling body wave u part to you.
Here is the features of the wig
- 100% Human Hair U Part Wig with Comb and Strong Straps That Can be Adjusted, Medium Size(22.5" in stock) Fits the Majority of a Woman's Head,1*4 Inches Middle Part Opening.
- The Wig Is Very Easy To Wear And Really Natural,Because You Could Keep Your Hair Out And Use Your Own Natural Part In The Wig.
- Hair Color/Hair Length:Natural Color(Natural Color is Black,Can Be Dyed),12-24 inch
- Hair Style:Body wave,U Part Wig Density:150% Density
- ALL NATURAL - This Human Hair Wigs Gives You Beautiful Results That Looks 100% Natural. You Can Wear It In Many Special Occasions. Buy Today With Confidence!
Highly Recommended this body wave wig for your‼gorgeous, stunning, and attractive,body wave wigs are attractive to many people, you will be the focus of the party,besides,it can use for for Halloween, cosplay party, concerts, theme parties, weddings, dating, tourism and more.
Biggest surprise:Buy it now can get 15% off without coupon codes,what are you waiting for!!! Click to get it!You deserve to have one!