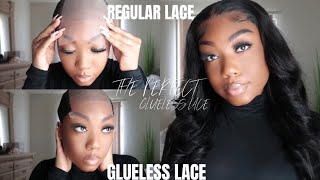
Glueless Wig Install | Swiss Lace 18' Deep Body Wave | Doittmiaaaa
- Posted on 28 April, 2022
- U Part Wig
- By Anonymous
#Fixxd #Glueless #Beginnerfriendly #StepByStep #NaturalColor #NoBaldCap #HowTo #DoIttMiaaaa
Connect w Me On Social Media ↓
https://www.instagram.com/doittmiaaaa/...
https://twitter.com/DoIttMiaaaa
https://www.facebook.com/mooremiamya
https://www.tiktok.com/@doittmiaaaa
→ Go Watch My JUMBO BOX BRAIDS Tutorial ↓
Fixxd Beauty Bundles → https://www.fixxdbeautybundles.com/
Lace Melting Band → https://www.amazon.com/Dolahair-Meltin...
EBIN Wonder Lace Bond → https://www.amazon.com/Wonder-Lace-Bon...
Olive Oil Wig Grip Spray → https://www.amazon.com/ORS-Olive-Oil-F...
Olive Oil Wrap/Set Mousse → https://www.amazon.com/ORS-Olive-Oil-S...
Milano Wig Grip Cap → https://www.amazon.com/MILANO-COLLECTI...
She Is Bomb Hair Wax Stick → https://www.amazon.com/She-Bomb-Collec...
‣ LEAVE VIDEO IDEAS IN THE COMMENT SECTION
I read and respond back to each and every one of my comments!!
Shout Out To All My Supporters
♥️ WE JUST HIT 420+ SUBSCRIBERS ♥️
‣ I couldn't have done it with out each and every one of you. THANK YOU!
→ Next Stop 500 Subs, Let's Go !!
Stop Playing' w Me
Intro Inquires/Outro ↓
https://www.instagram.com/tha_slap/
https://www.facebook.com/LV.SlapPhoen
LV Slap Phone Ft. Mia'Mya & Sammie: On Point
UNTIL NEXT TIME, Byee
What'S up, everybody welcome to, or welcome back to my youtube channel if you're trying to see how i completed this install, please stay tuned for the video come catch, a glimpse, you'll see how we do it. Okay, you guys so jumping right into the install. You see me putting rubbing alcohol alongside my hairline, i'm just kind of trying to remove any excess oils um from there. I'M going to go ahead and put the wig on my hand. I just want to see how it fits and kind of get an idea of where i want to lay that lace: okay, um again, this is my first time installing a wig myself. So you guys this video is everywhere, okay everywhere, because i didn't really have a technique. I really didn't have um, you know like a routine. I guess i didn't really have a routine of how i was going to do it. So i kind of just i was going with the flow and i kind of did what worked best for me, um, so uh right now you see me i'm looking at my ear tabs. As you can see, my ears are pretty small. You guys so um. The perk about that is. I really didn't have to cut too much lace off the ear tab. I'M gon na be honest, um from prior videos, i've watched of other people doing installs. I do always hear them saying like be really careful. Be super careful um when cutting off your ear tabs, because if you cut off too much like it, just ruins the wig okay, so you guys just be careful with that for sure, um and y'all know me. I don't really like to do too much talking. I just like to kind of elaborate on a couple key points um, so this video - i won't be doing too much talking for all my visual learners, um right here, i'm just pretty much sectioning off my lace, um. I felt like it'll, be a little bit easier for me to do it in sections versus just laying it all at once. So this method, it did actually work well for me, so i will definitely do it in sections the next time i install also. So that's something to keep in mind for you guys too. One thing i can tell you guys is: i really wanted to stay away from glue um, because i already have thin edges as it is, and i just i just really didn't want to take the chance of my edges being pulled out due to glue. So i wanted to try something a little bit different. I will be using eban wonder, lace, adhesive spray, for this install i've heard so many good things about this adhesive spray that i just really had to see what the hype was about for myself um. So i went ahead and put two coats on and then i blew dry it on a cool setting. You guys when i tell you this spray was given what it was supposed to give like. It was definitely given what it was supposed to get um. They do have a black one and i believe that one is water resistant. I haven't tried it, but once i do i will definitely let you guys know how i feel about it. Oh, oh is okay. So after i lay this side down, i'm gon na do the right side, the same exact way and i'm gon na go ahead and put on my lace, melting band and i'm gon na do that off: camera. Okay! So here we are now i'm just styling the hair. You know trying to make sure the curls is given. Okay, what i can say about this hair, you guys it was really light like it was just really light. It was soft. It was little to no shedding. Oh, my god, this hair is just so beautiful. You guys, i'm gon na leave the link in the description box for um this hair. I believe it is 18 inches, 180 density um, and it's just given like it's given, do y'all see like it's given y'all when i took off that melting band, i was shook like shook because it really did look like scalp like it was really giving scalp. When i tell y'all, i didn't do nothing to this wig like i literally took it out the box and put it on my head. I didn't pluck the edges, i didn't um bleach it. I didn't apply no makeup to it like when i tell you it's straight out the box onto the head like yeah. This wig is definitely given and i'm loving it so far, um so right now. What i'm about to do is i'm about to go ahead and style. My baby hairs, you guys what i will say is it's a lot harder than it may look like it's. I mean i style my regular baby hairs on a daily okay like and it's nothing, but this right here like this is an art like you really got. Ta take your time. Um! That'S that's the best advice i can give you take your time. It'S not going to look perfect on your first go around, you might have to re-swoop them and redo it, and but just just take your time and and you'll get it done for sure. If i can do it, you can do it and so to cut my baby hairs. I did use my eyebrow razor and honestly, i just knew like i didn't want to cut them too short, simply because if you cut them too short, there's no going back. But if you cut them too long, you know we got wiggle room and we got room to adjust and figure it out. So i did start off by cutting them longer. Just so you know, there's room for mistakes and improvements. You see what i mean. I told you when i said that this install video is everywhere. Like literally, i was just trying to figure it out. Okay, so right here, i'm going back in and i'm cutting off that access lace um. I really can't tell you why i did it in this order or why i did it like this, but it worked for me. Okay, so i'm gon na tell you this. It'S your wig! It'S your head! Do what works best for you, we're not gon na get it perfect on the first time um, you know, practice makes improvement, so i mean just just have fun with it and just just know like just take your time. Okay, me, one thing i can say is kind of different for my install versus other installs you might be used to looking at is. I did not want to cut my sideburns like i just really wanted them to be there. I don't know why. I might end up going back and cutting them later, like you know the next time i install my wig or something, but for this day, and for this install it was definitely given what i wanted it to give. So i just left them long. I do want to tell you also, if you see you know some additional lace that does not need to be, there feel free to clean it up, do not hesitate like just don't just go in and cut it out. You know what i mean um, because at the end of the day we want this wig to look as natural as possible. So in order for it to be seamless, i was going in with them scissors. Okay, oh so, once all that access lace is removed and you got it down to your liking um. I then started styling my baby hairs and i will say that curling my baby hairs prior to styling them. It did help a lot as you can see. I was kind of already styling them before i added any product um, but what i did use to actually mold the style is my olive oil, wig grip spray um. It worked pretty good. I think for my next install i'll try to use something different, not that i didn't like the wig grip spray. I just kind of want to try other things just so i can give you guys other content and you know other ideas to feed off of be wow, so i did have to pull out my. She is bomb wax, stick um, you guys. I pretty much feel like this is the ultimate go-to, especially if you have like straggler hairs or, if you're, just trying to get a more flattened. Look like this is definitely the goat. Okay, don't forget to check the description box, because i will have a link for you for every product used in this video, so do not hesitate. Um and leave some feedback leave some comments because, as you guys know, this is my first time installing a wig on myself or installing a wig period so definitely leave your thoughts down in the comments share. This video, like this video, subscribe to this youtube channel. If you haven't already - and please enjoy my outro on your way out until next time, bye make my swag on point. This sharp as an error, come catch a glimpse. You'Ll see how we do it. You see how we, your girl,


Comments
HoneyMadeItt: I’m so inspired rn. I’m losing my hair. And you’re making me want to try to lay a wig. I’ve never really thought about it before. But this it right here….this gunna be me period. LOVE IT.!!!
Stephanie W: Did you get a medium or small ? looks good btw
The Dazzling Chantal Noel: amazing job you did that shit and look amazing
HoneyMadeItt: You should try a purple or blue wig.!! I’ll be waiting.
Tanisha Massengale: Okkkkkk baby!! You did that
JBLETHAL TV: