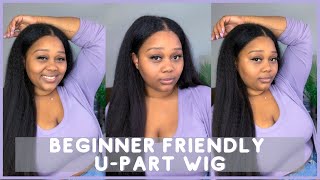
How To Install U-Part Wig For Beginners
- Posted on 18 July, 2019
- U Part Wig
- By Anonymous
I'm going to show you how I install my u-part wig seamlessly to look like an actual sew in on natural hair! Great for beginners and someone who wants the look of a sew in without hours and money wasted at the salon. Enjoy!
Hair: Kendras Boutique 16/18/20
Hey y'all: what's up it's Rachel back to you with another video, today's video is going to be on how I achieved this hair. I know it looks like a sewing, but believe it or not. It is a u-part wig that I actually installed myself so stay tuned on how you can recreate this look with your own. You part way: I'm freshly washed and blown out hair, I'm going to start by parting, my hair down the middle, and then I'm going to make a u-shape part around that in order to part off the hair that I'm actually going to leave out on top. Then, after I'm satisfied with the part, meaning everything is all straight and both carts aren't even I'm going to then wrap that around into a little bun and secure that, so that the hair will be out of the way and to complete my leave out parting. I'M going to part around my edge line in order to get a little bit of leave out over there and then secure it with a flat twist in order to get that hair out of the way, I would say that the most important step is this: next Step, which is the perimeter braid that will hold your you part in place, so I usually do a braid all the way around, but I'm not going to do that in this tutorial. What I'm going to do is I'm going to part off each side and make two braids that will then come together in the back. So what you'll see me doing here is parting off my hair in order to do the right side, braid and then I'll. Do the exact same thing on the left side as well, so I'm just going to go around the areas that I parted off and get that perimeter. Slash anchor braid really really strong and secure so that I can then so do you part on to that Brahe? So once both braids are secured I'll then take my coconut oil and moisturize, the remainder of my hair and also my scalp as well. I do have a very, very dry scalp, so it is very important that I'm moisturizing my scalp before putting on this cap once that is done. I'Ll, then part my hair into two parts and then make huge braids going down. Instead of you know doing the whole circular motion with the braids keeping like that break, going doing like the whole beehive method, nothing, I find it easier to just do two big-ass Dookie braids in the back and basically just secure them by braiding up the remainder of Those first two braids in the other braids and, of course, in order to keep those braids Sakura I'll, take two little black rubber bands and secure my ends as well. After both braids are secured and finished, and I have a little bow-wow type deal going on I'll. Then cross those braids in the back and take my needle and thread and sew them together, I'll kind of jump back and forth to one braid to the next sewing it together in that manner and I'll turn around so that you all can see exactly how. I have that secure and then once I get to a point that I feel like it's pretty, it's pretty solid back there. Well, then, not the needle and thread up and move on, even though I've worn this. You part eighty million times I always like to place it on my head, just to make sure that you know I got the measurements correct with the, u part and that everything fits correctly. So that's what you kind of see me doing here and then once that is done I'll then take it off and then place the? U part into a ponytail with the loose kind of ponytail holder in order to keep that hair. Out of my way, once I'm sewing the: U part on I'll then thread my needle and place. My! U part on top of my head and then just sew around the perimeter. I don't use a particular method in order to sell my you part on. I just show it so that it's tight and secure on to my head and it's very, very seamless in order to make the illusion that I got a sewing and after that, once that's all secure and I knotted it off and everything I'll then take down my Hair and style, and here it is after styling, super seamless. You can't even tell that this is actually a. U part wig that you installed yourself so guys, remember, smash that subscribe button and also click the like for me, and I will be back once again next week with another video bye.
Comments
Bruce Moxley: Great video! Ill keep this in mind if I ever need it LOL. Keep up the great work!!!
FREDYSTUBE: Your doing way to much!