How To Install Clip In U Part Wig - Aliexpress Hair
- Posted on 26 July, 2014
- U Part Wig
- By Anonymous
Hey Gremlins,
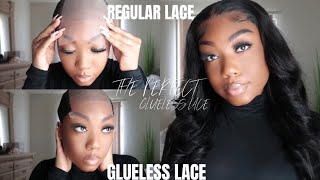
Just sharing how I install my clip in U-Part. This method is so useful for me as it means I have access to my hair and I don't have to go to sleep with all the extra hair :-)
Hope you find it useful, informative or entertaining.
Link to info on the hair: https://www.youtube.com/watch?v=olGKZK...
Makeup Tutorial: https://www.youtube.com/watch?v=oL0LwC...
Bisous.xxx
Hey you went ape, you guys are all well, so I'm actually in the middle of recording a makeup tutorial and I am going to actually show you guys how I do my hair um bit weird anyway. I don't know what I'm doing a super long intro. This way, so it would help you see my a great person, but I am going to put on my u-part wig now and just win sort of talk you through how I put my new part way trio, my braid pattern and tell you a bit about the Hair and how I made it and everything else, so this is the hair. I bought the hair from Aliexpress and I did do a video about it when I first got it initially since then, I have dyed it much darker black I've had it for a while. It'S been actually really weak and I created a: u part, wig and you pop. It is a shoe creator using a mannequin head and the cats that I actually use. I bought on Aliexpress as well, and this is specifically for making wigs u-part, wigs and everything else, and I actually sold some clips onto the ends now. I would suggest sewing clips to the sides as well and I will eventually do that. But what I did I just sew clips onto the you bit, so the bits are going to go here. I have so clips that this cap comes with elastic straps at the back and they have hooks on them. So Dan, if you guys, can see that so once you've tied it up, you can actually secure it with these are lastik straps and it definitely won't be going anywhere. So what I've done to my braid pattern? I'Ve done one straight break here. One kind of straight braid down here and I'm going to turn around and show you guys what the rest of it looks like it's braided the back together and do it all into one we're here. I left out a bit here a bit here and a bit in the middle, so this is my properly that that I'll be like straightening and doing all the crazy stuff too. I just go like this, and then I put the under part at first to get that all in there and then I just clip it into my braids. You can serve it on if you want to that. Probably would be better, but I like it like this because it means I can take it out in the evening and I don't go to sleep with the wig on my head. I just take it off at night and you just makes my life easy. I'M sorry! So I'm going to click this into that hair up front. There just be gentle with this and just make sure you don't pull your hair too tight. So, as you can see, I've just flipped it around there and what I meant about putting the extra extra clips in was for these bits here. So, for instance, if I had a clip here, I could pull it and secure it there and again sort of wherever else you want it. Alternatively, you can just use bobby pins with these ones. I'M okay with these clips for now and with my leave out, if I were to pull my hair backwards, you really wouldn't see anything because it's all you know like mm-hmm, I'm gon na relieve up. So you don't see anything any whose is this is what the hair looks like link for eyes, I'm going to just bring my camera down a little bit: okay, lengthwise! It just comes to like the top of my boob, like that's a boob area, and I used. I think it's the repackaged, I think we used 18 16 and 14 inches and it naturally layered it. But then I went in with my razor blade and I put I put some more layers in there as well, just to give it a little bit more texture and a fun stuff. What you eventually want to do is dip dye the ends. I want the ends to be blue, like peak mill, I said I wanted it, so I end, but that's a long way away elastic at the back with the hooks, so I just basically take both bits of elastic. This is one here one there and I just attach them together when I hook them cuz this and this hooks it between. You can latch them too, but I pull them all the way and I hook them to each other. So it's even tighter and there we go and now that it's pretty much done so um. All that's left is just to take the hair out and I guess straighten it tidy it do all that fun stuff. So I'm gon na move the camera a little bit. Sorry, it's three eyes right, so yeah, I'm going to straighten my own hair deal with this hair and but like a throats gon na comb. Everything out. While I wait for the straightener to heat up, I'm not going to do too much to this hair like I'm. Not going to fuss around it too much, I'm just going to tidy up the end so like straighten the ends. A little bit put a tiny bit of a curl over here and industry in these bits, so that this video isn't super SuperDuper long. I'M crazy! I'M crazy, that's it! That'S how I do my super super simple, Juha, hair. Wait! Fini! That'S it um! Thank you guys. So much for watching and yeah I'll leave a link to this makeup tutorial down below it's just like gold and purple the ideas to have like gold, brown, purple, look and yeah so I'll. Leave that I'm gon na yeah. Thank you for watching I'll, see you my next one: peace.


Comments
Make Me Fab: Your hair is beautiful. I wish I had your edges :) I can't wait to see the makeup tutorial for this look xx
JoAnn Martin: Beautiful!
MissGoldTwi: ooo Girl!!! It really suits you! Your hair blends perfectly! Limpopo! x
Dime Marie: pretty
Sarah Daji: Baby geh ❤❤❤❤❤