How To: Make Crochet Wig | Mane Concept Ripple Deep
- Posted on 16 May, 2019
- U Part Wig
- By Anonymous
HOW TO: MAKE CROCHET WIG | Mane Concept Ripple Deep
H A I R
https://www.amazon.com/gp/product/B07C...
♥️ LETS CONNECT
IG: @thekeyisme_
SC: thekeyisme
Music:
LAKEY INSPIRED - Chill Day
https://soundcloud.com/lakeyinspired/c...
BUSINESS INQUIRIES
DISCLAIMER: I don't own the rights to the music.
FTC: This is a sponsored video. The reviews are always 100 % of my own
Disclosure: Links contain affiliates. When you buy through one of our links we will receive a commission. This is at no cost to you.
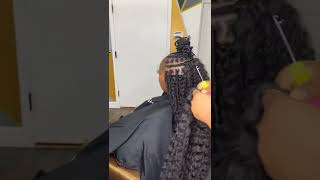
Hey: what's up y'all, it's girl, the kids mean I am back again with another video in this video. I'M going to be showing you how to make a crochet wig. Now I'm gon na be attaching this wig, but it's pretty much a crochet wing and how to make it. So the hair that I'm gon na be using is my main concept. Is they're Caribbean ripple, deep hair? As you can see, I showed you the neck cap that we are going to use and this hair comes in 18 inches, but I am gon na cut this hair in half. The reason why I like to do that is because I'm it's better for me to detangle the hair and it's easy for me to stretch, so you don't even really need a lot of hair when you do it this way. As you can see, I already put the net on my head and I'm just gon na go ahead and actually cut the hair and have this hair is so easy to separate, but it did get really stringy. So what I'm gon na do is I'm gon na. Take my crochet needle and I'm going to stick it through and just basically tie it, maybe two or three times you're, pretty much just doing this like a regular crochet look, the only thing that I could really say is that make sure you're not going through each Loop, as you can see, I'm gon na get real up close and personal, I'm taking my needle through like three or four of them, so you don't want to take it through one of them. You want to take it through like three or four of them. I can't even talk right now but yeah, so you want to do that you're, just basically gon na take it all the way around your head, you're gon na be skipping in between do not make these real close together. Honestly, I would make them about two to three finger length to two to three finger widths apart. You don't want to make them really close together, because I'm telling you you're gon na have a lot of hair in your hair. When you get done with this, 2-pack should be not even two packs. Little like a one-and-a-half pack should be enough hair for you to complete this entire look now. Stick around. I'M gon na play some music right now, but stick around because I'm going to show you how to actually attach this week on so this way it can be used for bracelets. You can put it on if you have braids and you can actually take it off and put it back on if you would like, as you can see with the back part, it is kind of sticking out that piece in the middle, but we are going to Cut that so what you want to do is you want to make sure that you put more side more hair on the side that you actually want to be full, like your bane area than the other side? So, as you can see, my right side is the side that I'm going for for a full look. Now I went ahead and I already marked where I want my actual parting area to be so that is the white marker that you do see on the actual Knitting cap and you're just gon na pretty much put this on your head and what you're going to Do is you're going to anchor it down to your head. Now you can anchor this with hair pins. You can put combs on this neck. You could pretty much do anything. What I'm gon na do is I'm going to crochet it down, because I wanted to actually stick to my head. So, as you can see, when I cut that part off in the middle, I'm just going to crochet it in regularly on my hair, so that that hole won't be an actual opening. So you don't even really need to do a lot, just maybe two or three will be perfectly fine and then what I'm gon na do after this, I'm gon na start anchoring it around. My actual edges so, like I said before you can put hair pins in, is, if you do that, you won't have to worry about actually anchoring the sides of the cap on your extra actual hair. Now, the reason why I cuz, I know a lot of people ask me well what's the purpose of the net, why he just can't crochet it regular. Ladies, you just want to keep in mind that there's a lot of ladies. That may not be as fortunate as you are to have the type of hair that you have. Some people are experiencing hair loss in certain areas. Some people aren't allowed to take two three four hours of their day to actually do their hair everyday. So I think that this is a great idea for something that you can pretty much do quickly. I finished his wig and not even an hour, probably yeah, probably like an hour. I finished his wig and then now I'm actually putting it on my head. The next day, so it was something that I was able to create one day and then pick back on it the next day, and I just always want to give y'all different styles and different, looks and different ways that you can actually do your hair. I mean you, don't have to do your hair the same way and at the same time we have to understand that what works for you may not work for other people. So that's why I like to show that's why I like to show different styles and different ways to do certain things. So if this works for you think yes go ahead and slay you get in it, you doing your hair on your own you're, being very resourceful by looking at different videos on YouTube to help you save money or to help you save time or to help you Grow your hair, so yes, this is the finished look. I did go ahead and cut the actual necks, and this is the look that it is giving me. I absolutely love it and the fact that this is actually anchored down to your head. As you can see, I'm gon na tug on it it ain't going nowhere. Not only is it not going nowhere, it's not a lot of stress on your hair. There'S no pulling there's no pretty much nothing. So I'm gon na put all of the information down in the description box for this hair. Thank you so much for tuning into this video. If you could please like comment, subscribe and share, and I look forward to seeing you in my next video yeah, I was really talking a lot. Wasn'T I three minutes. That'S the first time, I've everything like a whole three minutes, I'm a voiceover yeah. I love this. I love it, look how look I get it. I love it so yeah. Let me stop by

Comments
ILove Music: WOW! I absolutely love this tutorial! I have a large size head I can never never find a wig my size comfortably so I was thinking of making my own and you’ve explained this step by step perfectly! Thank You so much!!
Sabrina L.: Such a great job as always. You've taught me so much with my crochets I'm so grateful.
Mrs.Galloway: Omg thank you for this ! I cant spend 5-6 hrs on my hair anymore and this video really saves me time! God bless u girl
Mysheia Harrison: This tutorial was amazing!!! I’m starting to do my own crochet wigs by learning from you but the only thing is about cutting the net. How do I do that even if I don’t want to secure the crochet itself to my head?
Lisa Wedding Songs Lott: I love it!!! Hope I can do this & have the same results!!
MrsRosalynMichelle: Girl u did that! Beautiful! I’m currently in the process of making my first crochet braided, and regular crochet wig! Thanks for sharing . Again, you did an awesome job!
Kendre Tripp: Hi TheKeyIsMe! I love this braidless crochet wig tutorial. You make it look so easy, especially for us DIY Queens enrolled in Struggle Braid University. I'm addition to your braidless crochet wigs, will you create a faux locs wig using a braided wig cap? Or have you already posted that tutorial?
Tia Mariza: Your way will make it easy to uninstall which I love! You just have to detached the piece that are actually attached to your head. Love it! I have experience headache when attaching hair directly onto my braids, maybe this way will be better. Thanks.
ForEverMeTori: Great idea girl. I’m gonna try this option next after I take out this traditional crochet I got on. Looks real natural too. Thanks.
Casheena Renee': Very informative. Thanks for the tutorial Sis!!
Yukio Strachan: Beautiful and creative. Thank you for helping those of us who have alopecia have options for our hair.
J Brown: As a mom of a 2 year old this is on point. Thank you for showing this method, I hadn't thought about doing this. I usually stay up all night on a Saturday into Sunday morning to do my hair cause I just don't have the time. Stay blessed!
L’ Dougoux: Hey Gorgeous Girl!.. thanks so much for recognizing a Disabled Veteran like me on a budget.. get tired of paying all that money for something I can learn and have grown to love to do .. make my own Units just the way I want them!..
jmhrn52: This is very smart and creative! Thanks for sharing
Ladawn Warren: Love this!! And a great idea Hopefully i have the same Results Thanks for the Inspiration ❤️
babyno7: Absolutely beautiful!
Tonia Clark: Beautiful! Thank you for this. Tried it and I love it I don’t like braiding my hair because it’s time consuming but this way right here..... Guurrll it’s so much faster for me. Thank you and God Bless!!!!
Monifa 360: Thanks for sharing. I love It!! It looks amazing on you
Anita Terry: Beautiful. I love this too girl ❤
Eva Diva: This is beautiful and thank you so much for taking your time out to create something for those that may be experiencing hair loss for whatever reason-bless you !
Carla C: Prettiest crochet of ripple I've seen very professional and pretty
Nitasha Nicole: I love that you showed this. For years now I ONLY do crochet wigs. I will attach clips so I can take off at night. And it extends the life of the hair. I am able to clean the wigs and to keep them bouncy with movement and smelling good use about a tablespoon of fabric softener. Thanks hun!!!
Dragon Z: I’m trying this this weekend...keep the ideas coming sis
Knitsta: Thank you! I have very fine thin hair and this may actually work for me. I'm so excited to try this but I'm not sure I understand about cutting the net.
BlackGirlUnLOST: The Series: Girl you are a BLESSING. Thank you sis! ✨✨✨
Regina Michelle: I love this. Great for women with thin hair.
msgeg: Simply beautiful. Thanks sis!!!
darlene jones: Gorgeous! I also crochet wigs for myself i am thankful for your video about the edges i use a netting cap u did a excellent job looks very pretty. Very encouraging looking for your next video. Go girl
Tru K: I found my go to for my transition to locks; I’m making a crochet wig and style the front thank you ; I love how it’s like a pop on pop off
Impeccably Fit T: Chileeeee you just blessed my entire life!!!! Crochet it to my head???? Never thought about that. I’ll be doing it this weekend!!
Scorpios Finest: You always do a beautiful job with all hair.. I love it
RCB: Beautiful!
LBLovely236: So pretty! Girl u r the Queen of crochet! Love this channel!
Erica Hall: I love your energy. This is so pretty.
Ronni j: Thanks for sharing this method im going to try this looks really pretty
HoniNSpice: Beautiful! Can you show how you cut the net off? This is a great style for me. I got older and my hair got thinner lol.
Dorothy Howard: I've always wanted a crochet style but I have arthritis in my hands and shoulders and trying to do the regular way was a no go for me. This way is amazing and I can do a few of them with different hair types. Thank you
Alex Mason: You are seriously the reason why I even tried crochet hair. Just when I think you can't top yourself, you go do this sis. lol. Love it
nyx: this is super pretty and the process looks like a real time saver and honestly, more economical. although the hair to crochet is cheap, i still like to save my money and be able to reuse the hair.
Lady Jay: Really cute. And fits your face and complexion. Looks beautiful!
La Flo: Yes I made one a while ago and it was the easiest thing in the world. I was able to put it on style and go. So making a wig saves time and hair!!!
Tracey Meads: You look beautiful❤️ I’m gonna try this look
1 libby: Beautiful love it
Lorraine Gregg: Very pretty. Suggestion: you could also crochet the hole you cut closed by using the hair in case you don't want it attached to the middle of your hair. When I make my wig that's what I am going to try and if it doesn't work then I will go back to your complete method. Thank you.
Venice Samuels: Beautiful love it
Marissa Morales: Omg this is so cool this is way easier than the lace wig cuz you can blend it in your hair
Cheryl Carmichael-Collins: My hair is thinner due to age and medications and as a result these videos help A LOT! I can't cornrow, that's another thing wand when I dot, it's like 4-5 thin cornrows. I will try this thanks for the tutorial! Good stuff Sis - just GORGE!
Ikkey73: Well said! Love the look.
Patrice Bostick: Great idea, will try. We are so creative!
Danelle Marsh: Beautiful sis...I love crocheting..I do different braids styles as well..but crochet is the bomb faster and less stress on hair..very encouraging..#slay!!
Betterme4lf: Beautiful!! Thank goodness. Its so hard to find people still doing crochet.. Can you please do a straight hair crochet soon
girlnawww: Super cute!
Neva!: Love it. Looks so nice on you
Carla Peterson: I’ve been wanting to do this for some time, but I don’t have a head. I love it Key! As you know my natural hair is very short, so I will do it slightly different to cover the net. ❤️
Nana Pleze: Wonderful, I love it to..!
jessdeja: This is perfect for my thinning hairline..I would love to see more like this ...thank you!
Tomika Thomas: I love it. Very nice style
yoidkldk: It looks so good!!
Nique 0606: You are the bomb. I love this idea!!
Creating with Jayne: Yasss Queen love this look!
Marilyn Davis: Thank you for this video. My trouble when I cornrows my hair for a chrocet style the knots slip out. Will using the net instead of braiding keep the hair from slipping out? I have tried several ways and each one slips out at some point. What is the best way to avoid this problem using the net?
Cherease Andrews: Very pretty!!!
Lanique Monique: BEAUTIFUL WELL DONE LOVE❤️
Sonya Allen: I started to make this today. Taking my time . my first one..hopefully not my last. The hair is soft and beautifukml
LiElle Soaps: I Love it!
K Johnson: Love it
G Mal: @thekeyisme Question: did you cut the net all around the edge, or just at the parting? Thank you and the wig looks great!
Edvena Darden: Love this idea
Vonetta •LCooks: Nice work and you are right about what you said about everyone hair. Thank you
Angela Hamm: Love it !!!
Faustina Afram: Nice work ❤️
Pamela Howard: Thank you. My edges are very thin ❤️❤️
Debra Griffin Keys: Thank you Queen for the inspiration to make my own wig. you
Just Melissa: Great video!!!! Your gorgeous
Babee DoLL: Yes and crochet hair is very drying and can really break off your hair especially if it’s fine (learned the hard way) using a net and not anchoring allows to keep your own hair moisturized underneath. Cool idea I’m so about to try this!
Kat509diva M: This was an amazing video. I learn through demonstration. Please how did you cut the cap that was the most important part. New sub
Sarah Licious: Gorgeous!
Carla W.: I was reluctant to watch this video at first because I haven't been successful with the cap process in the past. I can't get to my hair like a need to to keep it moisturized, etc. I'm glad I watched though because I learned something new. This is resourceful and I love the hair itself. Good job!
Mek: Beautiful spirit!!! Keep.it real!!!
Camille Mathews: Thank you so much❤️❤️❤️ you are the bomb.com
The Teeya Skipper: Beautiful
TENA M: Love it
BB fashions: Great work sis
Cira Silva: Amei
Ms. Cicely Pinkston: Cute! But would have been nice to see you how cut the net at the part, and complete the look around your edges
amoryll36: Great job. This may be a way to gently ease into the wig game??
Anglia: Lovely hairstyle
Nety Santos: Amei vou fazer uma para mim shou
Lola Carlyle: Thank you soo much !!!
Ronni: Ok I love crochet wigs yesss ... exactly what works for you might not work for me best qoute ever thanks for sharing!!
XeniasWorld: Good job!
anitagaka: I love it! Can you show how to take it on and off?
American cutie: Thank you Sis!!!
Jem: Beautiful
Dustee's Gurl: I live for these tutoring videos.
Sonya Allen: I love it. Would like to try in # 27 if they have it. Can u tell me how much hair you use for each loop. Did you separate it at all?
BrèChelle S.: Slay Baby !!! YASSSS!! 2 cute thank you for this!!
Randi Douglas: I appreciate you compassion for others. Subscribing!
Nene K.: This is soo cute.
Buttafly McQueen: Beautiful