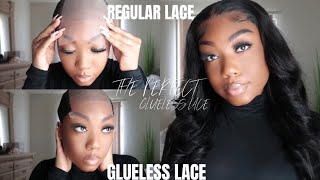
How To Make A Curly Wig | Flip Over Method Ft. Hergivenhair | Beginner Friendly
- Posted on 29 November, 2016
- U Part Wig
- By Anonymous
Halfrican Beaute here and today I was wondering if y'all are tired of having to spend your money on hair + paying someone who charges an arm & a leg to either install it or make a wig out of it?!! Yea, so was I, which is why I taught myself how to be my own beautian! And now I'm here to show y'all various tips and tricks on how t be your own as well! Save a little extra cash in your pockets and SLAY all on your own! Today, I wanted to give y'all a video showing how to make your own wig using Youtuber, Ivy Powell's flip over method! There are tons of tutorials on Youtube with other Youtubers showing different methods of how to do sew ins with the method or wigs as well with this method.
http://www.hergivenhair.com/coily-text...
Coily Textured Wefted Hair || 14" x2, 16"x2 Bundles
Hergivenhair natural hair extensions
http://www.hergivenhair.com/?y=Isimeme...
Headband: http://www.hergivenhair.com/protective...
Hergivenhair Black Friday Sale is coming!! Starts from Nov.21 to Nov.30.
$10 off for $100+
$30 off for $200+
$50 off for $300+
$80 off for $400+
U part wigs with a special offer of 20% discount are not included in the above sale
HerGivenHair Contact Info:
Blog:http://www.hergivenhair.com/blog/
Instagram::http://instagram.com/hergivenhair
Facebook:https://www.facebook.com/hergivenhair
YouTube: https://www.youtube.com/c/Hergivenhair...
OTHER HELPFUL YOUTUBER VIDEOS:
Forever Cryssy | IVYS FLIP OVER METHOD
https://www.youtube.com/watch?v=owPadP...
Ivy Dear | Signature Flip Over Method!! ♥ start to finish
https://www.youtube.com/watch?v=d3F8C-...
Sade Watkins | IVYS FLIP OVER METHOD BEGINNER FRIENDLY AF
https://www.youtube.com/watch?v=EvhLMt...
Yo yo shatter your soupy date. You will you girls taking shots like a real life. I know y'all hadn't come around when I got zapped, I loved so hoppin right into the video. The first thing you're going to need is a mannequin head: foam, a stretchy, spandex, dome cap, some t pins needle and thread. Of course, I have a curved needle and some scissors to help. You cut the thread and the final track when you're done here. I'Ve already applied the dome cap to the foam head. However, I do want to show you guys how to properly align the dome cap to the mannequin head to make sure it fits your head correctly. So the two seams that run down the middle of the dome cap, you need to make sure what is in line directly over the forehead and one is a line right below the nape of your head. Next, I'm going to take my needle and thread and pull the thread all the way through the needle, so that I can double thread the web spreader than just single threading them, because I feel like it has more security and it's more sturdy. What I do that now this is where the teaspoons start to come into play, because the dome cap is kind of fitted, naturally you're going to go ahead and pull it down to give it a stretch, while you're applying the West to the dome cap. So when the time comes to actually put the wig on, it's not too uncomfortably snug to your head now, it's time for what I say is the hardest part, which is getting that first track sewn onto the wig. So one thing that I will say you need to make sure you never go through the elastic band of the dome cap. You always want to go through cloth only because if you do that, then the wig will not stretch also, whenever you're applying a track to the dome cap, you want to make sure that you double loop, the track around before securing it down and by security you're Going to wrap that thread around the needle three times and pull through and it will end up creating this knot that secures the track better than anything else. Will I learned this dope technique from forever Chrissy here on YouTube, so I will be sure to leave the video and I'm referring to in the description box anyway. You'Re going to continue this technique of wrapping thread around the needle three times to make those knots throughout the whole process of making this week and because you're, making secure knots each time it's okay to space out the threading one did one and a half inches every Time you thread the needle through the dome cap now, because sometimes it's hard to keep the tracks and the flow in which you're sewing down the hair. You can go ahead and take a tee pin to secure the tracks down in the direction that you're sewing. It'Ll. Make your job a whole hell of a lot easier, because, instead of worrying about me dealing the thread through along with moving the weave as you go, the weave is already secured in the direction in which you're sewing. Here again, I just want to show you guys in slow motion what it looks like to wrap that string around the needle three times and pull it through to form that knot just so, you guys can start to get the hang of it. Also, you always want to make sure you push that knot down after it's been made to make sure it's for sure secure. Then I'm going to go ahead and make one more knot before I slip the whip over, because we don't cut wefts here and start. My next row, I feel so dumb. I completely forgot to let you guys know. The first bundle that I apply to my wig cap is double weft I like to have it really fall back there, so it's a double wefted track that I just go back and forth with laying them significantly close together, so that it's really full in the nape Area - and you can see - I don't keep going upward with the tracks until I'm finished. With this first bundle. I only want it to be in the nape area. I don't want the double tracks to go any higher, or else the wig won't lay flat and another reason why I'm not going to double with all the bundles that go with this wig cap is because it's already curly, hair curly hair is naturally thick for all That stuff, when I first made this week, I double wefted three of the four and I didn't have enough hair left at the end. Plus it was way too heavy and full. So it's best to only double whip, the back and go ahead and single whip. All the rest, it makes it flatter and makes it more neater. Looking it's just all overall better now here is what the wig is. Looking like with the first double weft bundles own, completely down it's very sturdy, it's secure so definitely make sure you use forever Christie's technique, yeah that they had gone nowhere and for the record, this is her given hair in the texture. Coyly they're really well known natural hair company that creates gorgeous realistic natural-looking weave like y'all. This stuff is bold, just wait to the end to see the final results o-m-g in any way. Starting with my second bundle, remember we are going to single weapon from now on. I am going to t, pin both ends down and gradually start moving upward away from the nape area now. So this is where you're going to start slightly carving your tracks to start shaping your wave structure. Now, with that second bundle done, you can obviously see how flat it is. Laying oh, my gosh. I was so like amazed with myself, but, yes, you really want to make sure your tracks are legs flat. You know take your time on this, don't rush it because you know wigs is supposed to last a decent amount of time. So you don't want to rush something like this so long as you continue to neatly. Lay the single weft tracks, one on top of the other. You will be fine and always remember when you're flipping these tracks over, you want to do it slightly higher than the previous track. That will also help with it laying flat as well. What you're, also going to notice is, with every slight curve of the tracks, you're going to slowly start kind of making this you type shape, but instead of this being like a? U part wig we're going to go ahead and do the whole thing so once you've made that distinct? U shape from that point forward. The flip over method is under comments', so you're going to go ahead and literally flip the tracks back and forth between that you shape you're going to continue that method until you reach the very end of the wig cap. Your final track should lay directly over top of the edge of the wig cap. I really hope that made sense. You don't want the wig cap to show it all, especially not in the front so once you've created that final knot in the youth section you go ahead and cut that weft and wha-la. Your wig is naked girl and hopefully and prayerfully. If you follow the steps exactly by the way, I said you should be able to flip the hair to the left, to the right and down the middle mm-hmm go ahead and slay girl, I'm being really goofy right now, but anyway, can we just have a moment Of silence for how beautiful this hair texture is like y'all, look how realistic it is, and on top of that, it's soft. It'S truly coiling to match type 4 hair types, because you already know we'd be going through the struggle to find the right, curl pattern and then not only do they have a coily texture only that matches my 4 type hair. They also have a curly texture, which is for like 3 type hair and a kinky texture for like 4c hair, so they're just said they got us laid. So you have. I were you and I were not true. I would definitely check out her given hair because I will go down in the books of saying they are probably one of the best natural hair companies out there for us, natural girl plus they're affordable. So it's a win-win situation. Speaking of affordable they're, currently having a her giving hair Black Friday sale up until November 30th, I will leave all the information in the description box, but I promise you guys if you want to get this hair get it now. I guarantee you guys, won't regret it. Go ahead and slay like me for the holidays: have people asking about your hair, all that good stuff in yeah? But I really hope you guys enjoyed this video and until next time, guys bye,


Comments
Faida Jama: This is the best flip over method I’ve seen that I actually think I can do. Thank you!
Britt: Wow that wig looks beautiful! I've never thought about making my own wig but you've definitely gotten me interested
Rita: This is one of the BEST wig tutorials I’ve seen! Bravo to you! ❤️
HeavenMarie: It looks natural and beautiful! Thank you
Tempest Bess: Great explanation on the wig girl!! Definitely subscribing you after that a lot of people like to brag that they can make a wig but don't ever teach you the right way to do it. Thanks
ItsMe Jah Marie: Love it... Thanks for taking your time to show step by step
Kuhmeera: My sister would find this very useful , I'm going to share your vid to her !! You did great !
Jasmine Adrianna': You're the only one so far that explained it in depth. Thankyou
Tharealist75: Thanks for the great tutorial looks amazing and very natural. Did you have a leave out to hide the front of the wig as I noticed you didn't use a closure also how many bundles did you end up using to make the wig?
Felicia Reed: as always you look beautiful and I like the way you made that wig I really need to learn how to do that because I'm struggling with my hair.
Beijing Brat: Hey Isi I just wanted to thank you for the tutorial because as a natural sister I don't have time to always wash and style my hair or depend on family to do it so this is great....but also what is the intro song I keep rewinding just to sing along to it
Monae Artistry's Hair and Makeup Blog: Great video. I think I'm in the mood for some curly hair. Oh... and I subscribed.
Ari and Ela: Love it. Go 'head and slay!
Yasmeen Niesa: I've always wanted to make wigs, but how do you ensure that they'll be able to fit your head? I made one once with a large cap and it didn't fit!
Dinee2925: you really did that hair you look so beautiful
Peacebaby 770: Great video!
Bria Epps: This probably the most helpful video,I know it's an old video but I always get confused where is the elastic band located at? It is were the stitches are?
Nylah DP: Can you do a video of how you put the wig on.
Blindian Jaay: finally my favorite youtuber made this video much love
BubblezSuarez Summer: Thank u so muchhhh....u look BOMBBB!!! U and our vid ROCK!!! thank uuuuu!!...ummm btw how many bundles did u use..??
Bajan Lifestyles: loveee it thanks
Ageless Beauty!: Girl you betta werk ok!!! you did dat! *snapsfingers* *flipshair*
keila b.: Do you buy the needle curved or do you curve it yourself? Always wondered this lol
Christina P: SOOO so will you know if the needle goes through the other layer? I’m so confused I thought you can just sew and push the needle through the cap? So you don’t do thaaatt?? Omg ugh
Laneisha: Beautiful
Desne On Ice: I am making a wig as well with their hair but I got two bundles.. Im not sure if I should get another one or stay with the two. Was having 3 bundles really full on your head & do you think having two bundles would have been fine?
NettaPrettyMeDuh: This hair reminds me if my afro kinky curly hair I orders from Kinky curly cartel.... Yes!
Sarah: Girl I just have a question: Do you speak french ? And also I love your videos, Good luck ;) :)
M Kay: Yaaaassssss girl!!!!
Trans4mation: can you please tell me where you got your stand from for the manequin head
Robin Griffin: Looks good and all but y'all need to do it up close so we can know what it looks like up close. If tracks showing etc.
Golden's World: what inches did you get this in
Naphtali Pierre Metellus: How do you put it on ?
Althea Spencer: Beautiful. .. wats the name of the song tat u start the video with please... thanks
Miss Overcomer: This is not the ivy Powell method this seems more like a half wig
Dessi Sade: How to do the knots???? The video link doesn't show it either
TaKiya B.: cuteee ❤❤❤❤
Lady's Boutique: ok....making the wig this way will you see the tracks in the front is this only if your going to have leave out
Mellonee Edgeston: Cute
Romine Zieck: i'm earllyyyy what's the song in the intro
Kuor A: first comment