How To Make Your Closure Look Like A Frontal
- Posted on 13 October, 2019
- Lace Closure
- By Anonymous
Hi Loves!
Recently I’ve been getting questions on how I lay my closure units to give it the illusion of a frontal. This video explains everything to the T & I hope its just as easy to follow! Enjoy!
I’m open to any ideas, (constructive) criticism, and opinions!
Like, Comment, & Subscribe!
_____________________________________________
P R O D U C T S U S E D :
*Real Techniques Blending Sponge
*Rat tail comb
*Got2B Freeze blast spray
*RK Fini Matte Foundation powder
*BB Foam Wrapping Lotion
*1 inch Elastic Band
*Infiniti Pro by Conair Flat iron
___________________________________
S O C I A L M E D I A
-Instagram: https://instagram.com/lexclusiveoffici...
-Twitter: https://twitter.com/withlovelexii
-SnapChat:
BUSINESS: [email protected]
______________________________________
M U S I C U S E D
In Fact - Melvitto ft Gabzy
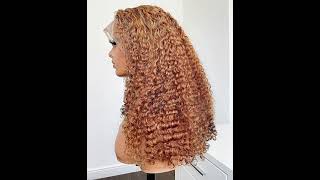
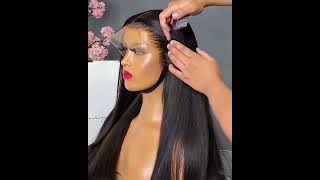
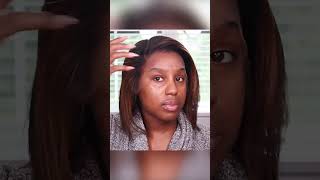
Exclusive being the only one of its kind, unique possessing qualities that belong to no other, hey guys, welcome back to another video, it's your girl legs and I'm so happy to have you guys here so today I wanted to show you guys how I make my closures. Look like frontals and trust me for being a dummy and not making an intro for this video. So that's why I'm here, but yeah, I'm not even gon na make this long. If you like, what you see don't forget to Like comment and subscribe and if you're interested in seeing how I make my closures, look like frontals then keep on watching. So the first thing I always do is I prep the actual closure and I wanted to match my skin as best as possible, so what I usually do, which I've already done, because when I made this wait, that's what I did, but I'm definitely gon na. Do it again just to show you guys how I do it in how I get my lace to look very similar or very close to my face. So what I do first, is I'm going to be taking this Dacian powder, and this is straight from the b-spline. It is the RK matte finish, fini matte foundation, powder or tartar foundation, and what I do you can either use a brush for this or you can use a blending sponge. But I just did my makeup and I used a blending sponge, so I'm gon na using so I'm going to take my Real Techniques: blending sponge, your are just pieces and I'm gon na my foundation and I'm just going to tap that in to as much as I need to and then I'm going to take my closure. I'M gon na take my closure and, as you can see, it's already pretty round very close to my skin color, and what I do is, I just add that foundation powder onto the closure. The areas that you want to concentrate it on is definitely the party where your party is because, obviously that's what you wants a little back, scalp and also the edge or the perimeter of your closure, so right at this little edge right here now that I've done That I just take this got to make freeze glass spray and I'm just going to spray that on to seal that color onto it and also it prevents it from transferring so we're just gon na spray it. Basically now, while that's drying, I'm going to put my wig cap, so I'll still get it to match you my skin color, and you definitely want to wait for your freeze Viceroy to dry completely before you apply it on, because a little transfer, so I'm just gon Na take that powder again with the same brush or sponge on, and I'm going to tap that into here, and this is a 4x4 closure, so not really focus on so I feel like this is pretty good enough. It'S focused right on the area where the lace it's gon na, be showing once and done with that, and this is dried you're, just gon na plop this right on so once I feel like I'm at a placement where I'm comfortable with it. I'M going to take my comb, and this is just a regular, bright tail comb and I'm going to brush this or comb with this backwards. So this is where you can see that this is why you make it look like a crunch, so I did cut this. Like I would have frontal and also left out some baby hairs when I made this closure when I was placing the when I was placing the closure onto the wig cap before I made it on what I did was. I shifted it for it's about an inch. So you can see right here that you see right here that there's this extra flap and it's in front of the weekend and it's in front of it about an inch or half image. It doesn't really matter but but yeah and also I cut you - know the extra pieces that come at the end of closure. I cut that little piece off just like an eight-lane, really amazing, so basically what I'm gon na do. I want to separate the actual hair from the baby hairs, so I'm going to brush the baby here, fords and brush the rest of the hair backwards. I'M gon na do the same thing to this side resonate backwards. You know you can see how it has that. Look of a cartoonist so in order to lay it straight, but in order to lay it what I do is I take foaming surgeons but the farm gon na foam before I'm gon na put foamy extreme on it. I want to take my hot comb and it's already on, and I'm just going to think that early everything as well as possible, every kind of tumble of a barn down did you know so now that I have it pretty good flatness. What I'm going to do is I'm going to take my plumbing spray and I'm going to spray that on now it's best that you do this, I mean you don't have makeup, but I don't really think this burns so yeah. So I'm going to put my foaming spray and I'm going to take my comb via just then I'm going to take some foaming spray because I have makeup. I'M not gon na put it directly on the edges, so I'm just gon na put it at the back of my hand and take some of it with the comb and just lay it's gon na verse. Five, so that's beyond every cannot believe a condom. Did you know it's me, nothing! So disclaimer definitely do this before you do your makeup, just because it's a little bit messier when you already have your makeup on you're trying to fight not taking someone off, but I'm going to fix up the data here. It'S just a little bit, basically y'all, already kind of see how I did it um it's not really much to it. It'S just applying some of the foaming spray pulling something here's out, pushing your hair or the rest of the hair backwards, so that you can see that, like in these, some of my skin, you know means like a regular console, and you know just play around with The baby years until you get it to how you want it to look so now, my edges are making a bit more sense. So I'm going to take an elastic band and basically just apply it right on top of where the hair line or where the the end of the closure means my grid. Not only will I be laying my baby hairs down, but I also be sealing or melting that leaves into a second. So this is the elastic band. I'M going to be using it's the same one. I use every turn to lay my edges or my front tool to make it lay or built into my skin, but this is a one inch elastic opinion. It'S already pretty stretched out. I got this from Walmart for maybe about 97 cents for a Dickey yard, but yeah so, like I said, I'm just going to take it right over like this and then I'm at the back of my head. I'M just gon na tie it up. So once you're done, it's gon na look just like this. I want to just right at that end and now I'm going to separate my hair in order to see why I feel like I'm two minutes to the baby, so I have flattering this to be as straight as I want it to be. This hair is literally so calm, so silky. So smooth, absolutely love this here. So to finish up everything, I'm going to go back with my hot comb and I just want to lay this down - it's still a bit wet, but I wanted to be a skeleton. So last thing you're gon na be taking that Gatsby freeze last brain as well as this comb and I'm just gon na spray right on top of the car, and I do that on both sides. Now I'm just gon na leave it to really like assure that everything is sleek and nice in. So I'm very happy and pleased with the way this looks so far. So now I'm going to take this elastic band off every kind of turn beloved power down. Did you know it's me and everything, as you can see, is nice and sleep baby years are on point, and so that is basically it on this. It'S honestly, not that complicated. Once you get the hang of it, it's literally just bringing the banging yours forward. Taking the rest of the hair backwards and then leaking everything down making it look nice and sleek, and I really really love this again. This is ally, grace hair. I got it in 26, 24, 24 and a 20 inch closure, and this is really really nice. I was really going for, like Naomi come belt, up a look or a tackle hives with this long straight 26 inch wig, and I'm really getting that. I really really loved it. I I cannot get my hands off of this wig. I love it sweet, it's just. It looks like a front tool, but it's not a frontal, and I really also like this, because I can just throw it on right for school. I don't like first of all, really didn't want to have something. That'S like I have to maintain a lot and like glue every peg take off at night with this. I just take it off and do it on like most times. I didn't really don't do this, but when I do have something like important to go to or I'm trying to be an extra birch, then I just go the extra mile and get this really nice and sleek and get this really from front solely titled. Look but nonetheless, I hope you guys really loved this video. If you did, please give it a huge thumbs up. Don'T forget subscribe comment, so I can know that you guys actually want to see more of me on your screen and yeah this really much it's. Basically. It I hope you guys, like this running out of things to say yeah. I really have nothing else to say so. Yeah I'll see you guys in my next video

Comments
li beige: I love how you made this closure part look so natural! I just got a wig from asteria hair and it’s really lovely. Only thing is that I really don’t know how to pluck it no matter how many videos I’ve watched. I’m really scared to pluck. Is it okay if I message you on insta and send you the pictures? Please?
Destiny Adam: This is the best I’ve seen so far! Could you please do a video with a 6x6 closure and show us how you construct the wig? That would look even more bomb Thanks
Esther Onafeko: Love this look!
Liz Smart: yeah sis, you got me convinced with this AliGrace hair! you did such a good job girl!
Stephanie Ozuo: You are gooooorgeous! This hair is laidt. Well done and thanks for sharing.
voxxy85: Wow I love this look
Jeanne Sophie Ndiaye: your doing amazingggg sweetie, loving the content. been following you since snapchat braiding and booking days lmaaooo
PlushByAngel: You are so great everything is so informal I love it
Diamond J: It looks like its coming straight from the scalp!
Nkechi Ubah: Nicely done!
Roneyri Moreta: Do that eyeshadow look
Ngozi Nwachukwu: Another one!!!!!!! Consistencyyyyyyy
Sandra A: Ok consistency!
Anisha Kirkpatrick: What brand hot comb did u use sis , hair is the
BundleOf Courage: Come thru yes mam!!!!
Joice Neto: Hi, where this wig's from?
Victoria: Tips!!
Neicy: Yes and yes !
DIZAH: heyy, where did u get your necklace?
Victoria: Laidttt
Elizabeth Bonojo: What laceee?!?!?
Christine Tracy: Which hair is that?