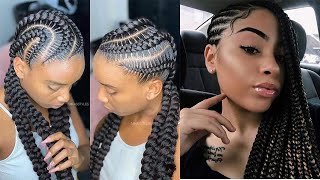
How I Create The "Frontal Effect" On My 4X4 Closure Wigs (Tutorial)
- Posted on 13 January, 2021
- Lace Closure
- By Anonymous
hey guys welcome back to my channel ♡ today's video is gonna be a little hair tutorial. im showing you guys how to get the frontal effect on a 4x4 closure. i love the dramatic baby hairs most frontal installs have, however due to my low hair line i never wear frontals. i wanted to show you how you can achieve a similar look with just a 4x4 closure. hope you enjoy the video and i'll see you in my next one xx
products used in video-
♡ eco styler gel (black castor + flaxseed)
♡ got2b ultra glued
♡ got2b glued blasting freeze spray
♡ lotta body wrap me foaming mousse
♡ tresemme thermal creations heat tamer spray
let be friends, like forreal?
twitter: www.twitter.com/itgirlkennedy
insta: www.instagram.com/itgirlkennedy
SHOP MY MAKEUP LINE!!!! http://www.prettybih.co
diagram by wigbymay https://www.wigsbymay.com/frontal-vs-c...
Music by Liles Music - Chill Mode - https://thmatc.co/?l=578B39F3
Hey guys welcome back to my channel so, as you can tell by the title of the video today, i'm going to be showing you how i give my 4x4 closures the frontal effect. This is my absolute favorite way to wear my wigs. I have a low hairline, so frontals don't normally work for me, but i love the look of it and so i try to achieve the same. Look with my 4x4 closures. I get a lot of questions about it in real life, so i wanted to show you guys exactly what i do and what products i use if you're familiar with wigs, then you probably already know what the frontal effect is. It'S a little difficult to explain. So i'm putting this diagram here on the screen. This is from wigs by may i got this off of their site, so thank you so much for that um, but basically the easiest way. I can explain it is kind of just like pushing the front of your hair like up to expose the pluck parts in the lace as opposed to just wearing it straight down on the wig um again sorry, this is really hard to explain, but the diagram should Help and let's get into it, okay, so before i do any wig installation i like to oil, my scalp, this is just regular scalp oil. I got from the beauty supply next, i'm going in with my eco gel and i'm laying down my edges. I'Ve seen a few people use got to be to lay down their edges, but i find that that gel is a little too strong and so i'm going in with eco. And then you especially want to make sure that you lay down your side edges since you're. Wearing a 4x4 closure wig, you don't want your natural hair to peek out underneath now. This is what the lace on my closure is looking like after i wash it, and i let it dry overnight, i'm going in with some foundation and a dense brush and i'm applying it on the front of the lace to help it match my skin tone. A little bit better so here i am putting on the wig and i'm checking to see if i like, the color of the lace and i'm adjusting everything and i'm making sure that everything is good before i lay it down now on to applying the wig. So i'm going in with my black got to be gel and i'm placing that all over my forehead, where i plan on laying down the lace. Okay, so you can see me doing the little hand, fan thing and then i'm going in with my got to be free spray and i'm applying that all over the previous gel and then i'm hand fanning it again. Of course, you can use a blow dryer to help it get tacky, but i didn't want to do all of that and then i'm pulling down the lace where i previously put the gel and then i'm going to use a rat tail comb to kind of help. Me guide it and lay down the lace a little bit better. Now, i'm tying my hair up with the scarf. This really helps to melt the lace into the skin and then i'm going to leave it like this for 10 minutes. Okay, so now that the 10 minutes is up, i have taken off my scarf and i'm brushing back the hair. This makes it easier to see the lace, because now we're going in with mousse and we're going to start molding the baby hairs. Okay. So now i'm applying mousse all over the front of the hair to kind of just make sure it's out of the way and then i'm applying a bunch of mousse on the baby hair and i'm going to start shaping the baby hairs. So explaining it is a little bit difficult, you kind of just shape it. The way you would your own natural baby hairs. So i tried to leave this part in real time as much as i possibly could. So you can kind of just see what i'm doing since explaining it is a little difficult. So also, i want to note that i keep a pair of scissors next to me just in case. I need to cut some of the longer strands and turn them into baby hairs when laying the baby hairs. I also use a little bit of eco gel. I find that when i use mousse only sometimes my edges don't lay like as flat as i want them to so here i am zooming in to show you guys what it looks like right now and then i go in with my got to be free spray On like the corners of the closure that aren't really laying flat and then i'll spray that one more time y'all already know the drill, i'm going to tie my scarf on the front of my head to help lay down my edges this time, i'm gon na leave It on, though, for three minutes okay, so this is what my hair is looking like after i take the scarf off, i'm super proud of it. I just want to show you guys what it looks like up close now, i'm going to part my hair down the middle, i'm going to do a middle part, since this is the 4x4 closure and then i'm going to brush it out and get ready to do The frontal effect part okay, so the frontal effect technique is not too difficult. I'M gon na go in with my mousse and then i'm gon na apply that on my finger and then apply that to the hair, and then i'm just brushing up the hair and kind of pulling it over again. This is one of those things. That'S a little bit difficult to explain but, as you can see, i'm just brushing up the hair and then kind of like pulling it down. So again, i'm going to try to leave this in real time as much as i can. So you guys can see what i'm doing, but it's like pushing up the hair and then pulling it down. So after i'm done with the mousse, i go in with my got to be free spray, and i just spray it to the front of the hair and then do the same up and down technique. Um. I find that the got to be free spray helps the hair keep its shape, so i mold it with the mousse and then the freeze spray kind of just like seals it, and that is basically it for the frontal effect part. That'S how i get it now. I'M just going in with my heat protectant and i'm going to flat iron. My hair, the hair is already straight, but i wanted it to be a little sleeker and so you'll see me flat iron. It and then this is basically the look. Okay - and this is basically the look, so this is how i get the frontal effect on my 4x4 closures. Definitely, my favorite way to wear my wigs. Thank you guys so much for watching my video, and i will see you in my next one. Bye,


Comments
Johanna Rose: Hair link??