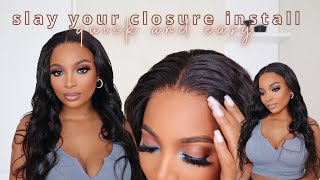
Chocolate Brown 13X4 Straight Lace Front Wig Ft. Allove Hair | Petite-Sue Divinitii
- Posted on 01 September, 2022
- Lace Closure
- By Anonymous
Chocolate Brown 13X4 Straight Lace Front Wig ft. Allove Hair | PETITE-SUE DIVINITII
( Use my special code to enjoy unlimited 10% off : PSD )
Allove hair official store: https://bit.ly/3KrsOgy
Same Allove Chocolate Brown 13X4 Straight HD Lace Front Wig in This Video link: https://bit.ly/3Reu8FU
Allove hair hot sale wigs**
Long 30-40Inch Human hair wigs: https://bit.ly/3csIgfS
Popular colored lace wig: https://bit.ly/3ArnhCh
Affordable U/V/T lace Part wig: https://bit.ly/3Arn9mh
New arrival 5x5/6x6 lace closure wig: https://bit.ly/3AyfGlz
Hot recommend Highlight Human Hair Wig: https://bit.ly/3cpGpIM
Top selling 613 blonde HD Transparent lace wig: https://bit.ly/3cq6pnl
Allove hot sale hair bundles**
Allove hair 3 bundles with closure: https://bit.ly/3pTIhge
Allove hair 3 bundles with frontal: https://bit.ly/3wxs7wH
Contact Allove hair: [Email] [email protected]
[Whatsapp] + 86 18337410986
Follow #Allovehair on social media :
YouTube (@Allovehair): https://bit.ly/3wFK1xd
Instagram (@Allovehair): https://bit.ly/3QY2eON
Facebook (@Allovehairofficial): https://bit.ly/3e4eHBK
Tik Tok (@allovehair): https://bit.ly/3e4eWNa
Twitter (@Allovehair): https://bit.ly/3TgBrP8
Click to Subscribe! http://bit.ly/subpetitesue
Check out my Hair & Makeup for Beginners Playlist! http://bit.ly/PETITESUEBeginners
CONNECT WITH ME:
Instagram: https://instagram.com/petite3ssence/
Snapchat: https://www.snapchat.com/add/petite3ss...
Twitter: https://twitter.com/pdivinitii
WATCH ME VLOG! http://bit.ly/PETITESUEVLOGS
WANT A DISCOUNT?!?
Discount Code: SUE15/Petite10 | RPGHair: https://www.rpghair.com/ambassador.htm...
Discount Code: SUE70 | Vanity Planet: http://vpwow.com/sue70 | 70% Off, $30 with code
Discount Code: Petitesue | www.Boulounguise.com
Discount Code: FLING | Mayvenn: https://divinitii.mayvenn.com | 15% Off
Discount Code: XOPETITE | Fashion Nova | 15% Off
#BOXYCHARM: http://mbsy.co/fDCHn | $21/Month with new sign up (4-5 products worth $100 each)
VIDEOS YOU MIGHT LIKE!
THE BEST WING LINER! | Beginners Friendly - https://youtu.be/Txemnjkv9_4
Techniques for Flawless Makeup - https://youtu.be/24OHzAcSdt4
Apply False Lashes Like A PRO | Step by Step Tutorial - https://youtu.be/IiH8RXf2f4s
UPDATED Eyebrow Routine - https://youtu.be/ELtvxfsPvYY
DIY CRANBERRY CRUSH Hair - https://youtu.be/iP00INkOTr8
Apply Eyeshadow Perfectly Step-by-Step (Beginner Friendly) - https://youtu.be/SYZRgHBGlO4
BRONZE GLOW + Poppin Lips | WOC - https://youtu.be/kfTkFi45o2M
Make a Wig w/ Lace Closure START to FINISH ft. RPGhair.com - https://youtu.be/GuuvWWOrV18
UPDATED SKINCARE ROUTINE | How to Get Clear & Glowy Skin - https://www.youtube.com/watch?v=pLsvdb...
BUSINESS INQUIRIES:
For all business & branding opportunities, please email: [email protected]
For public relations & appearances, please email: [email protected]
About PETITE-SUE DIVINITII:
Welcome to PETITE-SUE DIVINITII official YouTube Channel! I focus on makeup, hair & fashion videos. I believe in the products that I feature on my channel and I hope to bring you the best makeup tutorials/ get ready with me(s), fashion try-on hauls/ lookbooks/#OOTD(s), and hair/product reviews . I hope you enjoy my videos and always be sure to leave a comment and like so I can know your thoughts and what else your interested in seeing here on my channel.
[Video Title]
[Video URL]
PETITE-SUE DIVINITII
https://www.youtube.com/makeupbypetite...
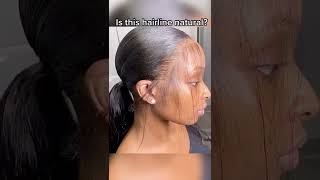
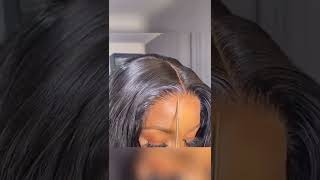
God welcome back guys so today, i'm here with all love here. I believe it's my first time trying a week from this company and i'm so excited. So this is today's packaging, so it looks excuse my nails. I'M gon na fix them in a few. So, let's get into what's on the inside, so before we get to the wig, i got a pair of lashes. I got a wig cap, a comb. Oh this comb looks so cute, so pretty a nice wide tooth comb perfect for wash day um. Okay, i got a pack of clips these trendy clips right here. These are so cute got like five different styles. As you guys can see, that's so nice. I got a bonnet how cute and lastly, so that's it for all the goodies. We got the wig guys. So this is today's week, guys it's a nice luscious um chocolate, brown colored straight wig. So you know this is in its natural state. So, of course it doesn't when you get a straight texture, if it's in its natural state, when you receive it, it won't look like bone straight. So this is how it looks, we're actually working with 28 inches. Today you know it's nice and full. I love that the color is nice. You guys know i've been rocking more chocolate. Brown like hair looks since recent time. So i'm happy about that. This is also a 13 by 4, transparent lace, frontal wig right, so you see that yeah and it's 13 by 4, like for the mid portion for the most part and then on the sides it get. It doesn't have as much depth. So that's how they've been doing the wigs for a while, no um, so it inside of the wig has three combs and it has adjustable straps here in the back as well for more security, so yeah. So this also comes lightly lightly pre-plopped. So that's how it looks at the hairline and stuff how the hair feels you could definitely tell that it's been processed okay, it doesn't feel like super super silky. You know, so i noticed that right off the bat am i getting shedding. I got one strand so yeah, it's minimal, which is standard, minimal, shading and yeah. That'S how that looks. So today's install guys i'm actually going to be doing a glue install with this hair, this wig um, because i'm feeling it and i want to rock out with it to go out for the weekend. So i'm gon na go ahead and jump into insulation. I went ahead and slipped down the wig and you know, as i said before, it's a stranded like construction in terms of the hairline. I suggest, if you want to do more, you definitely can it's not like we're working with that super delicate lace here um. So you could go ahead and feel free to like bleach the knots tint it pluck the hair further um. This is just an option to show you that it can also be worn straight out of the box, and i always try my best to show you know, especially like the people who are like more on the beginner side. People are easing into things, also people who don't have that much time to do that, much customization to a wig that they just bought so yeah um. So what i did as usual, you know i'm lining up the hairline with my natural hairline to ensure that you know it fits around my ears properly and comfortably and, as i said before, i'm doing a glue, a glue install, and so you know i always do It in halves - and so i cut in the middle there and i proceed to wiping away the area that i'll be applying the glue. No, i'm not doing a ball cap method. Today i don't do a ball cap method. Most of the times you know um. You know, that's just me, you know, as i said, a ball cap method can help with you know the install um lasting even longer so usually i'll do one. For that reason. Um also, it's good to you know just protect your hair and your edges and stuff, but what i do i never if you guys notice, i'm not even applying the glue on my edges. That'S not safe, and i mean unless you don't love your edges, but i never ever practice to put glue on my edges. Okay, i always put it in front of it. I don't care what nobody says. That'S what i do it's what i like and it works for me, and i really don't have no complaints in terms of working. You know, especially with somebody like me that works with so many wigs on a daily basis. You know this way of doing. It is just better for me, works way better. So, of course you know i go ahead and dry down the glue once i'm finished, with applying it and kind of just distributing it evenly. I did three layers of glue for today's install because i wanted this to last for a good time. So usually, when i'm going for like to like wear the wig for a longer period, i'll do at least three layers of glue. If you want it to last like over a week or so you could go up to like maybe even six layers, the other day i traveled, i believe i did four layers and it lasted me like i believe, six or seven days it was amazing. I didn't have to retouch it or anything, so that is that's amazing, so um. This is my third layer that i'm on right now and, as i said, i'm just you know spreading that out evenly with my rat tail comb and then i dry that down with my blow dryer on cool air. So once i'm done with that - and everything is clear and tacky, i then lay the lace on top of that and press it in and ensure that it's sticking really nicely so right here. I kind of fast forwarded everything you know what i did was really cut off the excess lace. I showed this portion a lot in my videos, so i felt like you know i could just be through that part. I know i'm pretty much just laying the front there with my hot comb, i'm doing my two soups today for sure. So that's why you see. I have those two pieces out in the front and after i'm finished with laying everything and it's looking flat to my liking, then i cut away the excess hair um. So i'm just i'm stealing it because i wanted a really nice flat, sleek looking install um and i decided that i would rock the hair. You know in its straight state. So i'm doing a center part, and it was quite, i must say guys. It was quite easy working with this wig. It didn't give me any hassle. You know really and truly really didn't and, as i said before, you know these chocolate brown colors are really growing on me. I'Ve been rocking them more since recent times. I'Ve rocked like a really nice curly brown, wig, i've done body wave. You know i've done straight, and here i am doing another street and it's just really gorgeous and i feel like this type of chocolate. Brown is perfect, for fall, fall is coming so like yes, it is a vibe. I love it. It'S cute here i was just laying the top of the hair, the parting um. With my hot comment, guys, you see how nice and flat that's laying it was so therapeutic for me to do this, like the flatter, the more i wanted to keep on running over it with my hot comb. I don't know what it is, but it was so satisfying to me so i kept on just you know, running my comb through that, getting it as flat as possible. Further down, i kind of used some concealer to make the parting a little bit more precise. Nothing too heavy um and yeah, so i went ahead and got glammed off camera as you can see, and i did use the concealer to make the parting brighter there. I don't know if you notice, but i didn't do too much with i didn't - want it too bright or noticeable. So i did. I never got too hard on it. You know so what i'm doing here, i'm just gon na run through the wig, the entire wig, with my um flat iron today, i'm using my kaposi flat iron um to get this nice and bone straight, and i must tell you guys. I was so pleased with when i was done. I'M straightening this. It was so nice and silky and the movement and everything was just like butter. It was really gorgeous, so that was a go again like the texture turned out really nice, because i remember in the beginning part of this video. I was telling you guys it that it's not as silky. Yes, it's not like extremely silky, but once i fly ironing flat ironed it, it definitely gave that silky buttery kind of flow, and i love that this is the final look with the hair manila. I remember. I started out the video saying that it's not as silky or whatever now that i straighten it. Of course it should feel better and it does, but i'm also impressed with the movement, because sometimes you know after their process, they don't have a great movement and stuff. Like that, this is moving so nicely and the luster looks nice and natural. It really looks good, so i am impressed with that um. So shout out to all of here um once more, the wig is doing what it's supposed to do like it's really gorgeous. So i'm going to be sure to put all the specifications of this wig as usual in my description box, go ahead and check that out, as well as the direct link, if you're interested in getting this week for yourself, it will be listed and that's it. For today today's week, look thank you guys so much for watching. Also, i have a whole get ready with me. Like of my, you know, updated look here, guys one. I love a nice soft glam and i all i use like 95 of new products. For this whole look - and you know i'll, show you my outfit and all those stuff in the get ready with me. So just stay tuned for that video. That video will be up like maybe this week, so stay tuned and don't forget to turn on your post notification bell and i'll see you guys in my next video royalty.
Comments
Lady Yatta: Simply beautiful it looks so natural and I love the fullness definitely a must try
Amoy McCarthy: Love this! The color is beautiful
Nicola Coke: Loving lace , always ❤️❤️❤️❤️
Vibe with Theresa !: Beautiful fits well ❤️❤️
Vinod Tripathi: 7:51 that smile is too beautiful
Christina Gordon: Which glue you used in this video?
Daniqueee A.:
Karimah Lawrence:
Allove Hair: Love you thanks honey
M: Vous faite plus de maquillage ?