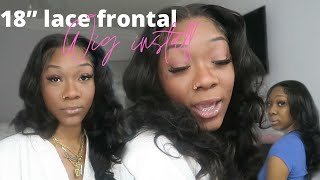
*Winner*Flawless Hd 5X5 Lace Closure Wig Glueless Install Tutorial Ft.Supernova Hair
- Posted on 09 December, 2020
- Lace Closure
- By Anonymous
●▬▬▬▬▬▬▬▬▬♛Supernova Hair♛▬▬▬▬▬▬▬▬●
Use coupon code➤"Naomixo" Save $10 !!
Hair Info: Curly HD lace 5x5 closure wig 200% density 24 inches
Video Hair Direct Link:➤https://bit.ly/2Jw7N9g
✿Supernova Hair Official Website::➤https://bit.ly/3qnsYLQ
Throw On & Go Headband Wigs:➤https://bit.ly/37qjiaC
★Hot selling #curlylacefrontalwig:➤https://bit.ly/3qmIAii
Highly recommended! HD Lace Wigs:➤https://bit.ly/2Ji7Be9
U Part Wigs:➤https://bit.ly/39wxEsv
5x5 Closure Wigs:➤https://bit.ly/3orMSDF
Hot 99j Burgundy Wigs:➤https://bit.ly/37oPGKJ
❤Follow #supernovahair on social media :
Tiktok@supernovahair
Instagram @supernovahairstore, https://bit.ly/37t4YOu
Youtube @SuperNova Hair, https://bit.ly/36u3gx1
Facebook @Supernova Hair, https://bit.ly/3lvJcPh
Hey loves, welcome or welcome back to my channel. If you are new here, i am danielle naomi. Do not forget to go ahead and subscribe, as well as to click the notification bell, so you can be notified every time. I upload a brand new video so in this video, what i'll be doing as you can see from the title? It'S just installing my glueless closure unit that i got from supernova hair. As you can see from the title, they sent me their curly hair 5x5 hd lace closure unit, and this is what it looks like after i've done. The glueless install and you guys see me pull and adjust this unit. So you know it's clueless and you know i use my handy. Dandy got to be glue gel to make this work to make all of this come to life, and so, if you'd like to see the rest, just keep on watching and also before you go, the links will be in the description box for you to purchase this Unit, if you are interested - and you can also go on supernova's website - they have all their social medias below as well in the description box. So don't forget to go ahead and check it out. They should be having some sales on their site as well as coupon codes below, so definitely definitely check it out if you like, to save some coins off or whatever, and let me stop rambling and get on into the video. This is the box that the wig came in. It just looks white on the outside and pink on the inside. It'S really really sleek, and it also has all of their contact information on there. The bag that the wig came in also has the specs below. So a medium cap, 200 density, 5x5 and 24 inches. They also sent me a satin bag, so you could put your wig in after you wear it and of course they sent a wig cap. What are you going to do without the wig caps? Is they sent a scarf, so you can tie your edges down at night. They also sent a headband. This is actually really really pretty. It'S like butterfly, butterfly print yeah. They sent another set of wig caps, but this time it's darker brown talk about inclusivity and they also sent uh lashes and the edge brush and comb. So this is the original state of the wig. This is the wig without it being touched like this is how it came honey. Now, i'm gon na just snip up the lace in the front. This is their hd lace, which i already tinted. That'S why the edges of the lace are a lighter complexion than my actual skin tone. So, as you can see, i'm cutting and it's five inches horizontally and five inches of parting space going vertically, which is straight. So you can see it's a really long parting space and i pretty much just get into cutting the lace and making sure that it works for me. You can honestly leave it like this and it is glueless, as you can see, i just lifted it or you could do baby hairs, which i am about to do so again. You could leave it like this or you get some got to be glued gel oop. Not that we need the got to be blue, gel and the toothbrush. So honestly, i do not know how to work with the edge slash comb, uh brush situation, the duo that they gave to me. I can only work with a toothbrush, so what i'm doing now is just parting out my edges, my baby hairs that i'm about to do, which is really easy and simple to do. I'M not gon na in any way shape or form like super speed. This or do a time lapse, you're going to be able to see exactly what i'm doing step by step, so you could follow along if you are a beginner and you want to do some edges again, this wig came pre-plugged, so you do not have to worry About going in and trying to plug like honey, this is how the way it came so right now, i'm doing the edges that are supposed to go in the middle, and i've already done the ones that go onto two sides, i'm just separating it from the hairs, Because i'm gon na go in with my scissors to cut and make sure that all the hairs are short and to my liking, so just keep on watching and follow everything that i do, because this is how i lay my glueless wigs do so. This is what i do put the blow dryer on cool on high speed or the highest setting, and this just ensures that i get the baby hairs to lay down flat. They are going nowhere. This also helps me to secure my lace in place, so i do this for about a minute or two, and this just really helps to lay the lace lay the baby hairs, like i said before, and once i'm done with that, i go in with the excess Got to be glued gel on the back of my hand, rub it together, and i apply it to the top. This gel makes your hair stiff. Hence why i use it on the baby hairs to lay them and they go nowhere and because it is stiff, it acts as hair spray. In a sense for me - and i use the back of my hot comb just to ensure that the top of the wig is super duper flat. This is the concoction that i'm using it's asi, moist, conditioner and water diluted. I use a lot of conditioner, so what i do is just spray from bottom to top and that's how you'll rake from bottom. To top you don't want to go from top to bottom, because that helps the hair to shed and break, and we do not want that, and it's just like your natural hair honey. We work from bottom to top always this helps with the hair, not snagging. It helps with the hair not shedding, as you can see, if you don't work from bottom to top, you are going to encounter some sort of snagging and that's what we don't want so always work from bottom to top and this portion of the video i'm definitely Going to speed up, you can see that one side is pretty much almost done and one side isn't. So you can see the difference between the hair when it is damp and wet and defined versus when it's pretty much in its natural state and dry down. So this is pretty much it for this video. I love this hair. It'S beautiful, the curls are to die for and they're really different curls i haven't had like actual curly hair in a long time. You know i've always been doing kinky curly or like deep curly, but regular curly hair. This is what it gives. This is what it looks like and, as i said before, it is in 24 inches. So this is where it's at. It is also in 200 density and it's a 5x5 closure, so it goes from here to here and i am getting the hang of closures now. So i think that's really good for me, because i'm a frontal gal, but the fact that these closures are so wide makes me love them even more because it just gives the appearance of a frontal without having to do all that frontal work. So this is just how it's coming. This is what it's giving and it's getting cute. So if you like to purchase it, the links will be in the description box for you to do so so definitely go ahead and check out supernova hair because they have some really gorgeous wigs. This is also their hd lace so get into it. I know you can't even see it or whatever. So without further ado, i will see you guys in my next one thank you so so so much for watching


Comments
tiffanyjackson521: That’s beautiful thanks for sharing your melanin is poppin honey simply stunning
Jazz Gardner: It looks like she’s snapping back her nose and face is slowly going back
Marcia Lee: Love the wig! am I the only one trying to look to see if I can see a baby bump. lol
Chicken Chicken: Is this deep wave hair?
Supernova Hair: Merry Christmas!❤️