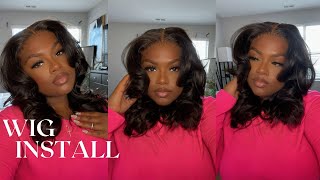
Glueless Wig Install! | Must Have | 5X5 Lace Closure Wig & Step By Step Ft. Recool Hair
- Posted on 28 January, 2022
- Lace Closure
- By Anonymous
#RecoolHair Buy Now Pay Later Accept! 4 Interest-Free Payment
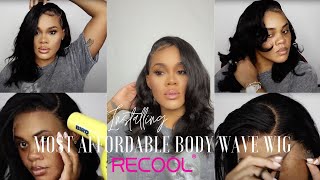
Hair info: barrel curls 5x5 Lace wig 20 inches
Use code “KO15” get extra 15% off
Skin Melt HD Lace Wig➤https://bit.ly/3nUNN1l
Colorful Wig➤https://bit.ly/3tTyLwP
Short Wig➤https://bit.ly/3rMAQb0
Headband Wig➤https://bit.ly/3IvGpBl
13x6 Lace Wig➤https://bit.ly/3rJQELF
Follow @recoolhair on IG:http://bit.ly/2L5XDZ5
Whatsapp/Tel: +86 17339028510
Email: [email protected]
-------------------------------------------------------------------
BUSINESS INQUIRES ONLY (NO personal emails!)
⇣ ⇣ ⇣ ⇣ ⇣ ⇣ ⇣ ⇣ ⇣
Connect With Me ⇣
Instagram ⇢ http://instagram.com/ko_glamour
TikTok ⇢ https://www.tiktok.com/@ko_glamour?lan...
Twitter ⇢ http://twitter.com/ko_glamour
Pinterest ⇢ https://www.pinterest.com/ko_glamour/_...
--------------------------------------------------------------------
SHOP MY SMALL BUSINESS, SHOPKOGLAM!
⇣ ⇣ ⇣ ⇣ ⇣ ⇣ ⇣ ⇣ ⇣ ⇣
►Check out: https://shopkoglam.com
❗️FOLLOW US ON INSTAGRAM: @SHOP.KOGLAM❗️
QUESTIONS: DM us on Instagram
Happy Shopping
--------------------------------------------------------------------
Kya's AmazonStore Front (Affiliate)
https://www.amazon.com/shop/koglamour
Shop my Most Used & Favorite Products
►Got2b Spray: https://amzn.to/38He2Ok
►Electric Hot Comb (Temp Control): https://amzn.to/38BCQHC
►Got2b Glue: https://amzn.to/3aKV5vv
►Electric Hot Comb (Non-Temp Control):https://amzn.to/2wNO1jj
►Hair Clips: https://amzn.to/2TH6LK7
►Ors Olive Oil Fix-It Grip Gel: https://amzn.to/39UEsNS
►Abody 5 in 1 Curling Iron: https://amzn.to/2TJVLM9
►KIPOZI Flat Iron 1 Inch: https://amzn.to/38HRKft
►Neutrogena Face Wipes: https://amzn.to/38HRKft
►Esha Glue: https://amzn.to/2TWzt8W
►Got2b High Hold Hair Spray: https://amzn.to/2YCqkop
►Got2B Flex Insta Hold Hair Spray: https://amzn.to/2MYsnh6
►Garnier Fructis Style Sky-Hi Volume Mousse: https://amzn.to/2ACyYv1
►HairDryer: https://amzn.to/3hnyeKK
⇣ ⇣ ⇣ ⇣ ⇣ ⇣ ⇣ ⇣ ⇣ ⇣
The links above are affiliate links. If you do choose to use them, I will earn a small commission. I appreciate your support. I am so glad you are here!
--------------------------------------------------------------------
CHECK OUT MY PLAYLISTS :)
►SYNTHETIC WIG REVIEWS: https://www.youtube.com/playlist?list=...
►HUMAN HAIR REVIEWS: https://www.youtube.com/playlist?list=...
►PONYTAILS: https://www.youtube.com/playlist?list=...
►UPART WIG REVIEWS: https://www.youtube.com/playlist?list=...
►CLOTHING TRY ON HAULS: https://www.youtube.com/playlist?list=...
►VLOGGING WITH KYA: https://www.youtube.com/playlist?list=...
►GLASSES COLLAB:https://www.youtube.com/playlist?list=...
►3-IN-1 GRWM: https://www.youtube.com/playlist?list=...
--------------------------------------------------------------------
CAMERA EQUIPMENT USED:
►Canon T6i: https://amzn.to/2Q7K0gu
►ESDDI Softbox: https://amzn.to/2TYZAfq
►Ringlight: https://amzn.to/2vaGMBk
--------------------------------------------------------------------
Some products are provided to me review purposes. I will indicate above if the products being used/reviews has been sent to me for promotion. All opinions are my own, TRUST and BELIEVE. We giving straight honesty over here. Haha! Love you guys!
Hey guys welcome back to my channel, my name is kaia for any of you that are new and viewing welcome today, i'm installing a wig from recoil hair. This is what the unit looks like after i have conditioned it and bleached the knots and wash that bleach out. Of course, so you can see that the whole closure area is bleached. You can tell from looking underneath the lace how orange it looks compared to when it first comes out of the packaging, it's more so of a pale black color. So i'm going to install my wig today with a little bit of holding products not too much but no like glue adhesive. Now i did do my cross method in the back with the adjustable straps, because i like to be able to wear my units without glue and i feel like doing that method really really works. So i was going back and forth if i wanted to do a side. Part middle part, side, part middle part going back and forth of that, like i usually do, but your girl was just really filling the middle part with this unit and that's what we went with so to start off, i'm going to use my hot comb, you know Get those hairs brushed out back out of the way get the roots flat, then we're going to move on to parting it and i'm gon na part it with my rat tail comb and just make sure i can get that middle part as straight as possible. So once i get that middle part straight, i'm going to move on to my edge palmate, stick and my hot comb yet again to get the roots flat, get that closure flat, so it can look very, very natural and yes, y'all. This is a process. This is a process you want to take your time be detailed, because i promise it pays off once you get it all done, you're like wow, i really like how this looks so now we're going to move on to curling the hair, i'm using this curling wand, That i picked up from amazon, it's a very affordable, curling wand that comes with about six different options for you to change the head out and make it into a bigger one or smaller one. I'M just adding some curls because i feel like curls was the way for today's unit. This is a body wave texture by the way, so i am just curling piece by piece. You guys get the deal, get the drift, and then i work my way up to the top also, and i'm just still doing that same method. I try to hold my curly one um in the direction of down. I like how it makes the curls look. That way and i'm going to move my way up to the top as well, and i just try to take section by section little piece by little piece, because it really gives you more of a defined curl versus taking a big clump of hair. So i would suggest taking your time separating it out if you can and just adding those curls overall. I think this process took me, maybe about 25 to 30 minutes max. So you can see those curls have so much body. They are moving galore. We love it. So i'm going to do a little bit of plucking on camera. I also did some plucking off camera, so you guys can see how i usually do that. I just try to thin out that hairline as much as i can to make it look super natural and i'm going to add just two baby hairs over to the side towards the end of this closure and there's products that i use for this. You want to have a good pair of sturdy, tweezers um. I use my edge palmate stick and, of course, my hot comb yet again making sure that's flat. It just kind of helps with the styling purposes, how you want your wig to come out. So i kind of thinned it out a little bit more towards the end of the closure versus the middle. I didn't pluck it out and make it as thin towards the middle, because it's not even usually how your natural hair is. So i just want to keep it a little bit more thick and i'm going to use this even um holding spray, their adhesive spray in the black container and by the way, just a quick little up up talk about. Even i love love love these sprays like they have replaced, got to be. I love these spray, so if you guys haven't got them, go to your local beauty, supply store or check out amazon.com um and i'll put a link below as well. For that you all need to try this spray, so i'm just going to cut my baby hairs in a downward motion. I usually keep them a little bit longer for that first styling method and then, if i need to make them shorter, i will cut them shorter. But i like to just start off with a longer length at first. So then, i'm just going to swoop my hairs into place with the even spray i kind of just sprayed a little bit on that edge brush and i'm just going to sweep them into place and then just to make sure that it is a flawless install. Very much so melted, i'm going to wrap my satin wrap cap around the lace area. It kind of just molds it into place. It'S really going to help with making your lace be super invisible and there were a little bit of areas where i over bleached it. So i'm taking some root touch up and just touching up the roots a little bit, so it doesn't look as bright in that parting space, but bleaching. Those knots definitely kept me from having to add any makeup or anything to my parting space. You guys could see how melted and seamless that lace is looking once you take off that satin wrap, i'm telling you guys it looks so good. This wig was giving natural. Like honestly, i feel like this is like one of the best installs. I have done you guys, can see a 360 view of the hair. I kind of missed a little bit of parts back there with that curling, but you get the drift. So this is what the hairline is. Looking like. I really really love how it came out. I love the plucking that i did. The hair is just amazing in general, i love how thick and voluptuous it is. It'S very, very soft. It'S shiny, it just looks really healthy. So if you guys are looking for a good little closure wig to try out human hair recoil hair might be your best choice. I'M just saying i like this hair, so make sure you guys check out my description bar below i'm going to have a link there for you. Thank you to read cool hair for send over today's unit. Thank you guys. So much for watching and i'll see you guys in my next video bye, y'all the
Comments
Ms. Shabria Gxo: So gorgeous
Alima Wilson: Gorgeous!! When you wear 5 by 5 closure glueless, how do you secure the sides? I'm use to wearing lace front where I put some kind of spray to hold the sides down. I need to invest in a human wig. Just brought one recently from So Good hair and ended up giving it to my mom. Did not like how it looked on me.
Recool Hair: love,thank you,you looks sooo gorgeous,very appreciate it
Sammy Da Goat: First Comment You Look Soooo Fine Loving The Flawless Unit
Alima Wilson: What's the density?