How To Make A Lace Frontal Wig On The Sewing Machine | 13 X 4 28" Frontal Wig Tutorial | Iamel
- Posted on 20 February, 2022
- Lace Closure
- By Anonymous
I hope you can learn from and enjoy this quick tutorial on how to make a lace frontal wig using a sewing machine.
Make sure you like and subscribe
TIMES :
Sewing Machine settings - 1:13
Resizing a cap for small heads - 1:17
Start of sewing machine wig tutorial - 2:32
___________________
MATERIALS:
Sewing machine: Janome
Pins
Mesh dome cap
Needle
Thread
Sharpie
Lace frontal
Bundles
HAIR DETAILS :
13 x 4, 20” lace frontal
24”, 26” & 28” bundles
USE the code : ELISER0225
for a discount on orders over $150
https://www.aliexpress.com/item/100500...
____________________
SOCIAL MEDIA :
INSTAGRAM - @iameliser - https://www.instagram.com/iameliser/
____________________
#wigtutorial #diy #frontalinstall #frontalwig #lacefrontal #28inchwig #howto #diywig #diy #wigs #closurewig #howtomakeawig #wig #frontal #sewingmachinewig #easywig #easywigtutorial #blackwomen #blackhairstyles #quickhairstyle #beginnerwig #sewingmachine #beautysupply #aliexpresshair #blackyoutuber #suggest #youtube #hairyoutube #hairinfluencer
hair install, sewing machine wig, how to make a wig, frontal wig,step by step wig making, frontal wig, start to finish install,beginner friendly wig, frontal wig install for beginners, easy frontal install melt, frontal wig install, frontal wig on sewing machine, clueless frontal wig, frontal wig tutorial, how to make a wig for beginners, sewing machine method, detailed wig on sewing machine
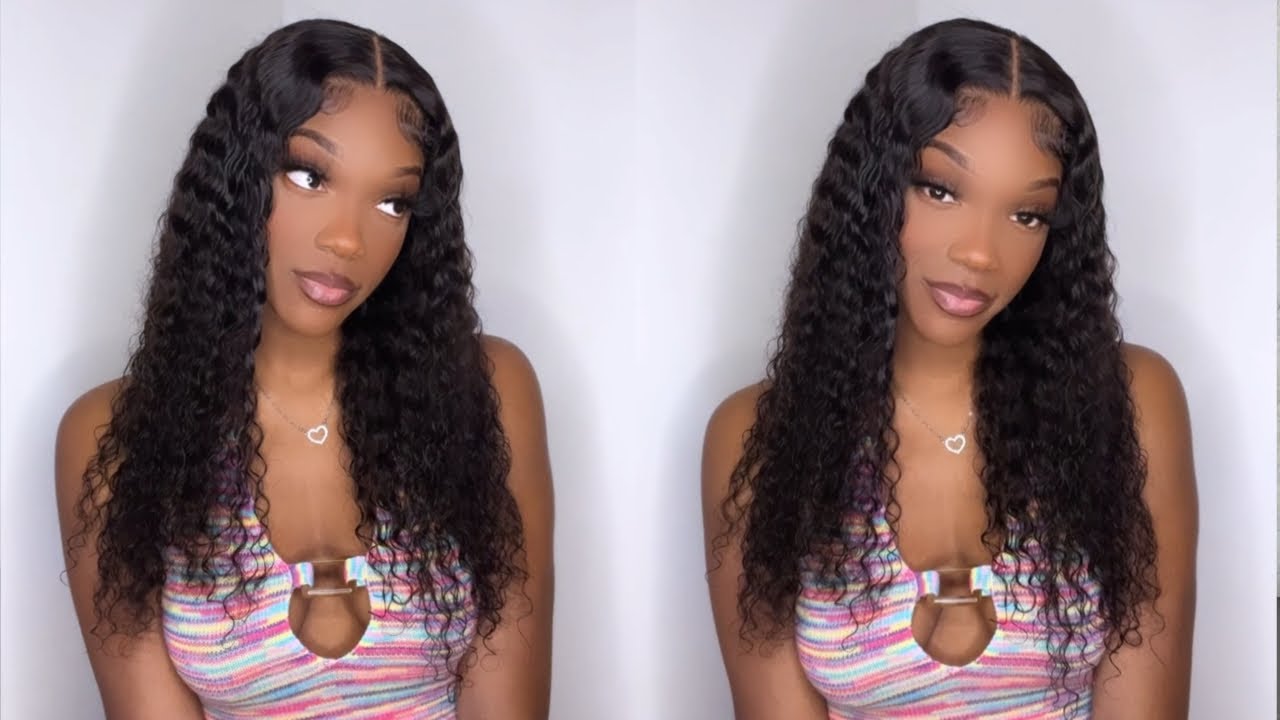
Hey guys welcome back to my channel, my name is elise, and today i'm going to be showing you how i made a lace, frontal wig on my sewing machine. So, as you can see, i got this hair from malaika official store on aliexpress i'll leave the link to the hair in the description. So when i opened the bag, i received a toni and guy anti-static hair comb, two wig caps, a 20 inch, 13x4 frontal and then the bundles in the 24, 26 and 28 inches. So that's just the close-up of the bundle, so you'll be needing a dome cap and i usually use the mesh one. A wig head, your needle and thread now, i'm just setting up the sewing machine - and these are my settings so because my head is small. I'M just going to show you guys how i'm resizing my cap, so i'm just drawing two lines about an inch and a half apart. So i'm just going to fold the cap in half so that the lines are meeting on each side and then i'm going to stitch a um, a zigzag stitch down the line that i've created so once you've stitched that line. It'S going to look just like this and you obviously don't want the top sticking out so you're going to fold it down so that the is flat and then you're gon na stitch. Another zigzag stitch down the side of it just so that that piece is flat. As you can see, my wig head has been through a lot, so don't watch her um, but so i placed my wig cap on the head and just pinned that down and now i'm going to place my frontal onto the wig um to make sure that my Frontal is um on the center of my wig cap. I usually just fold it in half and like cut a slit on the lace in the middle, so that i can line it up with my uh wig cap and i usually place my frontal around an inch um in front of the wig cap. Then i just tie the frontal hairs into a little pony and i begin to hand stitch the frontal to the wig cap once you've stitched it. It'S probably going to look something like this or maybe better. My stitch is a bit wonky, but i don't mind since the wig is for me. Then i took my chalk and i started to um create lines of where i'm gon na place the bundles, but i actually recommend a sharpie because my chalk wasn't working very well. Hence why my lines are embarrassingly not straight, but, as you can see, all the lines are about an inch apart, except from like the ones that are closer to the front they're a bit closer together. So, moving on to the bundles, i like to firstly, roll the bundle out and once you get to the end, um you're going to be sewing. The two, the two sides of the track together using a zigzag stitch and the key to this is not to put them on top of each other, but they need to be next to each other. Just like i'm showing you if you're a beginner with the sewing machine, i actually recommend that you go a slower pace than i am just because the tracks sort of slide and it can be really easy to mess this up and it's better to just. Do it slowly and get this part right, and i've actually found that if this step of the wig making isn't done correctly, you run the risk of your wig not being as durable as you would have liked it to be in because the wefts are not joined Together properly so when you're combing the wick out, you know the stitches might become a little bit loose so make sure that you're actually doing this properly. So now it's time to sew the weft to the wig cap and one of the most important tips that i can give at this stage is to make sure that you don't stretch the wig cap when you're guiding it through the sewing machine and the reason for This is so that you can achieve a flat looking wig and another really important thing is to backstitch when you start and finish a track on the wig cap, and this is that your wig has extra security. So now i'm cutting off the end of my first track um, and this is what it basically looks like, as you can see, there's no bunching um and it's looking quite flat, so once i've sewn most of the tracks. This is what it looks like and for the next three to four rows. I continue to use the double tracked wefts, but once i got to the last two rows, you want to be using a single weft, and this is because you want the flattest install possible. You don't want it to be bulky near the top. As you can see, this is what a single weft looks like and for the last two tracks. This is what you will sew onto the wig cap. So i'm sitting here editing the video and i've realized that i'm missing some of the footage of me completing the wig. So here's a video of me wearing the hair um i've had it for about four months now and the quality is still amazing. So here's some pictures of me wearing the wig. I did cut it um. It still holds um an amazing curl um. I'Ve had minimal shedding um, so overall i'd say the hair was pretty worth it. Thank you guys for watching, don't forget to like and subscribe and i'll see you guys in my next video

Comments
andyawe13: Your voice is lovely. I've hand sewn several wigs but I do not have the time for that. This was very helpful
Beautifuldenae: what size canvas head did you use?
Leroy: Promo_SM!!