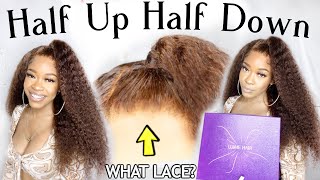
Diy T-Part Lace Closure Ventilation/ Start To Finish #Laceventilation #Closurewig #Tpartwig
- Posted on 07 August, 2022
- Lace Closure
- By Anonymous
Thank You for watching this video and if you are tired of factory made T-part closure this video is definitely for you.
Follow me for more hair videos on Instagram https://www.instagram.com/reel/CgElZGP...=
Here are the links to where I got my ventilation tools
Ventilation pin NGN 559.59 | Plussign 1-2/2-3/3-4 Ventilating Needle With 4*4 13*4 Hd Lace Net For Making Wigs Closure Frontal Toupee Making And Repair Tools
https://a.aliexpress.com/_mOv5j8y
Swiss lace NGN 983.63 | Hairnet Wig Making Accessories Plussign Swiss Lace Net For Wig Making Import Material For Lace Wigs Frontal Closure Red Coffee
https://a.aliexpress.com/_m0fH2lS
Link to more hair ventilation video
DIY crochet closure wig https://youtu.be/yHLJ7dm38DE
DIY crochet frontal knotless braid https://youtu.be/tTcS1PFaYE0
How to ventilate a handmade 2by4 closure https://youtu.be/g-c42u0r--I
Hey guys welcome back so um. This is going to be a t parts closure video. So i measure the net into a four by four. So now this is okay. This is uh four and a half. So now the middle part would be like uh one and a half inch, so you just have to measure it like a four by four. Then you can now go ahead to measure how long you want the pattern to be or how wide you want the cheaper to be. So that's what i did here. I measured it into four and a half by four and a half, so i cut it off giving me a square shape and the middle is um. I think uh one and a half inch. Then, after you've measured, you have to cut out the c shape like it is here, then you can now go ahead to measure again how um, how wide you want your closure to be and how long you want the pattern to be so. I um paint the net on my mannequin head on the wig cap. I made a mistake, although i have seen like two lines on the left, but i corrected it and um yeah. I see this is like almost a one and a half inch for the width and um, it's a four by four closure, which is a cheapest closure. So i use i'm going to cut off the weft from the ribbon that i'll use for the queen lesson. The closure guys i'm showing you guys, an in-depth video on how i ventilate the um back of the closure. So this is the vertical um line. I am ventilating, as you can see. I gave a mark to show where i am supposed to stop. So i've gone with through this um metal, which you get one of my bomb just going to come back down and tell you guys what's what's up so um, i am ventilating on one particular line, leaving the next vertical line empty and ventilating the line after that. So practically this is how i do all my closures like. I have to make sure the back of the closure is bulky enough. So if the web does not show that's a very key um point for the webs not to show you have to make sure the closure at the back is very not too thick, but it's thick enough. So um i like to go in again to fill out the empty space um by the edge so um the net out, so there won't be too much nets or holes showing at the back. So i'm done with the back. I have stabilizing the middle part um. So i left two holes in for the middle pattern. I'M used to doing one roll for the party, but this time around i gave two. I left two holes for the middle pattern, so that can be a bit wide, so i am practically taking like two three um strands of hair, passing it through the nets and just tying the knots and yeah. So it's the same method here you ventilate um. One line leave the next line. Actually, let me clean the line after that, so for the middle parting, i ventilated all the lines um in between, because i don't want. I like my closure to be like the pattern to be doing again. You know let it let basic pattern. It should be a pattern. That'S how i like my closure. Any question you see me do now just know i ventilate the whole line of the closure so guys for the hairline. As you can see, i'm almost done with the closure for the hairline. What i did was um. You know i learned like i said you, then sleep one line and you leave underlying empty and ventilate the next line after that. So for the front part, which i want like a like um, a natural looking hairline like a baby hairline, i ventilate on one level leave the next hole empty. The ventilated on the top, the third hole, as you can see, was closely. I ventilated one line. One whole left the legs who empty my head or the third hole. This just makes the front not big, not to be too bulky, and it's um also a good way to if you want to do like a baby, hair, um yeah. This is practically how i do my hairline, so yeah guys just keep on watching the rest of the video to see the outcome of the hair foreign. So so this is the hair. After i mentioned the closure, i went ahead to wing it and i'm going to be starting from the next clip. Yes guys, thank you guys so much for watching this video, if you didn't know how to make a teapot culture. I hope this video helped you to like start your ventilating journey and uh, don't forget to follow me on instagram i'll touch of mercy and it's honestly love when i think it's. My next video don't forget to like share and subscribe bye.


Comments
FIRE CROCHET HAIRSTYLES 🔥: The wig looks fabulous and the parting looks soooooo crisp and perfect!!!!! WOW!
FIRE CROCHET HAIRSTYLES 🔥: Where did u get the ventilation needle? I've been looking for a small on like that. Also ur work looks FANTASTIC!!
Bisola Alli: Please do you do trainings ?? I’m interested