Watch Me Attempt A Lace Closure Sew In On My Sister! | Lace Closure Sew In Install Tutorial | How To
- Posted on 05 February, 2021
- Lace Closure
- By Anonymous
ATTEMPTING A LACE CLOSURE SEW IN INSTALL FOR THE FIRST TIME: Here's a beginner friendly lace closure sew in install tutorial. The braid pattern I used for the lace closure sew in wasn't the best but we live and we learn! Shout out to my sis for letting me use her as my mannequin!
Check out my other videos:
I Did My Own Nails in 10 minutes: https://youtu.be/wKb_f-AiQBE
Perm Rod Set Tutorial on Short Natural Hair (ft blue Hair Wax): https://youtu.be/W5YBHyPpUCc
3 Strand Twist Out (Using Purple Hair Paint Wax): https://youtu.be/TtdUpYGt1TQ
Flexi Rod Set on Short Natural Hair: https://youtu.be/UQQDc9eiz9o
Braided Bantu Knots Tutorial: https://youtu.be/cfX2bEyUCRk
Crochet Feed In Braids: https://youtu.be/hphjyI9UNRQ
How I Trim My Natural Hair at Home: https://youtu.be/EfQWDbIHiqw
Short/Shoulder Length Passion Twists: https://youtu.be/EzkByw0k9E8
Products used:
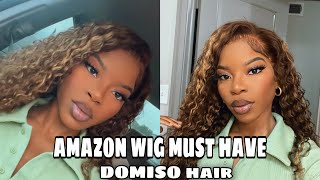
- Solo Express Remi Hair (2 packs, 18 inch, Colour 1B)
- Beauty Supply Store Closure (Colour 1B, straightened bodywave)
- Luster's Pink Glosser Sheen Spray https://www.amazon.com/Lusters-Glosser...
Follow me, let’s connect!
IG: @__lindseybeth: https://www.instagram.com/__lindseybet...
Twitter: @__lindseybeth: https://mobile.twitter.com/__lindseybe...
TikTok: @__lindseybeth: https://www.tiktok.com/@__lindseybeth?...
Facebook: LindseyBeth: https://www.facebook.com/LindseyBeth-1...
Snapchat: @LinziiLuv
Email: [email protected]
Watch in 4K!
Thanks for watching! ‘Til Next Time!
Xoxo
Lindsey
Hi guys welcome back to another video, so, as you can see, that's not me in the chat this time say hello to my sister, my big sis, so i'm just gon na be doing a closure weave on her. So i'm gon na be using this solo. Express remy hair and just this closure from the local beauty supply store, so i'm starting out by just parting, her hair down the center. I think i'm going to be doing some straight back. Braids um, her hair. She has a looser curl pattern, so braiding her hair. I started out just using well the hair in our scalp and yes, group. Game kind of tight is here holding the roots a little bit just strokes, but because her hair is avalusa curl pattern. I went ahead and i used this kanekalon pre-stretch conical on here and just use it to feed in do some feed in straight back braids that just kind of added a little more anchor in her hair helped to protect her hair and made it a little bit Like you know stronger for the sewing, so looking back um on this video, i don't think i would use this braid pattern again. I think i would definitely do a center part with two going to the side and the rest of them going back, but it's my first time doing a sewing on someone else. So practice makes perfect. So i'm going to go ahead and use these oils on her scalp because you know say when i want to flakes no dry scalp brown hair, so just oiling up her scalp like a bit and let's get into the meat of the matter. So i'm gon na take those back pieces that she has and i'm just gon na stitch them up, because i want the base to be as flat as possible and our hair is pretty long. So i just tried my best to stitch them down back in between her braids onto her scalp as much as as best as i could like any professional braider out. There don't fault me. This is my first time doing a sewing on someone else. So that's how it ended up looking and now we're gon na start out with the closure and this elastic band. I got from the local beauty supply store. So what i did i stitched down the elastic band to the sides of the closure to me. This helps the closure to kind of like lay a little bit flatter, especially if you're not really like a glue person. If you want to kind of have that glueless look, so i'm just gon na show you guys how i stitched it down onto one side. I really didn't do any fancy stitching, i kind of just not the thread like you regularly would, and i just stitched it into the lace kind of off to the side, and i did like measure the length how long i want it to be onto the side Of her head, but i didn't really do any fancy stitching, but i didn't do it like tight, where i would pull until it is cause. You know if you turn the lace, it is threaded closure, so that's basically it so now that i finished sewing. I just kind of okay. You know it's gon na look just kind of pulling it down to where i want it to stop, because i'm gon na sew down that elastic band onto her braids as well, because, like i said earlier, it's kind of going to stretch the closure and help it To lay flat, because this is going to be like a glueless lace, closure weave. So after i measured it, i just showed you guys how long it is, i'm just taking a little bit of got to be glue and brushing back her edges at the top, where the closure is gon na lay just a little bit so right here, i'm just Getting some powder like her skin tone powder and i started out by just dusting it onto like, where the knots were, but then i realized, because i didn't bleach not to anything because i'm gon na have no time for other. That'S honestly, i did take some liquid concealer. That was her complexion as well, and i just tapped it lightly onto the lace, not a lot because of the liquid concealer. It does get kind of cakey and it can look kind of mucky, but just a light tap. All right so here i'm gon na start sewing down the closure. I personally like to sew it on my closure frontal whatever first so i can just do the rest of the weave around the you know. Wherever the closure didn't hit, i don't know it just works for me. So, as i said, i would definitely use a different braid pattern kind of where you have like one like anchor braid or two going down to the side. I don't know why i didn't do it for this, like because, when i used to quick, weaves and stuff on myself, i used to like always do that type of anchor braid. I don't know i guess i was just trying something new and seeing what worked with this hair thing. I always tell people here is just trial and error. You try something new if it works, it works great. If it doesn't it's okay, you move on and you try again so i'm just going around the perimeter of the lace closure, just simple stitching, nothing crazy, not going too tight until i'm done all right. So now that i finished stitching on the closure, i'm gon na go ahead and stitch down the elastic band, so i found that this really and truly did help. This is what most people use when they're doing like glueless, wigs or just clueless, frontals or or anything like that and masses. She didn't really want to deal with like that glue business, so i tried my best, so i stitched this down onto the braids and you can see why i said having two braids going down to the side instead of straight back would have been much better or Much more practical or easier than doing it like this, it just would lay so much better, and then i didn't with this type of braid pattern. I didn't want to put the elastic band too far on our edges, because i didn't want it to rub on our edges and destroy them or anything. So definitely i would go in with a different braid pattern: okay, so for the first track, when i'm doing my first track, i just stitch through the weft i put the needle through the wave, i'm sorry. This is just like a terrible terrible far angle. I didn't get to show you guys, but i have another video of how i do my sewing on myself. I'Ll definitely link it um for up top in one of the cards, so i probably have a better demonstration there. But after i put it through that first wife, i kind of just sew under the website. I don't really go through and i just stitch. There'S no fancy stitching that i do i just stitch and then for each of the whips, i don't cut the whiffs i kind of just loop it. I think this prevents well that prevents what kind of minimizes shedding a little bit so they say and it just. I don't know, preserves the hair a little bit longer, so you don't have it in bits and pieces. I know when some people are stitching they like to like, maybe go under the weft and then not under the weft and not. But let me tell you something: i'm gon na have time you know and never have time for stun upon doing. All of that. So we were just trying to get this look done and i know some people like to use wig caps. They can use weaving nets, but it honestly i've done a sewing on myself and it didn't make a difference. So i'm just showing you guys here how i loop the weft and just continue the stitch into the second third next row, so we're um we're basically almost done so i'm just brushing it just to see how it lies. Okay, one benefit of the weaving net. It can add extra space to sew the hair. In case you don't have enough braids or cornrow, just an fyi. That'S i can see so right here. I'M just gon na go ahead and close the space between the closure and the weave so through the fur i'm gon na go through the weft just to help to anchor it in case. I should combine her hair, brushing it or anything. It doesn't like snap it over too easily and then just continue sewing around the closure. So now that i'm done sewing all the wefts in i'm just going to go ahead and flat iron, the hair starting from the bottom up, and then i'm going to be using the chase method. That'S a cantu heat protectant spray! Don'T come for me because can too that's what i had that's what i use and i'm just going to use that comb chase method is that is that what they say, but not really like a comb cheese are using a brush but comb cheese method. All right. So, since this is a glueless, you know weak closure, weave, i'm going to be using my got to be glue freezing spray um. I find that this has good hold for people who don't really want to mess with the glue, and you know you still want to. Maybe you know rinse it off a little easier or something so i just held down the closure and i sprayed the freezing spray along the closure right at where the hair is i'm gon na grab my molding wrap. I can never be without my molding wrap and just hold it down so then i ha i kept normal, did not wrap on for a few minutes and then, when i took it off, i just kind of cut the lace along where it's stuck onto her skin. Then i'm gon na grab some more of the freezing spray and spray it more like spray more of it on. If you have like pumpy top spray, that's probably even better. I know that works pretty. Well then, i'm gon na go in with the molding wrap again to hold it down. Then i'm gon na grab my blow dryer and just blow dry. Let me tell you a blow dryer and your freezing spray you're good to go. I'M just using a little l.a girl concealer here on the part just to make it a little little bit more, like blendable, just a little bit, not too much karma, but that it can get cakey. Then i'm gon na remove the molding wrap. So i'm just taking out a little bit of hair at the front to create well like baby hairs. They don't have to do this part if you don't want to, but it's just to kind of camouflage the lace just a little bit. So i took out some long pieces and then i'm just gon na go ahead and get grab. My mousse get some scissors, i'm gon na mousse them down because i think with the mousse. It helps it to like lay a little bit smoother yeah. I find it lays a little bit smoother than just a gel. I mean it's up to you really, so i just kind of molded it the way i want this just feels kind of weird doing it on someone else, because i'm so used to like doing that kind of suiting on myself. So i don't know that i don't know if it lean up but yeah, i'm just gon na go ahead and like mousse, the top of her hair as well, and then i know i added. I used some wax on the top just to help with any flyaways. As well, i didn't have a wax stick, but i did have maurice beeswax, so i don't know if that really is the same thing and just use a flat iron to kind of hold it down a little bit. I didn't like how it looked just straight. So went ahead and added some jumbo flexi rods and then she's gon na leave those in overnight. So i did about maybe just like six simple flexi rod and then she went to sleep with them. Alright, everyone! So it's the next morning and we are done. This was my first time doing a sewing on someone else. Like don't come for me, it's not perfect, but i tried love you, sis, thanks for letting me play a role in your head. Being my personal mannequin, truly love you and appreciate you all right people thanks! So much don't forget to like comment share and subscribe and follow me on all socials at underscore underscore lindsay beth and follow my sis too, on all socials at creamed, sugared, honey, all right thanks guys! So much for watching, like you, can't tell us that you're not feeling herself still like come on no come on, though cam, but i know like she was just cracking. Oh, my not even know. Oh i made a boost. I know alright guys thanks so much and i'll catch you in the next one until next time, bye, guys


Comments
Shanique Francis: I'm just amazed every time . This looks good! You're so talented!
natilue: I absolutely love this!!! Fantastic video as always.
Natalie R: You did well for your first time. Hair looks great. Great job and great video.