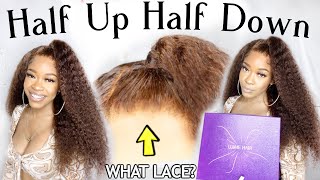
How I Lay My Lace Closure - No Glue No Tape No Band
- Posted on 12 June, 2019
- Lace Closure
- By Anonymous
EMAIL [email protected] to purchase !! ( Website coming soon)
EMAIL [email protected]
BOOK AN APPOINTMENT :https://Hairbyashleigh.as.me/
Location: QUEENS, NY
Instagram @Hairbyashleigh__
Like, Comment, Subscribe
#laceCLOSURE #CLOSURESEWIN #NATURALINSTALL
Hey guys, so I'm finally back with another video another tutorial. This is how I install my lace closures, step-by-step without glue and making them look real nice and flat and natural. So I'm just gon na start off by braiding, her hair, I'm already parted in here in the middle, as you saw, and I'm just gon na go ahead and do the connecting braid method and you wan na see exactly how I connect my braid. Sometimes I'm gon na be smaller, depending on how long the client wants to keep the hair in, but my sister, she just wanted to keep it in for like a month and a half again. So this is the appropriate size braids and it still gave her a nice flat install after I finish braiding. I always start off with sewing the tracks in the back and on the sides and they're not going, and I do my closure so you're gon na see me so my tracks underneath the braids just in case she wanted to put it up in a ponytail she's Able to do that, put her hair in a ponytail. She can do that um. You want to go ahead and make sure you're not in your thread very tightly and maybe a few times just so that the hair doesn't come loose because always the bottom track. Oh, it's coming loose first, because that's where here goes out to fastest, when I start the next bundle. I always start it from the front braid and angle it just so that the hair can come towards the face and when it lays down or you're in the wind, the wind is blowing or anything when it flies back. You will not have no problems with any brains showing or anything like that, so you just want to start your tracks like that it gives you a flawless look. I'M telling you guys start your tracks like this, and you want to see a big difference in your sewing. Now I already sold the parameter of the closure down, so it can be lifted up from here, but this is how I secure it. I'M gon na go ahead and sew on the braid. The first braid, I'm gon na part the closure out and I'm gon na. So the closure down on the first braid, so you're gon na see where I'm pointing that you're gon na see where I'm sewing that you want to make sure you're sewing on that first braid see, is able to lift. So now you just want to sew on the French braid and you want to sew it tightly, but not too tight where it can make the closure bunch up. So you just want to be very careful with that, and you want to be very careful of not ripping the lease go ahead and do that same thing to the other side, I'm showing you again too so on that braid. This is what's gon na make sure your closure is not lifting at all, and it is flat down. This is flat flat like this going on her scalp says, and I moved to closure a little bit before her hairline just so that winning grows out. It doesn't show her hair or it doesn't grow out too far back so definitely wan na do this method. Now you want to take a track and you want to show it to the end of the closure now. This is gon na help. Keep the front of the closure down, take the track and just sew it at the edge of the closure and make sure you connecting it tight and then you want to go ahead and sew it regularly to the braid. So this is gon na make sure your clothes are. These extra extra flats is like it can't get no more flatter than this, and this is used without glue a band because I hate using blue enclosures. Unless you wanted to look like a front - and I hate using band because it causes breakage on your edges and nobody wants to have just a breaking off, so this is the best method for that. This is the finishing look. Look how flat it is like she loved it. She just so spanked just so sing, but anyway yeah so look how flat it is. I I just straightened it. I didn't do much to it and she's done and ready to go out and be live check. My bio for extra details on this hair and get in the install done see you guys in the next video


Comments
Dark & lovely: I'm happy to you , You did a beautiful job like always I loved it ♥️♥️
Queen Victoria: We need you out here in memphis