Full Sew In No Closure No Frontal No Glue | Pixie Cut | Detailed Wig Tutorial
- Posted on 03 July, 2019
- Lace Closure
- By Anonymous
This video is a wig tutorial on how to make sew in weave without a lace closure or frontal.
Enjoy!!
Please give the video a THUMBS UP, SUBSCRIBE and remember to click on the bell next to the Subscribe Icon to get notified of new tutorials I will be putting out.
Please
SUBSCRIBE TO MY CHANNEL: http://bit.ly/2DgFxTq
LET'S BE FRIENDS
IG - https://www.instagram.com/ladyrella
TWITTER - https://twitter.com/Ladyrellaa
SNAPCHAT - Ladirella
____
Email me - [email protected]
____
Song Credit : Track: NIVIRO - Flashes [NCS Release]
Music provided by NoCopyrightSounds.
Camera used: Nikon D5100
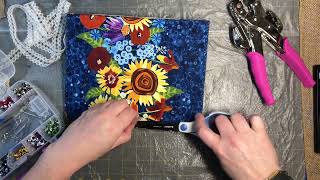
Hello guys welcome back so in this tutorial, I'm going to show how to make a pixie cut sweet and how to close a soy in without a closure or front are on the side of the crown or like in the previous video, where I show you guys How to close on the centre of the crown? This is the one I'm using as you can see guys it comes in different bundles and if you look just below the bundles, you would see where the inches and it's not. So if you care about the inches, you could, you know, go accordingly, but since is going to be a pixie cut and it's going to the culture might not look into that now. In the previous video I showed how to close without a closure or front ow. I'M going to put a link up and I move to the link after this tutorial. I followed the pattern on the crown and then I ended at the middle, but in this video I do not intend doing so. I intend ending by this side, which I explained in the previous video by the v-shape, so this video I'm going to show it and in doing so, I'm going to start from inside of one half and create the circle extending outside the crown. So enough of talking guys, let's get you know the main practical, so you guys understand so then I'm saying so first things. First, my walking with this kind of shot, we've all become, I'm in plenty, bong juice. The first thing you need to do is divide. Each bundle into two equal halves and then look for the front of these two halves, because this two halves don't have the same from you. Ideally, if a bundle of bhavani supposed to have the same thought, but they don't so divide them into two equal halves and then rushing on your lap or on your week, canvas like I'm doing here. Look for difference. This very place sharing here now is the back. Obviously, as you can see these shirts strands there and not you know laid properly, they are coming out exactly like I'm showing here they are coming. So this part, is it back? Well, the other side collapse properly, which is this very one being showed here in the front. As you can see, the short hairs are not coming out. Everything is real nuts, so, like I explained earlier, I'm starting my stirring from half of one side of the crown, as you guys can see, the crown is divided into two, so I'm starting from one side and they be true so round, go below the edge of The crown and then we'll come to my second movement swing, which, if you've seen the previous video I did, you would understand better, but still for those of us who haven't seen the previous video I'm still going to. You know champion this video. We need explicit and make you understand, but to just you know, get everything I'm saying, especially when I keep making reference to the previous video, especially when I keep making reference with previous with you I'll recommend. You see the previous video which I'm going to leave the link at the end of this video. There are some parts in this video like this very well for instance, which I'm going to make very fast cause. I'M not trying to make video so long and then it's boring and it is not achieved because I want to be neat. Most of the people see this with you already most. If not all of the people see. This video already know how to pass a chair than needle over a ribbon on a recap, so this video is not showing how to how to you know do that this video, instead of sharing how to make it much cooler stuff. So, just in case, I hope you guys understand whenever I it's really really fast like that, while areas where I need to speak on like areas I I feel I need to pass the knowledge I intend passing orbs, make the speed kind of upper fruits, and this Phone'S gone out the crown it's very important to prepare anew you're, given so that your sewing goes in a circular motion Constance, really important that your sewing business circular motion and, if possible, you can use it CP to properly secure that place. Like I'm doing here, it's actually important to you the tip into sake. Everyone just makes a lot easier, but this very place, even if you're, noticing C pins in other areas. It'S really important to get it in here. To just have you know layer without properly and make the sewing come out in a circular direction, so can adjusted for now. On this other front side of the crown you can see, I'm also trying to maintain the secular movement, which is very, very important in this kind of clothing that you maintain a secular. You know you keep going. You keep going in circles. It'S very, very important, very, very, very, very important, so that is just what I have been doing. I have been you know, moving in circles, probably how I'm moving in circles as I'm talking cuz. I sound like a broken record using the word seconds anyhow, I had no, I had not only mind I was you know combining this color like just, I would just need to play with the color. I didn't have a particular didn't mind like okay. I want this color to appear here or there or something of that sort. No, I was just going to you. The colors, like a so anyway go back so good free stuff with the colors place it wherever. If you like to see when it comes with when it comes to the colors, the colors of your Weaver and how and where you want to place them so at this point, I'm almost getting to the point where there's nowhere to show on. I haven't gotten there. Yet but I'm almost there, so obviously I have gone in circles and virtually sold on everywhere. There is on the net to be sold, and this is the very important part now where I need to close, very close and needs to. You know really clean and have your nothing medically. Basically, so the next thing I'm going to do is cut out the many parts of the river that they touch. Many now where there is no place to sleep on with a blade for a scissors. What I prefer they did doesn't cut so much just cut away. I wanted to cut them so using a blade, I'll cut it off and then carefully fold ugly, two paths that lead to and little wet showing fold it in to true and using the pin. I would you know so: it's inside now, today all the cuts of the crown where I've already soon now this thing I'm doing here, I'm going to do it like minimum of four times and these four times they are going to be in different directions. I will show the first time down to a direction. Look at: let's, let's use, let's use, left and right front and back I'm going to sew down on my left and then come back up to that same center. Spot, like I'm Jun, might see I'm trying to make sure I'm coming back up on that same tiny weights. I left behind after coming back up. I would go down again this time around on my life. Remember the first time the first instance I used on my neck. I go down again on my right this time and then come back up again to the same place. Then the third time I would go. You know to the back dustry to the back of the recap. Take you to my left come back up again. Take it down to my right, the first time I come back up again, then the final I'll just take it anyway. Now, whichever direction I take, the fine now sewing is going to be where I ended and like I'm, showing you guys here, I took him down, I don't know direction I took it down to and then I just acted like I was showing and then I not Had shared and that just dies, that is how you knit really close. You know the story without a closure of front ow. I did this in the previous video. That is not the tutorial for today, but I just felt like sharing what I explained in the previous video cause this tomorrow, unlike in the previous video, where I am dead, where the sewing ended at the center of the head. Okay, I'm showing how I'm showing how it's ends by this side. So it's basically just simple calculation. So at this point, I'm done with the crown area of the wheel, which is what I always touch from whenever I'm doing here, evolving and always loved to start from the crown you just add just my metal. Now many comes to the back of a pixie cards for most pixie cuts. If I would put see, lady sewing should be done close to each other, especially if the lower part of your pixie cut is going to be shredded. Very, very well that it's advisable you place each webs close to the other ways using on the table there. It just as guidance to help me, and so I don't stress myself - meets shiny sexy pins because my mannequin is really strong and in certain cities can be tougher time. So I just use chopped to help guide myself now you might wonder why the space between each line I do is kind of far apart. I did that intentionally close up trying to mix the color of my own way, so the black we both are going to stay on the line. I do have the cold come in between each lines. So now why I did it out they went. You see what I mean so after every line eyes, so I cut the weave on and then pass the thread to the next line, like I'm doing right here now, I'm just passing mature to next time, but I don't happen to portraiture and not to chat again. Now this is so because of the nature of the vivo. If you flip the weave on when going to the next line, if you didn't play properly so after every leg, it's advisable to cut the weave on and then laid, we shall eat the front and start your swing now. This is what I was talking about earlier when I said I was going to fix the whole colored before in between the black ones. Now this is just my metal you get, it doesn't have to you, don't have to do it this way. The main thing yeah, basically like the main thing here, is to just make sure you're sewing behind a close to each other for a fix equal, because I mean anyway, you have to shred in here and it depends you're good. You should really really wear like a good shot really well, it's we go to be soiled up close to each other, so the net is not sure or if it's been shown on the person's head, the women I've done front, so it's not showing so that just The whole idea at this point here at this very point I feel I'm done with the lower part of the head. That needs me just shredded, so I feel I'm coming throughout the crown area that doesn't really need more shredding, so I don't need to make myself so close to each other and that's why I like this recap, but the kind of helps give one an idea of How do you, man, hair, feels at this point? I am not really bothered about making my sewing close to each other. I am just going to meet up to the crown area and basically do the same thing. I'Ve explained to you guys earlier on the video just passing the chair to the next level and then show it. So this is how the hair usually looks after you're done sewing at this point, then style as desired. By studying, I mean shredding as desired with your new job blade, always open. Initially, I started with my visibly and I remember they actually have little comb and I switched over cuz little comb is kind of easier. It saves you from touching yourself like this taken. Oh that's now, this lower back area of the hair is usually in most fixie coats, where the major shredding is don't, and it's this shredding. That kind of gives the illusion, like the upper area, is hampi. It'S not hampi. It'S not like. There is much more hair day just because he had behind as we removed very very so you know how, in the shunting works now, basically now just a tip for trimming hair, especially a different area where he gets a sista trim from different angles like you can See I was taking the head to the side and trimming at the point. I also went from on that to team trust you from different angles. So now so, whichever way you want to make the hair go to Yahoo comfortably, go that way and still look properly laid. I don't know if I'm making sense like, I hope I am SOTA shedding or trimming the hair to get a more defined shape. You go in with your scissors and shape as desired. I gave this had the triangular shape, because you know the hair doesn't like hair touching her body, and I figured this shape. Would kind of you know give me the results I want. What I'm doing here is emitting a permanent pads for the hair and by doing so, a passing shadow need you to every single wept on the paths I want to create, so I'm just moving to like get through the closing of the sewing. That'S the closing I created without the frontal or closure the person this person of the church will ensure that no matter what happens, that part is to be dead on the head, and this is because of the kind of person that we was made phone calls. The last person I would you know, have time to do all this singing mega kind of things we young people do not Hershey's, but actually I made a wig for my mother and she specifically told me I would have thought you me here and there. This is a maximum length. It should be these dad dad and know the kind of person she is. I just had to make the hair like as easy as possible, as I know, she'll be able to handle it haven't gotten to this point. I just looked for a place behind to pass the church, so I can finally not the church. You know, of course I can't not the church where the closing is. I will have to look for somewhere behind on my decide or something of that sort to do that right now, not to not get shared. So this is what he had looks like on the mana Queen and yep. Yes - and this is me on the head - you know just playing with the colours taking the gold one side bringing it back, and this is what I was talking of when I gave the tip on trimming. Hair especially has in the Front's that you my watch money to lead. You see how I should go to one side and then the hair on deities to the kidney. So when you achieve mean heads that you like to manipulate it's always good to cut from different angles, so that any angle you want to take the head to it's still kind of find its way to love. That kind of thing. So here just click play with the colors, taking it from one side to the other side, just playing. Basically, so we've come to the end of the tutorial guys and I'm hope you guys liked the video I'm hoping identity not too pleased about to give this video a thumbs up and subscribe to my channel. If you haven't for more interesting content, outputs enough and for those of you who are subscribed to me already, I appreciate you guys. I really do so to my next. Video stay blessed stay of shovel and, as always, I love you all. Bye,


Comments
Victoria Berthran: OMG! I could kiss u right now. I'm so glad I came across this video. Thx 4 sharing hunny, u got yourself a new subbie here
Corinthians Girtman: Girl!! Girl!! Your video is definitely an answered prayer!! I love short hair and I'm getting away from gluing track hair and do sew in wigs due to scalp issues.I thank you so much for the time you put in to show us how to make it! I may have to practice a little bit you make it look so easy but I'm trying it!
Tina Ikujegbe: Wowww.. This is beautiful. The way you covered the wig is flawless and easy. I have seen a lot of videos of how to cover a round sew in like this but seriously, this is the easiest. I don't like to use glue. I think you should rename the video, let it be easy for people to find on YouTube when they search for a full sew in wig. A lot of people are looking for videos like this.
Chikzie Justina: Thanks for sharing ,beautiful and neat I love it
Chiburem Chukwuma: I didn't understand your technique at first but I'm thankful I had the patience to keep on watching. This is an ingenious and insightful video, you have saved me money, thank you once again
GE Signatures Ugorji: I wish I can give ten likes, this is so so lovely, and you teach so well
eze roseline: Thanks a lot with ur videos I can make my own wig,
Cherished Olivia TV: Beautiful chaiii I use to love this short hair back in uni!! This one is really beautiful plus that make up thou, nice one as always dear ❤️❤️
Vivian Idowu flecia: Beautiful
ADEYEMI ADEJOJU AZEEZAT: Tanx 4 sharing,God bless you ma. So detailed and helpful. You're so biutiful
Gracefully EUT: Great work, just got a new subscribe
odunusi ayomide: Nice tutorial. How many packs did you use
LISA ZOEY: Hi thanks for your video tutorial. I tried it out but mine didn't turn out as flat as yours behind. Please what can I do to fix it?
GOODCHOICE Channel: Good morning, please what is the name of the weavon.