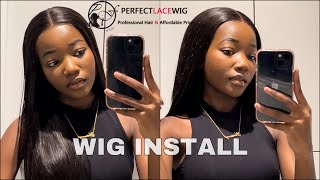
How To: Lace Frontal Sew In No Glue No Tape No Leave Out
- Posted on 14 January, 2018
- Lace Closure
- By Anonymous
How to: Lace Frontal sew in NO GLUE
Learn how I install my lace frontal with no glue no tape no leave out method is very easy and I hope you find this video helpful. If you have any questions feel free to leave them in the comments below.
So you guys are gon na measure from ear to ear, make sure that it matches perfectly then I'm taking it off of my head, cutting it just in the lace just to make sure that it was perfect size because you don't want to screw this part up. I'M just verifying to make sure that it matches from ear to ear cut those flaps off and now that's what you have make sure you're good, I doubled, make sure and also I'm gon na stitch, an elastic band from ear to ear from where I want. My elastic band, to start and - and this is gon na - be your guide to help you do the lace frontals so in on your own. These are gon na, be your hands, so this is what it should look like about now, after you've sewn your band on and now you are going to be cutting off. The lace now looks like this. Now, I'm gon na slide this baby on my hair. As you can see, that's my braid pattern under there you can do whatever braid pattern that works best for you, but this is what it looks like when I put it on my head very noise. If you guys are looking to customize your frontal, I have a video on that. I will link it down in the description box below and look at. It just looks so perfect. Now guys and now I'm going to toss all the hair towards the front. You know get it out the way and now I'm just measuring to where about. I want it too late on my head for or my forehead okay. Now, I'm flipping all that and I'm starting in the back to make sure where that stitch starts. You'Re gon na start from the middle working away from left or right. Whichever way you decide to go but make sure you stitch as close as possible to the back frame of the lace frontal, because we don't want to no air bubbles in our lace, frontal cuz. That'S just tacky yo. Have the excuse me for looking out bust it up in this video? I was not feeling well today, and this is where I'm stitching, as you guys, can see this little stitch on a braid on a place where I'm never gon na part. So that's kind of key to keep your lace frontal from shifting and you're gon na do that on both sides. That'S where I kind of got my like ear tabs, like from me, pay attention to like my snapchat videos. Prior to this clip then you'll see what I'm talking about. I have like little sideburns that I kind of like made and it's kind of cute and so yeah, I'm just stitching on the other side. As you guys can see, this frontal was very nicely detailed. I love how natural it turned out and how nice it turned out and see how is laying down flat up against my head. That'S what you're looking for okay, easy, peasy, okay, we're putting this all up in a bun now and we're going to stitch just like normal, but the thing is you're gon na stitch on to that elastic band. Just to give it, you know some because you don't want to flip over and see that elastic band, because that's just awful but we're gon na stitch on hair on to that band. One two, our braids, and that is just gon na cover most ground and you're gon na start, sewing your hair in like a u-shape. Once you make your way towards the top, it will be like just regular straight and then you'll connect your frontal, but I hope this helped you guys if you liked it, give it a big thumbs up and I'll talk to you guys later.


Comments
Annabell Asare: How long does your sewin last before you need a touch up?