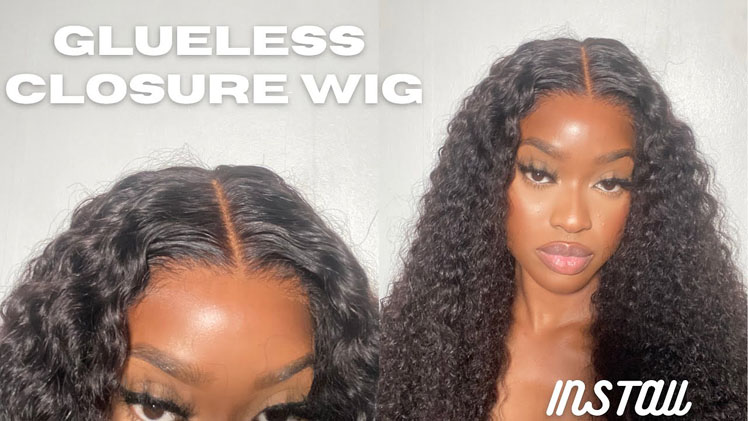
Finalefall For Me Ep.4| Rich Eggplant Purple With Highlights | Hd 613 Wig| Bel Fanm Hair
- Posted on 24 October, 2022
- Lace Closure
- By Anonymous
Details : 24” straight Hd 613 wig from
Instagram : Belfanmextensions
Wigs are ON HAND (Miami/Broward)
Shipping Available !
Dye colors :Rich eggplant , funky yellow , orange blaze , raging red
Welcome to My Channel
Be sure to SUBSCRIBE & TURN ON YOUR ALERTS
HAIR CHANNEL @iambeautifulhustlertv
——————————————————
MY PERSONAL YOUTUBE CHANNEL : @Life with ShaeTV
https://www.youtube.com/channel/UCB9xX...
——————————————————
Follow My Socials:
PERSONAL
@iambeautifulhustler
BUSINESS
Instagram:_Beautifulhustler
@thebhslay
@girlsniteoutapparel
Twitter:_Beautifulhustl
YouTube :IAmBeautifulHustlerTV
✨For Sponsorships ,Reviews,& Questions
Email:[email protected]
786-571-1313
To Purchase Hair & Products Www.ibhslays.com
Allow 3-14 Business Days For All Orders
#miamihairstylist,#miamihair,
#browardhair,#browardhairstylist, #Atlanta #atlantahair,#atlantahairstylist #reels, #explore #trending #tiktok #viral #miamimakeup #miamimua #miaminails
Thank you. Okay, look [ __ ]. He gon na spin them racks before I ever. Let them touch [, __ ] once live up your pants. I want that neck. You cannot [ __ ] him yeah. He know I'm prettied in a [ __ ], but I get like hey Beauties and welcome back to I'm before hustle TV. Today we are back with our last and final video for our fall. For me, series. Okay, I know I said I was gon na give y'all about five or six, but with this number four um I just had to just give y'all this one hard last banger, so we can move on with our next series, but today's hair is provided by Bell. Famine extensions: this is a Miami um located um store and she always has her wigs on hand, and she gave me this bomb HD lace, wig, 24, inch, 613, HD, lace, wig and y'all know. We love us a good HD lace, wig and this ring was super. Super super super full like thank God. I love that wig for me now today, I'll be showing you guys, first and foremost how I created this color and first thing: we're going to do is, go ahead and stop by the water dipping method. Now today, I'm going to be dipping the whole entire wig purple and I am using the color Rich eggplant. I used about like two to three bottles y'all to get this color and once I finish dipping this hole with purple, then I will go ahead and color. Each other color that will be used for our highlights as y'all can see. In the beginning of this video, we have a purple look with highlights of red orange and yellow and we will dye each individual of those four colors on its own. But, like I mentioned first and foremost, we will be dying. This full uh, wig, Rich, eggplant and y'all, know with 613. It takes pretty easy simple. You know pretty fast, pretty simple, pretty easy, okay! So now I'm just going in with my second bottle of that rich eggplant and I'm just dipping the wig in there again and once I'm like, I said before y'all this is HD lace and y'all know some of y'all. Ask me a lot. How do you not get the lace to stain um to not stain um, and just honestly, I don't know y'all I'd just be dipping it, but pretty much all the wigs I get for the most part do be HD lace and what I've noticed that the HD Lace does not stain, and even if you are using like a permanent dye, pretty much if you just go back in and bleach the knots, then that color will lift off of the lace and you won't have no stain lace issues now. Another thing I did have was a one bundle of 613 and it was also a 24 inch which I got from another company, because I did not um. I wanted to make this wig very simple and very easily, so it would be like a full highlight. You know type of look where that way. You don't have to go in and take your time and dye by hand. So the first color that I'm going to use for part of our highlights is that funky, yellow Temptation that I used in a previous video. What I did with the yellow orange and like burgundy-ish um ombre, so I'm using that same funky, yellow and I just took that one bundle that I had cut it in half and then I cut it into like four different pieces. And I just took one of a quarter of the bundle and I'm just dipping it in the yellow, simple, fast, easy now we're going in with that orange Blaze. I'M gon na do um another corner of that bundle and I'm just going to dip that color in there and you don't need that much water, because it's just literally a piece of hair, literally y'all, just a piece of Pizza do not even need that much. When I only tell you, I only use a few tracks to get the highlight color in the bang area, but um nevertheless we're gon na mix in that orange dip that bundle and then we're gon na repeat the same steps using the Raging red foreign foreign. So now that we have all those colors ready, I went ahead and rinsed the wig out almost out the bundles blow dried everything, so it's nice and ready, but to make my job a little bit easier today, I'm going to pre-curl and style the wig before I Actually put it on my head that way when I go to install it, it's not so much work. So the first thing I'm going to do is just go ahead and hot comb that hairline and then I'm going to create my side part and then I'm going to actually pin curl the whole back part of the wig. That way, it's already in pins. When I install it and the curls could be sitting foreign going ahead and creating my side part and adding that Glam wax stick to really just slip: the wig down nice and flat um - and it's really good to do your wig on the mannequin. Because you can really lay that hot comb down honey, get that wig as flat as you need it, because when you do it, when it's on top of your hair you'll be trying to be so careful not to burn yourself. But when you do style your wig beforehand, you can really lay that hot comb down honey, but don't leave it on that too long, because you don't want to put the holes in your lace, but nevertheless I am parting off the section in the back of the Wig, just to make sure that the hair is covered in covering the tracks, and once I get that part um all said and done, I will go ahead and clip the whole front, part of that lace up and we will focus on pin curling the whole back Foreign foreign, my Fantasia's heat, protectant spray and just spray the wig entirely, and then I'm going to part off my first section pin everything else up flat iron, the hair. Before I curl it, then I'm going to curl it up taking some more heat protectant on each curl, just to make sure it's nice flat and sleek and curling it up and then, as as I curl it up, I will go ahead and pin it. You know one by one foreign foreign, foreign foreign, our second section um same thing, going in with the heat protectant spray flat iron of the hair. Before I curl it and then you know curling it and then pinning it up with the duck clip foreign foreign, foreign, foreign, foreign, foreign, foreign and I went and should um went ahead and showed you guys how I curled the first two pieces. I mean the first two sections, so I just went ahead and did the Reds off camera and now that everything is all pinned up and not the front just the whole bag, I'm just going to take a little even hold and spread a little pink glosser. So I don't look so hard and um. What'S the word like white looking from the holding spray, so I just let I'm gon na let that sit while I actually installed the wig, but this is the prep for me installing the wig and as you can see the face is Beats. Yes, the lock. It'S the eyes for me like the found, not the foundation on the eyes, but the eyeshadow on the eyes is giving y'all see our three color highlights. So we're gon na get into this sleigh, so um, easy, peasy install I'm just gon na put the wig on my head make sure if there's no extra um lace around the size around my ear, okay, which is going to fit perfectly so now, I'm going to Take my Ruby kisses Foundation using a mixture of both of those colors, even though this is HD lace, I like to go in with my shade in a shade darker just to get that real, Perfect Blend added that Foundation and the inside of the legs. Putting the wig back in place just to make sure it's going to lay where I need it to lay and then y'all know we're going to go in with our layers. I only use two layers of glue today to secure my wig, because y'all know I changed. My wig, like I changed my drawers yeah, so I'm gon na go ahead and apply my two layers brush that one in and then once both layers are clear. We will begin to tuck down the wig. Thank you, foreign foreign, that lace down into that glue, pushing it um in with my fingertips, nice and firmly doing it on both sides and just picking it up and placing it by replacing it down. If I need to just to make sure it's past the hairline just to make sure it's laying down flat and everything like that, and once I get it where I want it to be, I will go in and push down some more with my fingertip pressure and Of course, go in with the blow dryer on the heated setting blow dry, that lace a little bit and then tie down that melt belt. Foreign foreign about you know five to ten minutes: we're gon na slip, the lace down the middle and, of course, going with the fresh eyebrow razor and raise off that lace. And you already know the model raise off the lace first and then go back in with the lace glue to tack down any lace that is still lifting that you did not catch the first time or if you don't need that escalation. Just go ahead and cut all of it off, but if you need that lace to fully cover your hairline and to give it that nice natural look pre-plucked, look then keep it and glue it down. Okay, foreign! That'S how you know when you're feeling yourself, you know you're having to be cute. Yes, it's the eye. Do y'all, see the eyes shout out to Mama Hustler who got down and busy on the eyeshadow, listen y'all. I can do my makeup all day, but I cannot do no eyeshadow for sugar honey iced tea, so I always have to call Mama over and let her do my eyeshadows because yeah I would be looking like a straight up clown in the face, because I don't Know what I'd be doing so me and Mama collaborate uh collaborated on this makeup. Look because baby, I did the basics. You know the foundation eyebrows all that, but this wouldn't even be popping without the shadow on the lips. So let's give it let's get into that. Okay, this the eye look itself made the hair pop even more, and then it was just the highlights. The color, the all that, like this overall look, was so freaking bombing. That'S why I was like you know what I've been doing pretty good with this fall series, but let me just get on one last banger and on top of that Beauties okay. On top of that, this is also like the perfect Halloween color as well, because y'all know spooky day is approaching October 31st Halloween, and these are also like Halloween, colors, orange, yellow purples and all that. So it's like the fall for me series Grand Finale, but also like welcome spooky series, even I'm not doing a Halloween series, but you know what I mean: okay, if you get the girls that get it get it and the girls that don't just don't, but nevertheless, As I continue to tack down this weekend, you're watching don't forget to click that subscribe button turn on those bells. Okay, give this video a thumbs up while you're watching take the time out right now to do that, because you watching it anyway. So just go ahead and make sure you click that like button and also leave a comment down below - and let me know how you loving this video so far: okay but um anyways. Now that we have that all tacked down, I'm going to pull out a section for my baby hair, so I'm gon na go ahead and pull out my two sideburns and then pull out my little other baby hair for the side and then we're gon na. Also hot comb and begin to um what you call it add those tracks in a little bit foreign like that, we're just going to tap the hairline again with some Foundation, even though it's already blending. But you know you can never go wrong with a little extra. A little extra squirrel, okay um. What am I looking for? Oh the holding spray, so here we are with the even holding spray. Y'All know my favorite and I'm just going to spray it on my fingertips, so it don't get messy and all over the place, and I know I got this makeup on um and just tap it across the hairline before we tie it down with that melt. Melt again, but while that melt belt is sitting you guys, what am I going to do? I forgot what I was going to do hold on. Let me watch the video, so I can tell y'all okay yeah so now remember I'm going to actually uh take down the frontal part of the wig and just go ahead and pre-flat iron it and everything like that. Um because we're going to be curling that up next and everything like that, so I just want to comb that part out flat iron. It really good because then we're gon na have to go in and add those highlighted tracks. Now let me let me just go ahead and say this before y'all try to eat me up in the comments, not my real Beauties, who know like I do what I do, but for the ones who might be new and they might try to troll me. Okay, I know some of y'all put some type of way about adding tracks on between your frontals, your wigs and everything like that. I understand that, but me, on the other hand, baby, like I said I changed my width like I changed my drawers and nine times out of ten. I do not wear any of my wigs again unless they're wigs from my actual brand or, like you know, really Top Notch Brands like this one, for example like this wig, is Top Notch. I will probably wear this again and remake this. Look for another series. I'M gon na do on this channel, but if it wasn't a raw wig like this one, you know, then that's different. I'M still gon na glue these tracks on this wig, though, but I know how to remove it and clean the wig if needed be, but, like I said somebody I'll go, feel some type of way about me. Gluing these tracks, in between this wig, but when you're trying to serve a look baby, you got to do what you got to do to serve a look now, if you're, one of those who are very patient and you decide - you want to go in piece by Piece and um actually color each color that I'm using then do your big one, but over here I make it easy for my beginners okay. So if you want to do a faux Locs, look fake locks, uh fake highlights, look whatever you want to call it. Then you can follow me, but if you want to do the real deal, go in and hand paint each color, then do your professionalism, baby, but I'll make it easy for my Beauties okay. So what I'm gon na do is. I went ahead and party each section out, I'm coming flat iron, it and first I'm going in with my red color, and you want to make sure you glue those tracks about a half inch back from the hairline. Don'T put it directly at the front of the lace on the edges, we want to bring about an inch or about half an inch behind the hairline and then once you um cut your track to you know go like in between, then you go ahead and take Your bonding glue, you put the glue on your track and you lay your track down like I mentioned a half an inch or an inch depending on how much parting space you have on your wig for your frontal part and glue that track down. So I went ahead and glued that first red one parted it off. Now I got my orange one and I'm gon na do the same thing: cut it flat iron. It add the bonding glue and place it a half an inch to an inch behind the hairline. As y'all can see, okay, that is a very key factor when doing this part here on lace, you know doing the bonding is different, but on lace like yeah, I know the very first video of the Fall series. When we did it was since my sister Nika. We play some tracks right at the front because it was a bonding, but because this is lace, you have to place those tracks at least an inch or a half an inch behind the hairline. That way, you can still comb your hairline back and see. You know just regular um lace and hair and not actual tracks, okay, but I'm gon na. Do this all the way up - and this is the pattern that I'm going to be doing red orange, yellow then um, you know part the purple, hair and then red orange yellow again, so I'm just going to go in that same pattern until I get all the Way to the top foreign foreign foreign foreign and, as you can see, I'm just going to continue to um glue the tracks until I get a little piece of that purple left but um. I think my last cut that I will be doing is red or yellow. I'M not mistaken, I can't remember which one was my actual last one, but once I get that last one in we're going to go ahead and comb the hair down and be done with it, I think I'm going to add. Maybe one more track or two more tracks here, um, but, as you can see, the colors blend perfectly and let's just like, take some appreciation to how the makeup and the colors were exactly the same, like the same color of yellow the same color of orange. The same color purple in red, like we did that okay, like if it had to compare eye shadow to this look. This is the perfect eyeshadow. Look like it Blended perfectly, but I'm gon na go ahead and finish out of those last tracks. Then we're gon na cut some layers into our bang and curl up the last few pieces and I'm gon na also do my baby hairs off camera foreign foreign razor and cut us a diagonal angle. Then I'm going to pick up the hair, go diagonal, pick up the hair again in the bang and go diagonal sideways just to get some levels and layers in this vein. Okay, this color combination is so freaking cute, like I might have to do this look again and highlight the whole entire wig, because it was so so pretty and just even how I chopped it up and how you can see the colors just oh, my mom was On the couch, I was talking to her like how bomb he's - oh, oh yeah, yeah, feeling it um. So I went ahead and did my baby hairs off camera? I did only did two baby hairs on the side they're showing I did not bother to do the Sideburn area, because once I curl all this up again for the seat, none of that okay, so um, I'm just taking a little um Fantasia's heat protecting spraying, the Hair curling it up and pinning it like. I did, the other hair um the rest of the hair. So you know just doing that until I get every piece curled up, then we're going to remove those pin, curls and finger comb, the hair out foreign foreign everything and I'm just going to go ahead and do my very last curl right here on this side and I'M just going to wait a few minutes before taking everything down. Okay, so once I finish curling this up, I'm gon na pin that let the hair sit for a few minutes and then starting with the back, I'm going to pull the pants down foreign and I'm just putting everything down one by one. Whatever I don't see, Mama Hustler gon na smash that out for me. But yes, oh, my God, I can't wait for you guys to see the look okay. So this is the hair all around okay. This is a straight wig, so um, you know. Usually when I do curls curls curls, I prefer body wave, but this straight didn't it did its job or whatever. To give me the nice look that I wanted and just finger combing these curls and seeing the blends of the highlights y'all, it was good thing. Baby come on Fast Series. This is how you, in a series, with a bang literally period period period, get into the look, absolutely love it gon na smooth everything down, fluff it out hot comb, it a little bit and off camera. I did go ahead and conceal my part with the brown Foundation, but I'm going to continue to just sleep this thing up and plate in these curls till I get that final desire. Look but y'all stop playing with the Hustler okay, I'm gon na turn around a little bit. Let y'all see um. I didn't really cut no layers and the hair only just that front. Bang part okay, because I might wonder what it's look but here's. The final look. Let me know what y'all think down below thank y'all for watching thumbs up comment like subscribe turn on your bells and stay tuned for more. I love y'all thank y'all for watching
Comments
Toyia: This is gorgeous friend! I only ever wear jet black hair but this is phenomenal!!! And Mama Hustler SLAYED your makeup!!! I LOVE the eyes!! And girl there is nothing wrong with adding tracks!!! You do what it do to make that ish look AMAZING and easy for the rest of us beauties to do!!!
#MadeInDesignzSlay: Yeeeen never disappoint. Thank you so much for this DOPE series. I can't wait to buy my wig '&& install it. Yes! It would be my 1st time, but watching you inspires me. Thank you soo soo much again ✅ #Appreciated
Janee Bivins: The way you ate this style up is bananas!!!!!!! You are truly the GOAT‼️
Laneicha: Never disappoint, always slay
SimplyAtia91: Yesssss! You ate this look and didn’t leave no crumbs!
strawberryvines: I miss Mama Hustler She did her thing on the eyes. Hair is
Loveable Gray: HEY SWEETIE YESSSSS THAT HAIR IS BOMB I LOVE IT, WISH I HAD SKILLS LIKE THAT...
L. B: Another slayage, love the colors❤
Jae Insider: This is everything thing, thank you ‼️
Rene Bradley: I love it so creative ❤
Nicole Smith: Freaking love it
Queen Alisha E: Love this look love the color as you know my favorite color is purple I'm over excited about it lately life has been held my mom recently passed I don't know if you remember me you send me some glue and some hair products when you was having the raffle and I called you my hair stylist mom so I've been been watching YouTube videos of you and slayed by Jordan
Raven Brown: That's real pretty
Maryann Pleasant: I love it got to try it
modelchiic17: DAM girl !!!!!! Come through GOAT !!!!!!!
Alisha Shelton: This is just FIRE ........ PERIOD
Zharia Hosea: Beautiful ❤️
ANOINTEDHAIRSOLUTIONS: Love this
Serenity TV: Beautiful ❤
T Henderson: Pretty and that was smart to me just adding the tracks instead of trying to dye it on the wig nice
Sammy Da Goat: Bomb Color Lovely Thumbnail
Johneitha Dunklin: Awesome ❤❤❤❤
T-khara Lawrence: Immediately subscribed causeeee pheww
gzachia: thanks for sharing!
Edna Williams:
Divine Esthetics Skin & Hair: Okay! ✨✨
NemoTheGreat !: Like Dj Khaled ANOTHER ONE PURR EAT THE GURLS RESPECTFULLY PURR
Jackie Bang: ❤
BlackinAction:
David golv: First