How To Make A Wig On A Sewing Machine For Beginners - Look & Learn
- Posted on 20 March, 2022
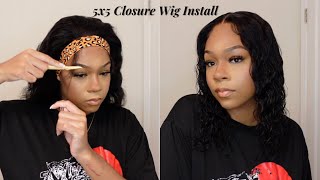
- Lace Closure
- By Anonymous
In this video I show you how I block measurements, sew down a closure, draw weft guidelines and lay down tracks by way of sewing machine. I am a self taught wig artist.
materials mentioned:
-3 bundle deals: https://cynthiaboss.com/collections/vi...
t-pins: https://amzn.to/3emaQ3C
-metallic sharpie: https://amzn.to/3rO08Gh
-pre-wound bobbins: https://amzn.to/3yWV4m0
-smithread large spool polyester thread: https://amzn.to/3CfMAJO
-singer 4423 heavy duty sewing machine: https://amzn.to/3ysvhCY
Grab my personal wig cap vendor here: https://cynthiaboss.com/products/whole...
------------------------------
| S 0 C I A L S |
IG: https://www.instagram.com/cyntheboss | https://www.instagram.com/cynthiabossb...
TWITTER: https://www.twitter.com/cyntheboss
VISIT MY STORE: https://www.cynthiaboss.com
For partnerships: [email protected]
Hey y'all, it's big sand! Thank you for tuning in today, i'm going to show you guys how i make a custom wig from start to finish today, we're going to be using a 23 inch, which is a size large canvas it today, as you can see, there's a lot of extra space In the back of the cap, so all we're going to do is remove this excess mesh and i'm going to show you how i do that so first things, first we're going to take our t-pins and hold the back of the wig in place. Do so now that we have our wig secured on our canvas head, as you can see, i'm just going around and grabbing the excess mesh and i'm folding it over and as i fold it over, i secure it down with the t-pin and when i'm doing this, I make sure that everything is really taut, nice and snug, so everything is just form fitting when i'm going around pinning down the excess mesh. I do this because it makes it easier to sew the mesh down so anywhere. I feel like i need to put a pin down, i'mma put it down there. We have everything pinned down securely and now it's time to sew. So what we're going to do here is we're going to take our thread thread our needle prepare for sewing. Now, when you're sewing the mesh down, you want to make sure that you don't sew through the elastic band. You only want to sew through the mesh material. As you get closer to your t-pins, you can remove that. Pin with this sewing technique, i'm not doing anything. Fancy i'm just doing a standard in and out method. I don't even know if that's what it's really called, but the most basic in and out motion that you use with sewing. That'S all i'm doing here. You don't have to do anything too extravagant here because, like i said, you're going to be sewing over this with the sewing machine anyway, so it's going to be super super secure and that's all there is to this method. You just want to do this all the way around to wherever you have your t-pins on just sew like this all the way around and you're done, and here we have our finished product. Our cap is laying super duper flat. There are no lumps no bumps no gaps, it looks absolutely perfect. This is the key to a flat wig. Your foundation has to be flat. Your foundation has to be clean. This is how you do it so now we're going to go ahead and apply our closure. We have a 4x4 free part and lace closure from the cynthia boss hairline. This is in the texture body wave brazilian body wave. Now, when you're applying a closure, when you are about to lay closure down, you want to make sure the tabs kind of go a little bit past the edge of the cap. So you don't want. Basically, you don't want the hairline to be lined up exactly with the cap. You want the hairline of the closure to be a little bit to go a little bit beyond the cap. The way that i laid out my closures, i put t pins on each side. I pulled the closure, so it's really taut and flat and when i lay it down, it's like it's laying flat all the way around. So if you have your closure laying like that, when you sew it on it's going to be flat here, we have our closure. Is laying nice and flat all the way around so now we're ready to sew it down before i start sewing. I take my alligator clips and just pin back any hair. That'S in my way, so another technique that i use to make sure that my closures are laying super flat is only sewing down one side at a time. I don't sew all the way around. I sew one side to about close to the middle. Then i stop and then i go to the other side and sew the other side down. I find that doing it. This way both sides are sure to be nice and flat. This is just how i've been doing it since i've been making wigs. Even before i started, making wigs on the sewing machine when i was hand sewing wigs. I learned how to lay my closures down this way, and this ensures that the closure doesn't move. It doesn't shift while you're sewing it on one side. So if you sew one side down at a time, this is a great way to make sure that everything lays nice and flat. So so look at this y'all. We got our closure laying so flat, so nice and neat no lumps no bumps no gaps. Nothing now it's time to lay our guidelines for our tricks, draw our guidelines, i'm going to use a metallic sharpie. I got these from amazon when you're drawing guidelines. You want to make the lines about a fingers length or two apart. You don't want to put them too close together, because when you sew on your tracks, this could cause your cap to shrink, because the caps, because the lines are too close - and you don't want to make your line too far apart, because then there would just be The spaces in between the tracks will be too big, and you don't want that. You want everything to be seamless, you don't want to see any gaps or spaces in between the tracks. When i went below so - and i used to draw my guidelines with a tape measure before i just learned how to do it by hand the way y'all see me doing it now, i used to use a tape measure and i started off using. I started off drawing the guidelines about a half inch apart, so the more you practice this, the better you'll get. You won't even have to use a tape measure at some point. Baby. Take a is every time now that we got our guidelines laid we're about to sell these tracks down honey. We got two bundles one, twelve one, fourteen inch of brazilian body wave from our cynthia boss, hair collection and i'll link below where you can shop since we're only using two bundles. Today, i think i'm going to just single these wefts. The shorter webs tend to be fuller and then the way i just knew how to space my guidelines, i know i'ma have enough to single the west, so keep watching check out how i, ladies trucks, the stitching pattern i'm using today is zigzag. I'M using zigzag because, like i said, i only got two bundles today and i tend to use straight stitch when i have when i'm making a wig with three or more bundles, and then it depends on the cap. Size too. I like to use straight stitch when i have a lot of bundles, because it'll give the cap room to stretch because the more bundles you put on a wig, the smaller your cap may be so to just ensure that there's still space for stretching. I like to use straight stitch, but today we are using zigzag. Don'T let it fall on me. Make me feel right. I can't show me something: everybody is i'm already on my way. I'M pulling up, don't be late me for sure. Now, on to the second bundle, i'm going to repeat the exact same process as i did for the first bundle your place is so at this point i ran out of bobbin at the bottom, so i'm going to replace my bobbin with these pre-wound bobbins that i Got from amazon, i will link these in the description box places my place like you do so so to finish off our wig. We are now going to cut the mesh. That'S underneath the lace closure. I always take my sweep time when i'm cutting this mesh off, because i have cut through the lace before and that was not a fun experience, especially the first time i cut the lace. I didn't know how to. I know how to fix that. So i had to figure out how to fix it. I found out how to fix it eventually, so i can also make a video about that, showing y'all how to fix the lace you cut. But what i do is i cut the mesh down in the middle, so i can pull it back away from the lace when i cut - and i also use my finger as a barrier between the lace and the mesh. So i can't cut the lace because the blade is brushing up against my finger now so so that is it. This is how i construct my wigs from start to finish and now i'm just showing you guys just how flat a cynthia boss wig is i'm putting the cap on the canvas head backwards or inside out so y'all can see ain't. No lumps ain't, no bumps ain't! No none of that the foundation here is solid. They are always solid check it out. If y'all have any questions, please feel free to ask me in the dms or in the comment section below if y'all want me to do a video on something specific. Let me know i got you all. I love you all thank y'all for watching. Thank you for subscribing. Thank you for everything, see you guys next time you


Comments
Neicy Jay: Also, my wigs always end up being too big for my clients. I love the way your wigs look nice and neat too. No birds nest! The tip you gave with the sewing the access cap down might help with sizing of the cap as well. And yes, I subscribed. I will be following you girl!
VonOnCurls: Beautiful work!❤
Cynthia K.Christian: Thanks so much Cynthia, God bless you. I am have made wigs by hand and am now getting into wigmaking using a sewing machine and this is so helpful.
Ayemenisan Rebecca: wow this is so beautiful to watch, am about to start how to learn wig making. You just earned a new subscriber
Okere light Chinonso: You are a great stylist indeed Keep it up sister
obiageli okegbo: have been doing wigs for longtime now, but I just learned something new , thanks so much,
LaTanya Chance: I don't even have a wig to make currently but you got me wanting to make one just to try this method ... Good work!!!
BETTY DUNU: I just subscribed to your channel,you teach very well.
devin harrell: Very nice detailed video Thank u for sharing
Lorraine Blake: Hi beautiful wig. What thread do you use and what tension on your sewing machine. Great content. New subscriber. Thanks
Okere light Chinonso: Wow that's awesome
Idy Idy: I’m wondering when you pull the closure forward past the front of the cap, will you be able to see the excess on the sides?
Mari H: Beautiful work. I'm new to your channel. It might already be there, but I need to know how to dye the cap chocolate brown. Your nails are gorgeous. Maybe invest in a clip on mic? I'm an older person and you're soft-spoken. (My hearing isn't what it used to be...)
Patience Ledoumdé: Thank you so much ❤️ ❤️ ❤️ ❤️
BETTY DUNU: Please do a video on how to make lace closures,thanks.
Lokenya Mccorvey: What sz cap did you use?
Mz TR: Tks for sharing this method with us
fola sade: Hello please how can I prevent my wigs from having humps ?
Junius Stroman: Thank you for your time and your patience for teaching us your skill for teaching us to ask you and thank God for you no subscribe
Robbie Diles: I'm sure that you have, but please give the Lord Jesus praise and thanks for your talent because that is very very creative of you I wish you would have tried it on the but that looks really good thanks so much be blessed in the Lord
Thomas Olive: Good day cynthia, pls how do you know the size of a customer’s skull
Tanya Johnson: coming. All wig making. Keep coming all new okay .on all cable company
Nokuthula Khumalo: Can you be my supplier
EMPRESS GIFTY JOHNSON: My dear you wasting too much time on your tutorial, there are too many kind of your style so please do best and beat time thnks