How To Wig Tutorial With Lace Closure (Beginner Friendly)
- Posted on 24 February, 2022
- Lace Closure
- By Anonymous
Closure Wig Construction on Sewing Machine: Learn how to make a 5x5 whip stitched closure unit on a ventilated cap with a sewing machine!
Hey loves! Thank you for stopping by to check out my very first youtube video! In this video, I will show you how I make my closure wigs using a ventilated cap and a sewing machine. If you have any questions leave them down below.
Thanks for watching ❤️
XO Sirleane | Knikolee
Music:
Tropicana x Soundroll
Trendsetter x Mood Maze
D O N ‘ T F O R G E T: ⭐️ Like | ⭐️ Comment | ⭐️ Share
C O N N E C T I O N S:
INSTAGRAM @the.sirleaneknikoleeco
FACEBOOK: The SK Collection
https://www.facebook.com/sirleanekniko...
B U I N E S S I N Q U I R I E S
#howtodoawigforbeginners #wigtutorial #laceclosurewig #laceclosurewigtutorial
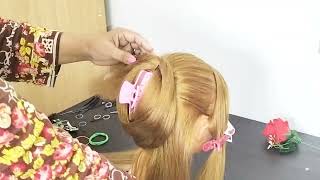
Hi everyone welcome to my youtube channel in today's video i'm going to show you how i construct a closure unit on my sewing machine. I was pretty detailed and up close and personal, so i hope you like it. If you do comment subscribe like and enjoy. Okay, so here i am just prepping my sewing machine. I always like to make sure that before i start any project uh that my thread is good um see all this mess. That'S going on all that. So i like to just do a draw test, run um, making sure my machine doesn't need any fixing before i get started on my wigs, the hair i'll be using to make this wig today comes from a vendor that i'm testing out for my business um. I believe i was sent over 216 inches and a 5x5 closure, so let's get into these bundles. Since i have quite a few bundles, i believe i had three at this time. I like to go ahead and double just one bundle and use that first um. Look how pretty this is turning out, so i feel like if you have open toe pressure foots, it does make it a lot easier to see what you're doing, if you want to get into doubling, tripling quadrupling your wefts. If you buy a sewing machine for the very first time, it doesn't come with an open toe, so if you have like joanne's or amazon, if you go ahead ahead of time and purchase those, it would just save you a lot of time. So real quick, i wanted to show you guys the cap, i used to construct this wig and it was a ventilated cap. I resized it to fit my head and to do that, i used a method called whip stitching instead of using normal thread. I chose this method because i love how flat it gets. The cap, any cap that you choose to do this on and it doesn't make it so bulky from normal thread. I didn't want to talk a lot on this video, but one thing i wanted to point out is notice: how flat the tracks are anytime you're using a sewing machine. You want to make sure your tracks are as flat and neat as possible, going based off your grid lines. When i start my track on the cap, i like to start and place the track at the very edge of the cap, but i don't start sewing at the edge because it can be a little difficult, so i'll start a little bit before the edge and then I'Ll just back stitch to the edge and then continue sewing forward. So, as you can see, i made it to the second bundle um. I can go ahead and let you know now that i did have to take this down and just single track it once i got towards the top um. That is because i simply just ran out of hair, and that is okay, sometimes it you have to improvise, and maybe you want your back to be more fuller than your top, and you really don't want your top to be overly bulky, because one that's why you Have a closure in the first place yeah, i did end up taking it down once i got towards the top and just single tracking the top. The last thing i wanted to point out is on a ventilated cap. You have the straps that are covered by the plastic, so what you see me doing, or have been seeing me doing, is once i get to the strap every single strap. I do back stitch and fourth stitch a few times. The reason why is because majority of it is plastic, so it's not gripping onto anything, so you just want to make sure your wig is, as your tracks on your cap are as secured as possible um just in the middle. So there's no thread that would come loose me again, so you remember when i said that i had to take down the the double tract um at some point at the top. Here we are at the top, and let me also tell you what i did since we're here. So i just by the grace of goodness within me, was thinking. Oh, let me just single stitch this and see how that goes. Yeah. Let'S not do that, and here we are now so i didn't want to make this video too super long for it being my first youtube video yay. I hope i did great um, but i did off camera slow down the closure and i also used the whip stitch method. To do this, i love how flat flat flat it really gets it, and also without the black thread. It'S just a personal preference. Another thing i didn't show was me finishing up the wig, but i do did include some photos of how it turned out. So if you like this video again comment subscribe and definitely tell me what type of videos you would like to see in the future.


Comments
Malcolm Graves: Content!! You are late to the party - Promo-SM !