Lesson Ii: Very Detailed& Beginner Friendly-Pinning Wig Cap & Attaching Lace Closure For Custom Wigs
- Posted on 14 January, 2023
- Lace Closure
- By Anonymous
Straight to the point! I teach you how to select and pin your wig dome cap to your block head based on your measurements. Also, how to correctly attached your lace closure onto your wig cap.
I’m using a 5x5 closure in this tutorial. However, this method works for any size closure.
Let’s learn! Ask any questions below.
Connect with for more tips and DM me your progress!
Instagram: @Wig Genius Training Room
TikTok: @Wig Making for Dummies
Join my private Facebook group: https://www.wgtroom.com/product-page/w...
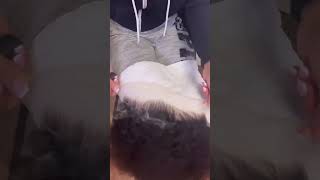
Foreign, okay, so, let's get straight into it after you transfer the measurements. The way I've shown you in lesson, one you need to decide which cap to use for this DIY wig making we are making wigs on the mesh Dome cap Q fit, is a very good brand. Also, I sell Japanese swim caps and I'll save that for another YouTube, video, I'm telling you the differences and when I use them, but for the sake of this video, this is a good brand. If your client is, or yourself is a 23 and up, you want to use an extra large wig cap if they are 22 and a half and Below you use the standard wig cap. Now there are times when I use a standard wig cap for someone. That'S a 23 and that's because they're frontinate and Temple to Temple are what I call shorter measurements. So if you have any questions about measurements or which cap to use, feel free to drop your measurements down below or to ask any questions. So I'm using an extra large because I am a 23 and a half and I'm making a wig for myself, and this is a 23 and a half weight block. When you look at the wig cap for the Q fit brand, one side is going to look like this is starting to connect and the other side is going to be square. This is the back side, so we're going to take the front of this cap and just put it on the wig block, so symmetry matters once you take it out. You just put it on the wig block, trying to keep this in the middle, and I'm just going to bring my cap down to my pan. I like to pin my front first, I'm going to take my T-Pain put it here in the middle. Take this T-Pain drag the cap into the measurement, so this is my temple to Temple measurement. It is starting to show my hairline as you can see, if you have a shorter Temple to Temple, because from lesson one or you remember - I am a 19.. Let'S say if you were a 16 temperature Temple, these t-pains will be further back, probably about right here, turn it around, and then you want to pin the bag. When you pull the back of your cap down, look at these two lines. Try to put it as even as possible. So when I say that I mean from the middle of my block to this line, I am trying to have about the same amount of space. Not you putting the cap on, and it's over here like that, once you've done, that you take your t-pin and you just pin it. This measurement is important. It is the Nate that we transfer take your t-pin, drag it directly up and bring it back into that measurement, push down and lock your t-pin in push down and lock your t-pin in now, when you try this, my nape is very long of 15.. If your nape is a 13, you will be right here. So, instead of pinning your cap here, you will pin at the measurements that you transferred like in lesson one and I'm gon na. Tell you. If you have a 13 front to Nate measurement with a larger head, there is going to be room that you need to remove out of this cap. So, instead of it's being flush, you're going to have extra cap certain measurements, it isn't going to always be flush when it's like that. You need to remove the extra space and I'll link that video down below on how to remove the extra space. And after you pin your cap, this is what it should look like and again this is for my exact measurements. Yours will look a certain way depending on your measurements. The next step is to pin your closure when it's time to pin your closure - and this is from my vendor - number 28 - Vietnamese bone straight hair. So, regardless of what size clothes closure you are using, I always follow this step and that's folding it in half foreign. So to fold it in half I align it, and this crease this fold is what I want to pay attention to right here. So I'm gon na take my little pin and I am going to pin it straight through so that I know where the halfway mark is, and you can mark this as well too for the sake of the video I might just mark it, but you can mark It and you are going to use this line as as a guide, and you don't want to take your pen necessarily and pin it right underneath the cap. Why? Because the hairline is back here - and I do not like to have my pen right next to my hairline, if you are new making wigs, please take this tip if you are using t-pains, which I do use t-pins, do not take your t-pin and put it so Close to this hairline, because sometimes the lace get caught up in the t-pin and it'll rip. So if the lace is going to rip, we want it to rip somewhere right up in this area. Tension is so important when you are um. Attaching your lace closure to your wig cap, so I'm going to bring it down again stand on this dotted line and I'm gon na just pin it in you. Do not need this pen so I'll always move this pin because my measurements are coming in like this. I'M going to leave these pins here for right now, but I do not leave these pins here whenever I am pinning my actual lace, closure down and I'll show you so now look at the hairline. You want the hairline to be below the cap right here. This is a good amount of space right here, so, if I'm looking, I have about a t-pin length. Just this part of the T-Pain is a good amount of space. If you need a guide of how much your hairline should be below the cap now my measurements are challenging because I have a longer Temple to Temple. You are going to need several more pen t-pins when you are doing this so be prepared, and now that I have it here, I am going to remove these t-pains and, as you can see, the cap shifted a little bit, but I'm not really concerned about that. Just a tiny bit, it doesn't make a difference when you're making custom wigs. When I apply it, it's still going to be where I need it to be for my temple to Temple area. So once you have it here, you have tension. What I like to do is take another T-Pain and apply it right here without pushing it all the way in I am pressing. I am pulling this back gently without ripping it and pulling too much, but at the same time I'm putting enough tension and I'm gon na pull outward. When I pull outward. I take this T-Pain and I stretch it to pin right here, and that is where I want my placement. So if you can see, you always want to leave a little bit of hair off the side of the cap on your lace closure. Then, if you want to to keep it from shifting, you can take your t-pin and place it. You do not have to put all of these tea plants in here, but this is a very beginner friendly way of doing it, because we do not want this lace. Closure to shield - and you see I, the key - is I'm keeping tension, I'm applying pressure with this hand and I'm pulling out, so you have to have a way to gain control over your lace closure doing this step. It helps so because I'm pulling it, you see how it's starting to rip. This lace is very thin, so I'm pulling it and I am barely putting it in and I'm gon na come back and put a t-pin here. Now it's not right or wrong. If you wanted to, you can take another T-Pain and put it here if you feel like you need it, I'm very heavy-handed now once you've done, that you see how I release the tension is coming down, but that's fine, because when we pinned the back, it's going To go back where I want my lace closure to be, and if you do what I told you by trying to find the middle of the closure, it's always going to be, even even if it doesn't look visually um, even just trust the process, if it's, if It looks too uneven and then go back and check to make sure that you are in the middle now once you have it like that, I am going to turn it around so that you can see. So you want to use a clip to keep the hair out of the way I'm not worried about the front, because it's pinned without shifting an easy way to do. This is to pull back. So I am finding the corners of my lace closure. If you look here here are the corners, you are going to need two pink two t-pins for this. I like to find the corners and pull directly back, ensure that each side is going to be flush. You can use a duct clip, keep it out of the way, so here's one way of doing it, you can most definitely take this pen. Pin it here, come here and paint it here, ensuring it's enough tension, take another t-pin and put it in the middle. Okay. Now this would be flush enough for us to sew it out. What I like to do is after I've identified my corners, I place a T-Pain in I place another T-Pain, the corn is over here and I picked them up and with even tension. I pulled back put my t-pins in my block and when you do that, you want to make sure that you can lock it in and I lock it in and, as you can see it's flat, it's flush on this side. It'S flushed on this side and I am going to turn it around so that you can see that it's flush on this side as well. So once you have your closure pinned down, you want to hand sew or hand Stitch the closure onto the wig cap, but before you do that, you need this hair out of your way, whether you put it in a ball corn rolled it. Down put it in the Plaid for the sake of this video, it's going to ball it up. Okay, that knot didn't go too well use a clip and clip it out of my way. If you need to you, can have your duct clip. So if I'm sewing on this side, I can pin here if I need to, I can pin it in the back. Let me just put this pan here and when you get ready to sew, you want to start at the very tip and you can sew all the way around once you have it pinned with enough tension now, sometimes, if you're, just only using the ball pins, to Pin this down it doesn't, in my opinion, it doesn't give enough tension. Sometimes, when you're pinning it down certain closures, do certain closures don't another way to sew. Your closure, which I do do a lot as well, is to start from the middle here and you're going to sew this way and then you're going to come here, start from The Middle and then sew this way, so no right or wrong. It'S a preference before when we started making wigs and like when we were putting closures sewing closures as a sew-in. You always wanted to start from the middle because you wanted that tension to pull out to pull on both sides, but it's whatever works for you. There'S no right or wrong when I teach I like to teach different techniques now this is a needle, and this is thread I already have this pre-threaded, but if you do not know how to thread your needle, I will show you. I have a needle here and thread you can find this at your local beauty supply store. You want to take your thread and put it through the eye of the needle this little hole I like to have when you are threading, you don't want it too short. One way is like arm lymph because you don't want to run out of thread and go back in if you're going to start from one end and go all the way around. If you are starting from the middle and coming this way and then coming on the middle and going the other way, your thread doesn't need to be as long and you are going to thread two needles. So we just cut this thread off and when you get to the end, you are going to tie a knot. There are many different ways to tie a knot for the sake of this closure. One works you can come here and tie it like a regular knot. I do tend to take my needle and tie it that way, but for this video I'm going to show you, you just put a little knot and that's it so now that we have our needle threaded, we are going to sew when you are sewing. It does not matter if you sew up or if you sew down so this is sewing up, keep control of your thread, so it doesn't tangle or not up. If it does try to untangle it. If it cannot untangle, you want to knot it off and then re-thread and another needle and then keep going rethread the same needle, so I'm sewing up and I'm pulling with enough tension now, if you notice how I am sewing, if you look right here, what I Am doing is sewing on this part of the closure right here and I am sewing in the middle right here. If your closure doesn't look like this right here and it's let's say it just has it just plain lace, so it doesn't have that extra fold right here. You want to sew the way I'm sewing still now. A one way is to sew down. If you sew down, then you are going like this and, as you can see, when you sew down - and I am going through the actual rubber band here when you sew down, you can see your thread right here when I sew a closure on again. It'S not right or wrong to sew up or down. However, I like to sew down, because when I'm sewing down, I have more room to continue to pull the closure outward and create more tension. When I start off, I always start up just so that they're not cannot be on top of the closure. Another thing you need to know when you're sewing your closure is spacing. Do you see how much spacing I have in this Stitch to this Stitch? So you do not need them super close and you do not want them too gappy. So I'm not going to be right here and then come all the way over here to start my next Stitch and I'm not going to start my knit stitch right here. Super close, so let me put a few stitches in so that you can see. So this is a good amount of space and when I take the t-pin, it's a little less than this t-pin and if you soak really well the more you do, even if you had a T-Pain space, it would be okay. But I always sew like this right here now: another step that I'm doing when i'm sewing. If you watch when I sew this is my thread I am sewing down. I am looping my thread as I sew, so it's natural for me. So let's say if I was to just put the thread in and pull right: I'm gon na do that again, so you can see I'm gon na put the needle in and I'm not going to Loop it. So I'm not taking the thread and making sure my needle is coming through the loop, so the thread is on this side of the needle and I'm just pulling it out. I do not like to sew my lace closures on like this. If you do it, you can still make a good wig, but I highly advise you to go over it with your sewing machine regardless. I'M gon na go over it with my sewing machine, but you see how it looks right here. It doesn't look as clean as this right here, so try your best to so and loop to create that extra security in your Stitch. So, for me, the way I'm holding my thread already allows and again it's tension here me too just pull it and create the loop. The more you do, this, the better you become again anything that you need help with. I do not mind doing virtual classes just feel free to send me an email and I'll. Let you know how you can book without having to take a full class, and then you just continue to sew all the way around. I sew around that T-Pain without moving it. So you see I'm taking the thread under the T-Pain and as I go, I'm not going on top I'm going under the T-Pain and then I am going to sew again trying to stay right here on the lace closure and that's it. So we just keep sewing the same way and again, let me show you that, as I'm sewing, I wouldn't just keep going, I'm making sure I Loop my thread. Another thing: sometimes we pin down the closures and you find yourself keep going through the wig block. If you are going through the wig block, like this, a way to avoid that is to gently, as you are putting your needle in the lace, closure and wig cap pull up a little bit, because it's going to take the cap off of the wig block and Help prevent you from sewing into the wig block and if you do so into the wig block, when you get ready to remove your wig cap, you will know it's fine, just cut it off. You see how I lost control here and it almost Tangled Up or created or not so I'm gon na just keep sewing when I get here. I might need to turn this T-Pain this way. So again, I'm at another T-Pain. I am going to sew around it. I can't get it to go under by moving, so I left the T-Pain up a little bit and I keep sewing and you are going to follow this technique all the way around. Once you get to the end right, I come up and I nod it off. So I come through the lace closure and I create a knot, one knot and that's it and I tighten it down and, as you can see, my lace closure is still hanging off and that's it. It really doesn't matter when you do it, but make sure you cut it off and, as you can see as I remove my t-pins releasing tension and my closure is still in place now. The next step is to draw your guidelines.


Comments
Dee Versatility: Great Info!
RainLoft: ❤