How To Make Your Own Handmade Lace Closure Wig Unit | Detailed | Zina Dolls Hair Collection
- Posted on 11 January, 2019
- Lace Closure
- By Anonymous
please watch in 1080p :)
I DO NOT OWN THE RIGHTS TO ANY OF THIS MUSIC!!!!!
This is a super easy beginner friendly closure wig construction tutorial. this video will guide you through each step into creating a beautiful wig!
I used a 4x4 closure and 3 bundles 16" straight hair provided from Zina Dolls Hair Collection on Instagram.
https://www.zinadollshaircollection.co...
https://www.instagram.com/zinadollshai...
Instagram: k.nani / knanilauoho
https://www.instagram.com/k.nani/
https://www.instagram.com/knanilauoho/...
items mentioned:
Clairol bleach powder https://www.bedbathandbeyond.com/store...
Clairol creme developer https://www.houseofbeautyworld.com/clp...
She Is Bomb Wax Stick https://www.walmart.com/ip/She-Is-Bomb...
Biosilk Therapy Oil https://www.ulta.com/silk-therapy-orig...
Hot comb https://www.houseofbeautyworld.com/ant...
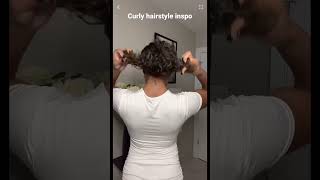
Hello, all my lovely sunflowers today I'll be showing you guys how to make a handmade closure unit super easy. So, if you'd like to see how stay tuned, the hair I'll be using today is Susanna dolls, hair collection on instagram. Here I have three bundles of 16 inches, all straight and a 4 by 4 14 inch closure, and here I'm just showing you the packaging and equality which is really really good and their prices are extremely affordable. So if you're interested I'll have their Instagram link in my description box below the first thing, we need to do in order to make our wig is bleach our nuts. So here I have some powder and I'm only using 2 scoops of it, because I only have a closure as far as my developer, I'm only using 30 developer, because it's a lace and you don't want to get too brassy or you don't want to bleach too Fast and I'm not going to use that much because it's supposed to have the consistency as toothpaste, so yeah you're, just gon na put some in and mix it mix it mix it until it's all mixed in together, like you see me doing, make sure was a Little too thick, so I'm gon na have to use a smidge, more developer and mix that in there and it's gon na be perfect. Now I'm gon na spread it like some butter and I'm not gon na, like press into the lace, I'm just gon na spread. It nice and smooth and make sure my whole lace is covered and sometimes well, I'm not you gon na see, sometimes because all the time I like to go a little bit above the lace or the front of the lace. I don't know why. Just because I don't know so, you don't have to do it, but you see me doing once you're done with that you're just gon na. Let it sit for about you, know: 25, maybe 30 minutes and off-camera. I wash my closure with shimmer lights, both the shampoo and conditioner, which helps get the brassiness out and now we're gon na go and super lucky here. You'Ll see me parting off about half an inch, maybe an inch or so, and I'm gon na start from where I parted and just while plucking you want to keep in mind not to stay in the same area, because you will pluck a hole and see your Lace and then you're screwed, so you see me moving back and forth with the tweezers, no specific area and there's literally no specific way to do it just and don't over pluck but like pluck, like I said, you'll see me working my way from that area, where I first parted and working my way to the front of the lace and you're just gon na keep following the same steps until you get all the way to the front and then pluck the areas where you feel you need to pluck a little more. I finally made my way to the front - and here I'm just going in the areas where I feel has a little bit too much hair for me, so I'm just going in and plucking that, so I can look a little bit more realistic. Now we're moving on, to wit, construction, placing down your closure. You want to make sure your lace is a little above the dome cap and then you're gon na pin it down and you're gon na make sure that it's extremely flat with no bumps no space in it. So when you're ready to sew the closure down, it'll be sewn down flat, sewing down the closure, be sure to not sow into the spandex but into the actual cap and you'll. See me starting from the front - and I am not the first one and then the next one I'll just sew in and try to keep a neat and steady pattern and work my way all the way to the middle and what I did to one side. I'M just gon na mimic those same steps and do it to the other sewing down your first track. You never want to sew on that bottom part. You'Re, always so over it, like you'll, see me placing my track down, that's exactly where I'm so. I won't show on that bottom part. I don't know why, but I took class and somebody told me that so that's what I don't and just like, I said, for a closure. You want to keep in mind to not so through the spandex but through the cap and to help me if you need some type of guide, you'll take a white eyeliner. I think this is like the highlight pencil and you'll just mark up where your tracks will be placed, and this is how I place my tracks with a cold. You can totally skip this step if you feel like you got it like that, but this is a beginner family video. So I advise you to mark up the places where you'll be sewing down your tracks, because it just makes it things a lot easier when I'm sewing my tracks down on a wig. I first like to sew through my weft first to lock it in and then make sure I keep a steady and consistent stitch until everything is completely sold down. Like you'll, see me doing you see how helpful these lines are. They'Re literally making things a lot easier for me, but I'm just placing my track down, pinning it down and I'm gon na cut off what I don't need and I'm gon na start sewing remember to first so through your weft and not into the spandex. But through the cap - and you don't want to sew through the lace closure either you just want to get really really close by it and lock. It then keep a steady and consistent stitch until you're all done once you get here. You won't have to curb your tracks in a u-shape and you'll just show them straight across, so it gets really really easy. You'Ll be doing the same exact steps, but you'll be sewing. It straight across now we're down to our very last track, and here you want to sew as close as you can, to the lace closure, but do not turn through the lace closure, because it will be very lumpy and not natural. So you'll do the same exact steps that we've been doing but really close to the lace closure. Not through it. I don't know if y'all noticed, but that stitch is very, very nice and I'm just gon na cut off the excess cap underneath the lace closure, because we don't need that. I'M going in with my shoes bomb wax stick and my hot comb just to press out this closure to get it flat, because it's not cute right now and you're, just gon na do that until it's really really really really flat going in with some biosilk oil. I'M just going to put it through the hair and I'm just going to go through with my flat iron and press it out a bit because it's not cute right now and this isn't the flat iron I usually use to flower. This is like the one I used to curl, but this is what I had hot at the moment. Did it feel like grabbing the other one, but my girlfriend is done. She is cute as far as styling. You could leave it like this. You could curl it blunt it whatever, but here's. My final look cute very wise, like I really really hope this video was helpful and yeah I'll see you next time. Bye.


Comments
Leondra Nicole: Beautiful
katuraa Kay: Yessssss Cousiiiinnnnnnn ❤️