Tips On How To Make A Lace Closure Wig (For Beginners) | Mshere Deep Curly | Michelle Iyere
- Posted on 10 March, 2019
- Lace Closure
- By Anonymous
Hey beauties!
This is part 2 of how I made my lace closure wig for beginners l. These are mainly tips that I wanted to share with you guys, especially if you’re new to making a wig. If you haven’t check out part 1 to see how I customized this lace closure. Don’t forget to like, comment, share, subscribe! Muah!!
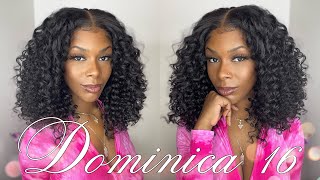
Hair: MsHere Aliexpress Deep Curly (2-26’, 2-24’, and a 20’ free part closure)
This video is not sponsored!
#howtomakelaceclosurewig #deepcurlyhair #beginnerwig
Stay connected :)
Twitter: @e_mcmxcvii
IG: @e.mcmxcvii
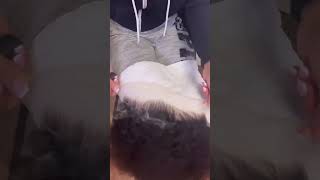
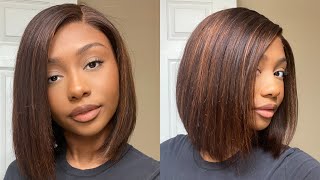
Hey beauties welcome back to my channel and, if you're new hello, please do not forget to subscribe and check out more of my videos and stay tuned with me on my socials. So this is just part two of how I make my wig and if you want to see more than please keep watching a good set for beginners. Making a wig is to make sure that the lines on the wig cap is aligned with the mannequin head lines. So that whenever you place your closure, it'll be aligned in or centered that mentioned in part one of my wig series. This is a free part closure, so I'm gon na treat it like a frontal and move the closure a little bit past the wig cap. So I didn't put it directly with the wig cap. I put it a little bit over it and I'm just gon na use my t pins and align my closure with the lines on the wig cap, so that I can make sure it's Center now too. So the closure I'm gon na take my needle and I'm gon na sew the size of our closure and go on top of the wig cap. Hopefully you guys can see exactly what I'm doing. I'M just gon na take my needle and go on top of the wig cap, and I'm only gon na do this close to where this elastic beam is like that little inch of elastic band that you see on the wig cap. That'S what I'm going through! But when I get further down past that elastic cap, I'm gon na actually go through the cap, but you guys will see what I'm talking about. So I sped up the video just to save time, but I must assume in and show you guys exactly how I did it. I'M gon na take my needle, so my closure, through the cap, separate the thread and so the needle through that thread, and that creates a knot which will make the closure secure on the cap and I'm just gon na. Do that all throughout my closure. But what I did for the first side is: I cut off that leftover thread and I just created about three to five knots to make you very very secure and just continue sewing the rest of the closure get easier to sew on your tracks. They'Ll be best. If you use T pins and attached it to your mannequin head that way as you're sewing, nothing will move and it'll stay in the place that you want it to be. I used four bundles of hair, so in order for me to get all four bundles and I made sure that I didn't space it too much and for the first bundle I sold most of it on to the elastic band, not all of it they're. Just probably the first two tracks when you're at the very edge of your wig, you want to make sure you soak through the track and then go through the wig cap, and the reason you want to sew through the track is so that when you flip your Wig over you won't have any spaces, it'll just be it'll, be there. I hope that makes sense. We continue sewing my tracks onto my wig cap in AU shape form and when I get to about the middle of my head, I'm gon na stop going in a u-shape for him and I'm gon na change. The way I store my wig so just stay tuned for that I did use the flip-over method for most of my tracks. I only cut it towards the very top. Hopefully you guys can get a glimpse of how I'm doing it by just paying attention. I can't really explain exactly how I did this little method, but I did try my best to show it in this video weii. If you do want to make a knot with your thread, just wrap it around your finger, rub it and then pull a little bit, and you should have a knot all right so now we're towards the middle of the week app. So, instead of me consuming to so my trucks on in a u-shaped form, because clearly, there's not enough space right there for me to keep going so I'm gon na change the way I saw it by going straight across the way cap and though I'm sawing my Track straight across, I'm still making sure I'm using the flip over method, because I do not want to cut my tracks. I only cut my tracks towards the front and I will show that hard. So I decided to cut my tracks, and the leftover is what I use to fill in the rest of the space of the week. I remember when you're first, starting with the new track, always go through the track. First, before you start sewing, because that will ensure that your track stay in place and you don't have them a space left, then you can go ahead and saw your tracks through your closure. So everything can be in place to die. Making your wig you're gon na cut off the wig cap, that is, underneath the closure, make sure you're cutting around the closure, because, if you cut too close to the thread, the whole thing is just gon na fall apart. I love the way this week turned out. I was truly happy with it. This is my second time making a wig. So if I can do it, you can do it too. Please, please, please don't forget to subscribe to my channel and thank you guys so much for your love and support. Yeah I'll see you guys my next video

Comments
N E: I do my wigs the same exact way ! Your Unit came out perfect
Michelle Iyere: Hey beauties! Check out part 1 to see how I customized this lace closure. Let me know down below if there’s anything y’all want to see and I’ll make it happen! Thank y’all for the love and don’t forget to subscribe!
Mutayo Ekiye: Love the wig you made!! You have skills!!
BUKKYLOVES: Yess I’m gonna try to make my own wig using ur method
Joshua Ashley: You did that!!!