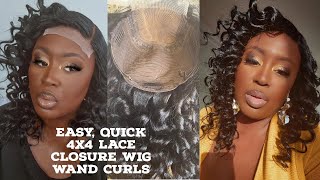
Part 1 : Bleaching And Plucking Lace Closure | Quick & Easy Method
- Posted on 25 April, 2020
- Lace Closure
- By Anonymous
Here’s a easy detailed tutorial of me bleaching and plucking a lace closure. This video is part 1/2, Part 2 of the video will be a side part wig construction! Comment below more videos you’d like to see :)
THINGS YOU’LL NEED:
Canvas head
Butter knife
Spray bottle
Quick blue bleaching powder
40 Volume Developer
Tweezer
Comb
CLICK THE LINK BELOW TO WATCH MY LATEST VIDEOS & OTHER VIDEOS YOU MAY LOVE!⬇️⬇️⬇️
https://m.youtube.com/channel/UCRH3BNw...
Instagram:
Business acct | https://www.instagram.com/slayedbyduca...
Person acct | https://www.instagram.com/felicia.duca...
Snap: felicia.ducasse
Email: [email protected]
LIKE, COMMENT, & SUBSCRIBE!
Comment below videos you’d like to see next!
#feliciaducasse #bleachingandplucking #closure #hdlace #hdclosure #slayedbyducasse
Today, I'll be showing you guys how to reach your nods and pluck your Koji, this will be a part one of two videos in part, one I'll be showing you guys how to each enclosure and plug the mods and, in part two I'll be using the same. That closure to make a wig, so this is the closure that I'll be using it's a 5 by 5 HD potion 16 inches. As you can see, the knots on this lace is very small, so it won't be hard to reach these items that you'll be needing to boot. Your closure using powder you'll, need a bowl to mix the powder and developer in, and I've got a knife and your 40 volume developer you'll also need a spray bottle. Keep watching and you're gon na see why so first you're gon na take one scoop of the bleaching powder and place it in the mixing bowl I'll be eating more than hoser sides. They go back for another school now, you're gon na take the 40 volume developer and place it in the bowl. You don't want to put too much because then you have to add bleaching powder to balance it out. I always put a little bit in that first and then go back and add if I feel like it's needed when you're mixing both the bleaching powder and the developer together, you want to make sure that you get everything as I was mixing. I realized that it was too thick, so I went back and added more developer, so it can be not as thick as it is now. Your mixer shouldn't be too thick or too liquidy to come out just like this. This is where you'll be needing the spray bottle. So when I use this red bottle and spray on the top of the closure to push back the baby ears, we don't want any bleach to catch them. Now. We'Re gon na begin to apply the mixture on the back of the closure when you're applying the reach to the back to the close you, you want to make sure that you're not being wood, because you don't want any of the beach seeping through the closure. You only want the bleach to be on the knocks of the closure if it ends up being all more than your cause, your world of reach right here, I'm showing you guys what the front of the. So you should look like when you finish applying the bleach. As you can see, the bleach is only on the knobs of the printer. I do not touch the hair now, I'm showing you guys the results of the beach being on the closure for about 15 to 20 minutes. As you can see not so I already started to change colors, but not everywhere on the closure is not screeched, so I did leave the culture to bleach for about 10 to 15 more minutes. Now I'm showing you guys what the closure looks like after the bleach has been left on for 30 to 35 minutes. The parts of the closure that wasn't reached before are now Beach. All of the knots and closures are still not bleached, but I was able to catch most of them, so I did wash it out after this, even though this closure knots were being bleached for 30 minutes. That doesn't mean that your closure will preach for 30 minutes. Every closure is different and the knots do not bleach the same. This is what the closure looks like after I washed off all the bleach continue watching and I'm gon na show you guys what the poster looks like when it's party, then we're gon na start with the plucking so Tupac. The Closer you're gon na need a canvas hand and you're gon na need. T-Pins, don't want to hold you down when you're plugging the closure you're going to need a spray bottle for the way that I'm making it'll be a side part song. Let me use my tail comb and part off the side if you're plucking your closure for little thing, you should part your closure to the middle I'm doing this because I don't want to pluck in the area I'm going to start with the plucking on this side, Because my closure is already free plug, I let me down, like I parted out the final closure, because I don't want to pluck where your hair is already creep up. I want to focus on where most of the air is you're, going to use your spray bottle and spray where you're about to pluck when the hair is wet. It makes it easier to see what you're plucking you're gon na use the slanted Potter your tweezer and start pulling the hair out from the leaves. You want to make sure that you're pulling directly from the leech. Because, if you don't, you start to see little pieces of the hair sticking out we're gon na use a tow home and part out the part that you already when you feel as if the hair starts to get drawn. You use your spray bottle to spray. The hair, when you're finished plucking your clothes, you're gon na push all the hair back to see if it needs more plucking. If it does, then you can go back in and start plucking. This is what one side of the potion looks like after it's been clubbed. As you can see. I didn't pluck that much, but you can tell the difference now. I'M going to use my spray bottle and start plucking. The other side, you're gon na, follow the same steps and it should come out like the first side you. This is the outcome of the closure. When it's finished reading club, I use this spray bottle and spray the hair, so you guys can see clearly what the hairline looks like after it's been flow, continue watching to see more videos of the closure closed off. Remember this is the part 1 of 2 videos. So watch part 2 to see how I use this closure to make a side part way on the left is a picture of the wig that I made using this closure remember to Like comment and subscribe and comment below videos you'd like to see thanks for watching You


Comments
Josephine Edu: Just liked and subscribed! Keep these hair and wig making videos coming sis!!
Chanell Mayes: How long did you leave the bleach on
Tiesha Collins: Hey. Does your bleach and powder tend to puff up ? Mines does which sometimes will bleach the hair
abby parker: Informative !
Jo Milani: Yass I needed this ❗️
Valeria Maria: Tem como traduzir em português
Babyshay: How long did u leave the bleach x
Funmilayo Ojo: Thank you why did u use a 40 volume developer instead of a 20 ?
Deborah Dimelu: Your almost at 1k!!!!! I’m a huge fannn
Lee Walker: do you wash it out w reg shampoo or purple shampoo
Hilary B.: You’re so talented!!
tackony love: Hey where did you get your HD closure ?
Fiona Stephenson: Can you do a lemonade braids tutorial
Valeria Maria: Como faz está parde do cabelos