Best 4X4 Silky Straight Lace Closure Wig | Low Hairline Installation | Isee Hair | Missuniquebeautii
- Posted on 08 March, 2021
- Lace Closure
- By Anonymous
#iseehair #lowhairline #laceclosurewig
●▬▬▬▬▬▬▬▬▬#ISEEHAIRWIG▬▬▬▬▬▬▬▬●
●Best hair for best u➤ ➤UP TO 85% off for ISEE Spring Sale NOW!!
★Direct Link➤ ➤https://s.click.aliexpress.com/e/_pRR8...
●Hot Sale/Same➤➤https://s.click.aliexpress.com/e/_pwgo...
●Our store➤➤https://s.click.aliexpress.com/e/_pzPn...
●Our New store➤➤https://www.aliexpress.com/store/91112...
Attention: We provide the best hair and after-sale customer services for you,no matter you like or dislike it, any problem plz contact us first , we will do our best to help you!
●▬▬▬▬▬▬▬▬▬social info▬▬▬▬▬▬▬▬●
Follow us
YouTuBe➤➤https://bit.ly/30MB9n4
IG➤➤ https://www.instagram.com/iseehair.joa... & https://www.instagram.com/iseehair_ali...
Twitter➤➤https://twitter.com/iseehairstore/with...
Like ISEE hair? click with➤#ISEEHAIRALIEXPRESSS #ISEEHAIRWIG
Want to promoter ISEE hair? contact with➤ [email protected]
Whatsapp(WHOLESALE)➤ +8613469246255
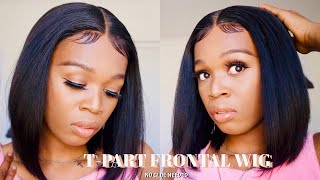
BEST 4X4 Silky Straight Lace Closure Wig | Low Hairline Installation | ISEE Hair | MissUniqueBeautii
In this video, I was able to show you guys exactly how I install a lace closure wig with my low hairline. Having a low hairline means that your hairline begins less than 1 inch away from your eyebrows. A lot of people struggle with this and have no idea how to lay their closure wigs. Like this video, share it with your friends and family, and don't forget to subscribe to my channel to be notified of my future uploads.
Follow Me On Instagram@: https://www.instagram.com/missuniquebe...
Follow My Business Instagram@: https://www.instagram.com/missuniquebe...
Shop My Website https://pressedbymissuniquebeautii.com...
Discount Code: YouTube25 for 25% off the Entire Website!
Shop for your favorite beauty essentials! Press-on Nails, Lip Gloss, Mink Eyelashes & MORE!
I also make and sell Headband Wigs, Half Wigs (without the headband) Lace Closure Wigs, Frontal Wigs, & Drawstring Ponytails. If you are interested in having me make a wig or drawstring ponytail for you, please send me an email at [email protected]. SERIOUS INQUIRIES ONLY!
Products Used:
Got 2beGlued High Insta Hold Hairspray
https://www.amazon.com/gp/product/B082...
Nairobi Foaming Mousse
https://www.amazon.com/gp/product/B003...
Style Factor Edge Booster Wax Stick https://www.amazon.com/gp/product/B07J...
Hot Comb https://www.amazon.com/gp/product/B001...
Blow Dryer https://www.amazon.com/gp/product/B00I...
Lace Tint Spray https://www.amazon.com/gp/product/B07Y...
Snipping Scissors
https://www.amazon.com/gp/product/B01J...
Equipment Used:
Cannon SL2 https://www.amazon.com/gp/product/B071...
Neewer Back Drop Kit https://www.amazon.com/gp/product/B07P...
Ring Light https://www.amazon.com/gp/product/B08D...
Rose Gold Backdrop https://www.amazon.com/gp/product/B01C...
So hey my beauties: it's miss unique beauty in the building and i'm back with another video. If you are new to my channel tap that subscribe button so that you won't miss out on any of my new uploads and if you have already subscribed, what's good. What'S poppin welcome back to my channel, the hair in today's video was sent to me by a company called icy hair and i'm gon na do a quick unboxing so that you guys can see exactly what the hair will look like when it comes now inside the Box will be the wig. You also will get a pair of lashes, a wig cap and a thank you card, which also has all of their contact information on the back. They were kind enough to send me their 24 inch straight 4x4 lace, closure wig. Now i'm going to go ahead and un-package the wig so that you guys can see exactly what it's looking like. This wig does come really nicely secured in the box and on the inside of this wig it does have four combs and an adjustable strap. Now i really love the cap construction of this wig. It'S absolutely amazing. One thing that i will be doing is: i will go ahead and tint the lace just to make it match more with my skin tone. The hair on this wig is super silky, very flowy, and very soft to the touch. Now i'm going to begin with prepping my hair to install the wig. Now, as you guys know, i do have an extremely low hairline. So when i install my wigs the way i can get my wigs to look, the most natural on me is to install them right behind my hairline. So i do go ahead and leave some of my hair out along my edges. Just to make the wig blend a lot more for me in the front section of my head now, if i were to put the wig right in front of my hairline, i will not have any forehead and the wig will not lay naturally onto my head. So that's the reason why i like to put the wig right behind my hairline. Now i'm going to go ahead and apply a wig cap to my head and this wig cap will serve as a barrier underneath the wig. It will also help your wig not to move, and it does a great job at keeping your hair, nice and flat and secure underneath the wig. Now, once i finish getting my cap all positioned, exactly where i want it to be on my head, i am going to go in with some hairspray to tack this cap down to my head. The hairspray that i will be using is the got to be glued insta hold hairspray, and this hairspray dries extremely fast, and with this hairspray, your wig, your cap, nothing, is moving. I absolutely love this hairspray when i'm tacking my wigs down. Now i'm going to go ahead and use my blow dryer just to dry, this very, very dry. You do not want it to be wet. You want to make sure that you dry it all the way and then we're going to continue with applying the wig. Now i'm going to go ahead and apply the wig just to make sure that the wig will be able to sit right exactly where i want it. In the front section of my head now before i go ahead and fully apply the wig, i am going to go in with my lace, tint spray and this spray. I did go ahead and get from my local beauty supply store in the color, medium brown, and i'm just going to spray this on the lace area of the wig. Then i'm going to go ahead and cut the extra lace off of the front section of the wig. This is what the lace is looking like after i went ahead and sprayed the lace, tint spray onto the wig and cut the lace off of the front section of the wig. Now i'm just going to go ahead and position the wig directly behind my hairline and i'm going to meet it with the hair that i left out in the front section of my head. That'S where i will get the most natural look for this wig now, once i've gotten the wig positioned, exactly where i want it, i'm going to go ahead and snip away the edge parts of the lace closure and you guys will see exactly what i'm talking about In a second because i can still see them in the front, and i don't want to see that so i'm just going to go ahead and snip them away and once i've done that, i'm going to go ahead and use my got to be glued insta hold Hairspray again to tack down the front section of this wig. Now, when i am using this hairspray, i am going to be very generous with the spray, because i want to make sure that the front section of this wig is tacked down completely and will not move during styling or throughout the wear of this wig. Now it is okay if some of the hairspray gets on your edges, because once we go ahead and apply some mousse, it will loosen up your edges a little bit and will allow you to style your edges as you please. So now that i've done spraying the hairspray i'm going to go ahead and use my blow dryer just to speed up the drying process and make sure the front section of this wig is completely tacked down and dry. Now that this wig is nice and secure. On my head, i'm gon na go ahead and define my middle part and get the top section of this wig looking as natural as possible. Now that i've gotten my middle part, all nice and defined, i am gon na, go in with my style factor edge. Booster wax stick and i'm gon na use this to lay down those flyaways in the front section of my head and then i'm gon na go ahead and use my hot comb just to flatten out the entire top section of this wig. I am being pretty generous with this wax stick, because i want the top section of this wig to lay down as flat as possible. Now i'm going to go ahead and use my hot comb on the highest setting to lay the top section of this wig nice and flat. Now this hot comb i did purchase from amazon, i think it was about 20 or 25 dollars for this hot home super affordable, and it does exactly what i needed to do. I do want to quickly mention that it's really important to use a wax stick when hot combing the front section of your wigs, because it does a great job at keeping the top section really really flat and the wax stick also gives your hair a nice natural Shine now i'm going to go ahead and use just a little bit of the nairobi foaming mousse, just to lay down any flyaways that i see at the top section of the wig and what i mean just a little bit. You only need just a little bit to lay down those flyaways now, once i've gotten the parting and everything nice and flat and defined at the top section of my head, i am going to go ahead and work on my baby hairs in the front section of This wig now i did not take any baby hairs from the wig. When laying my hair, all i did was use my natural hair as baby hairs in the front section of my head. Now all i'm doing is using that nairobi, foamy mousse to sculpt out my baby hairs. Now. The reason why i'm not using any pomade or any gel is because, when i spray the front section of my head, it already has hairspray there. So by me just adding the foamy mousse it reactivated the hairspray and that's what will keep my edges, nice and laid and looking sleek in the front section of my head now, once i'm done, laying my baby hair, this style is pretty much complete. I am going to go in with my blow dryer just to blow dry the front section of my head just a little bit more and we're pretty much done. This wig already comes nice and sleek and straight for you in the box. So, there's really no need to go ahead and re-flat iron, the wig. All you have to do is go ahead and just comb the wig out and it's nice and styled and ready to go so now i'm gon na go ahead and get up close and personal. So that you guys can see how the lace is looking in the front section of my head, the wig does reach right below my bust and it does fall below my brush strap in the back section of my head. Now i am going to go ahead and show you guys my slow-mo, so that you guys can see the texture and movement of this wig. In this video. I was able to show you guys how to install your ic hair 4x4 lace closure straight wig. If you have a low hairline, just like i do, i will go ahead and leave the link to this hair in the description box below so that you guys can go ahead and check it out. I really hope that you guys enjoyed this video comment down below any questions that you may have like this video and don't forget to subscribe bye. My beauties you

Comments
Virgil Lopez: seems like a great tutorial, thank you
Hilda Shaw: wow that looks so good on you!
Hot Mama Brown: Love it
Yesenia Ramos: Beautiful
Joe Murray: where do you get your wigs
Mattie Sanders: that wig looks good
Melinda Richardson: subbed for more