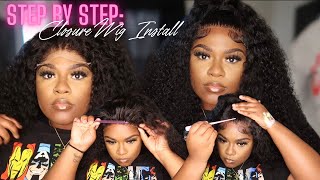
Make A Lace Closure Wig W/ Adjustable Straps Ft. Yiroo Hair | Part 2
- Posted on 27 November, 2017
- Lace Closure
- By Anonymous
Thumbs up & Subscribe !
PART 1↙️
Snapchat: dreaaiam
Yiroo Hair --Guaranteed Quality, 7 Days No Reason Return
Link to Website: http://www.yiroohair.com
Products: Yiroo Hair Brazilian Straight Hair22”22”22”+18”Frontal
Products Link: https://goo.gl/cZuDbZ
Cyber Monday Coupon Code: Yiroo12 12%off
Brazilian Straight Hair 3bundles with Closure: https://goo.gl/5HkhmN
Cyber Monday Promotion!
Over US$79 Get US$5 Off Code: Best5
Over US$159 Get US$12 Off Code: Best12
Over US$299 Get US$25 Off Code: Best25
All Orders Discount Coupon Code: SALE 5%OFF (no time limited Code)
Cyber Monday 3 Special Products Big Promotion!
Body Wave 3bundles with Frontal: https://goo.gl/BdoXaZ 15%off Code: Yiroo15
Straight Hair 3bundles with Frontal:https://goo.gl/S7sZQB 12%off Code:Yiroo12
Curly Hair 3Bundles with Frontal:https://goo.gl/Qjw8xn 10%off Code:Yiroo10
Contact Yiroo Hair:
Email: [email protected]
Whatsapp:+8615903749627
IG : yiroo_hair
FACEBOOK:@yiroohair
TWITTER:@yiroo_hair
Companies wishing to Contact for Business↙️
This video is sponsored by YIROO HAIR
18" lace closure w/ 3X 22"Bundles (Loose Wave)
Yiroohair.com
Hey guys welcome to part two of my how to make a wig with a lace closure, video featuring guru, hair, and I hope that you were able to tune in to part one of this process so that you won't misunderstand anything. But here we're just going to be picking up where we left off and I'm just gon na continue sewing that wealth all the way to the edge of that mesh cap and, of course, on up until this point I just went and used the flip over method. In case you missed that part, I used to flip over method to get up until this point, and I just kept flipping that left over until I'm just gon na keep flipping that left over until I reached the top, where you see that lace, closure sitting and So now I'm gon na go in and fill in that and, as you can see, I did go in and fill in the rest of the wealth and next I'm gon na go in and secure the West that is gon na, be laying directly lead that lace Closure, if you look closely you'll, be able to see that there is some gaps underneath where I'm sewing, and that is because I want to place this wealth underneath that lace closure, so that I can make sure that is sitting how I want to and that it Is laying as flat as possible so I lay this track first and then I go in and flip this over and filling the remaining gap. That is underneath the work that I'm sewing now and if you're misunderstanding me, just stay tuned, you're gon na see what I'm talking about, and I make sure that I leave about a third of an inch in in between that lace, closure and the weft that I'm Sorry, but need that lace closure so that it can fluently as flat as possible. You don't want to really lay that website, actually underneath the closure. You want to leave a tiny tiny space in between for that nice and even flow, so that it'll look as flat as possible and I'm gon na be going in and cutting that work. Each time that I reached the edge because I don't flip over because it causes bumps and lumps so I just cut that when I reach the edge and as you can see, there is a gap there neat where I was just sewing, which is what I was Explaining um - and I do this like I said so - that I can make sure that that flow between the lace, closure and the weft is as flat and seamless as possible. So now I'm gon na be going in and filling in. The gap in between that are less wet that are so down, so I'm gon na be putting about two additional wefts to fill in this gap that you see what we're for my man is. My man is your man, Tuesday and Wednesday. I just keep themselves and, like I said you can kind of see that I'm leaving little tiny spaces in between the webs. That is because I don't want it to be directly seen eating on top of each other, because I find that with my wigs it leaves much flatter and seamless when I leave just that tiny tiny bit of space in between wet and I'm just going to be Going in and filling this part in and then we'll be done so I went in and I saw that last left on and, as you can see, we're done with the sewing process and you can see where that closure stops and the web starts. This is the very last part I do which is go, and I flip that wig over and I cut out the additional neck that is in between the arm wig. So I cut that additional neck from beneath the lace so that you won't be able to see the neck through the lace closure and we're pretty much done. As you can see, it's very full. You don't see any spaces any lumps or bumps, and that's just pretty much it. This concludes the two-part series of my how to make a wig with a lace closure video with a neck cap. I hope that you guys enjoyed - and I want to thank - do you hair for sponsoring this video don't forget to thumbs up and subscribe guys. I will be bringing to you my first impressions on this shoe hair. Thank you. So much for watching I'll, see you in my next video


Comments
Pretty313Eyez: what to use when washing bundles??
Val: what is your head circumference? I wonder will this specific cap shrink after sewing wefts on it for bigger heads?
Ashley Clark: I just subscribed but you are wonderful.
TheNewMe: That man singing is horrible!