Body Wave Lace Closure Quickweave Install| Beauty Forever Hair
- Posted on 28 May, 2020
- Lace Closure
- By Anonymous
●▬▬▬▬▬ ❤#BeautyForeverHair❤ ▬▬▬▬▬●
Hello, Graduation Season
Leaving is not an end, but a new beginning
Up to 50% off excellent Hair Journey
Discover Now
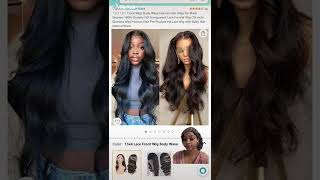
I’m wearing Brazilian Body Wave hair in the video:https://bit.ly/3d6lXYG
Brazilian Body Wave Bundles with Frontal:https://bit.ly/3egAPDQ
Hot 13*4 lace frontal 150% density body wave wig:https://bit.ly/2XBNPgA
Hair Details: Brazilian Body wave 20 22 24 +20 closure
Use my special coupon save $$$20: YTBE20
Add Cart/Follow Store to Get Free Coupon:https://bit.ly/3d6XAKr
Top Selling bundles and wigs in our store:https://bit.ly/3c7oqkd
New!!! Arrival ombre and 99J Wigs:https://bit.ly/2M0cAxR
Aliexpress Beauty Forever Hair Store: http://bit.ly/2S5h61F
https://www.beautyforever.com/ Official Web:https://bit.ly/2TDrtKw
Amazon Beauty Forever Hair Store: https://amzn.to/2KSGkyB
Social Media:
YouTube:
Welcome to IAmBeautifulHustler TV
Be sure to SUBSCRIBE & Turn ON Your Bells✨
TO PURCHASE MY HAIR & PRODUCTS FROM MY BRAND: (TheBeautifulHustlerBrand )
Use Link Below ⤵️
WWW.iBhSlays.com✨
We Ship Internationally ✈️
TO CONNECT WITH ME ✨
Personal IG: Iambeautifulhustler
Business Instagram:_Beautifulhustler & @thebeautifulhustlerbrand
Twitter:_Beautifulhustl
YouTube: IAmBeautifulHustlerTV
CONTACT ME✨
☎️ 786-571-1313
Email : [email protected]
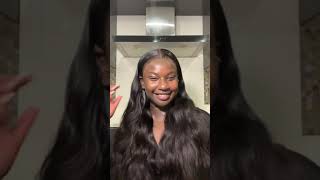
Hey beauties and welcome back to our beautiful house of TV today, i'll be doing a body wave lace, closure, quick, we've installed and today's head is provided by beauty forever hair. Now I always love this hair, this company in general. They always send me some bomb, hair or wigs, and everything like that and the quality is always superior. So I absolutely recommend this company, unless you guys check out the details in the description down below so you can purchase, is here now they did send me over a twenty inch, a body wave lace, closure and it looks like it is transparent lace and they also Sent me 20, 22 and 24 of their body wave bundles and today, I'm just gon na. Do a quick, easy lace closure install today now as far as the process of installing the hair, I did do my left a little bit differently. Usually I like to sew the closure down and then glue it down, but today I decided to glue the closure in the front first and then you know tie it down with the last band. So on the rest of it, and then you know bonding the bundles subby fries when it's all there, I'm just gon na go ahead and go on with my beautiful hasta lace prep I cleaned their hair line, and now I'm just taking my lace, mate, adhesive and Just I'm gon na go ahead and apply my five layers and then I'm going to lay the closure down. Where I placed the glue and then um. I will go ahead and blow-dry that into place and tie that down with the elastic band and if I see to sew down the rest of the closure now, something else I did is that I did go ahead and cut off the side flaps of the closure That will also give you a more seamless closure of installation. Look so make sure you just person somewhere I'm doing and try this a way of laying down your closure first, where, as far as cutting it down - and let me know how this method works, you and now that the hair has dried clear, I'm just gon na Go ahead and pull that lace right into the glue and then I'm going to blow dry on the heat setting and then go ahead and begin to cut off the extra lace tuck. Whatever lifting down and just go ahead and tie that down with the melt belt and then proceed to sew it down now, with the help of that melt, bail, holding down that front analyst and also because it is glued down, you can just go ahead and stretch Your closure completely out to this flat. It begins to slow it down. What I like to do is kind of like stretch it and pull it as I'm sewing and because it is secured down and also tied down with the melt that it's not going to move. So you can stretch it out as far as you need to to secure your knot to secure it and make sure that it is flexed without your closure will lay flat. So I'm just gon na do that and stole it all around till all of it has been cut down. Then I will go on with the second stocking cap and apply and begin to bond in the bundles. Now for quick ways, I like to use confidence first, I want the tab and also I use a little bit of holders very, whether it's the doctor, but the bed head or the chest images. I use this phrase enough trust the sprints in the holding spray and I spread along the chaps I always used to catch by the way when I'm doing a quick lead and I'm just going to spray that on there to secure that a cat will stay on. I will go into detail on how to correctly do a proper, quick, wheeze video. This one was just like a butt kind of like on a press for time because we're actually going somewhere. So we didn't even like check out her braids from her previous install. We just kind of like took the wig off cleaned the hairline and reapply to another cap, and everything like that, and she has like plaques, underneath the wig cap, like with her natural hair or like little twist these that you know she didn't they're like taken out And everything like that, so don't mind on the way this cap is looking right now, since, as I mentioned, I would do a full, detailed video on how to correct me. Do like a protective, quick weave install so don't kill me in the comments. This is just something quick and plus this is my sister, so it's just like at the end of the day, she knew her. Hair was gon na be late by the end, and it is they want to lay completely flat and everything like that. There'S no worries, but right now, I'm just taking the tracks and what I'm doing right now is called double wedding. I like to keep the bundles unravel in the double web. I don't unwrap it all the way to the single. I keep the double and I just take my bonding glue and I place the blue one, both the tracks, I kind of like place the tracks once above the other not directly on top, but above it. So that way, it's like I'm gluing two tracks at once, but not two tracks right on top of each other like is there going to be? You know one land on top the one land like not even an inch like 2 centimeters above the other one, and this way armed it makes the quickly process faster and also you can really get more abundance in, because with that single weapon, you use less bundles. But when you double well, you have, the advantage to add, is my hair and to your quick deed as possible, and I'm just going to go ahead and glue all of them out of those bundles and until I have reached the top and then I'll begin to You know start the styling process and you know how combing a closure out getting it super straight super flat and as far as getting the curl pattern back into when I would occur a pattern but to get curls back into that lace. Closure. Because, after you do, you know bleach the knots and wash that closure do you know it does lose that natural body shape that body wave pattern, so I just like to go in typically the body wave hair and just create more curls and using my Wong curler. So you will see me going with my Wong curler and you know kind of like curl the curls back up to there, but I wanted more of a fluffier look than just a calm by the way. So I do use that wand curler on the biggest size, because it's an interchangeable me me like I could change the top and put different size curler thingies on there. So I just used a larger one to give me some nice little body curls and now I'm just gon na quickly just shake my baby here. I just did to baby her today, one on each side using my Holden's first open up with the edge brush and then I'm gon na go ahead and black spray and conceal the part. You know black spray helps it because his hair is like natural brown. I use the black spray or whatever I do not recommend using the brown one, because the brown one is typically lighter than natural brown hair color. That'S why I use the black shade in the high beams and then I just go in with the same foundation that I use underneath there. You know they lace and everything, and I just use that to consider the part to get a super stray super clean and flawless. And then I will go ahead and go in with the wand, curl and add the body curls and I'm just grabbing different sections. Curling and towards the back and kind of like squeezing the curls together for a few seconds and then released in there, but I'm gon na rub my fingers to the cursor. I do want it to be, like you know, fluffy looking, I don't want it to just be like tight curls, so I like to curl it I'm squeezing and stretch it out, and I'm gon na run my fingers to it and pretty much everything I'm doing on This side, I would, I will repeat to the other side as well. So now that is sad is complete. I wouldn't had to be the other side of chemicals just the same process. It'S repetition and I'm just loving my fingers to across until I get that desired. Look, I'm feel free to go back in and curl certain pieces. If you feel like you need to so I'm gon na. Do it now just add a little Sheen and I couldn't find my horse MIOSHA nice I'll, just use that heat protecting spray cos. I like a more shine to it and use that, but I hope you guys enjoyed this tutorial. Thank you guys for tuning in and I was

Comments
Chelsey Sadé: Why didnt she smile all the way? She's so gorgeous
Lukundo Nambela: This is beautiful
Red Tucker: Love it❤
zoelynn69: You are so talented. She looks beautiful
pretty pumpkin: I loved it
Katherine Colbert: Beautiful
Sheila Clay: What inch barrel is the wand ?
ANOINTEDHAIRSOLUTIONS: Your so blessed and highly favored GOD BLESS U..
Ashley Griggs: BH you are the best
Moodahh King:
LifeWithRae: How many inches is this ?
Kaylah Jenkins: Is the hair in the link the hair that you are using ?
Jane Lishomwa: Wow
Robin Turnage: Did u cut the black cap
um chile: Yess..