Easy $30 Quick Weave Wig Tutorial ♡︎ Baddie On A Budget♡︎
- Posted on 01 September, 2021
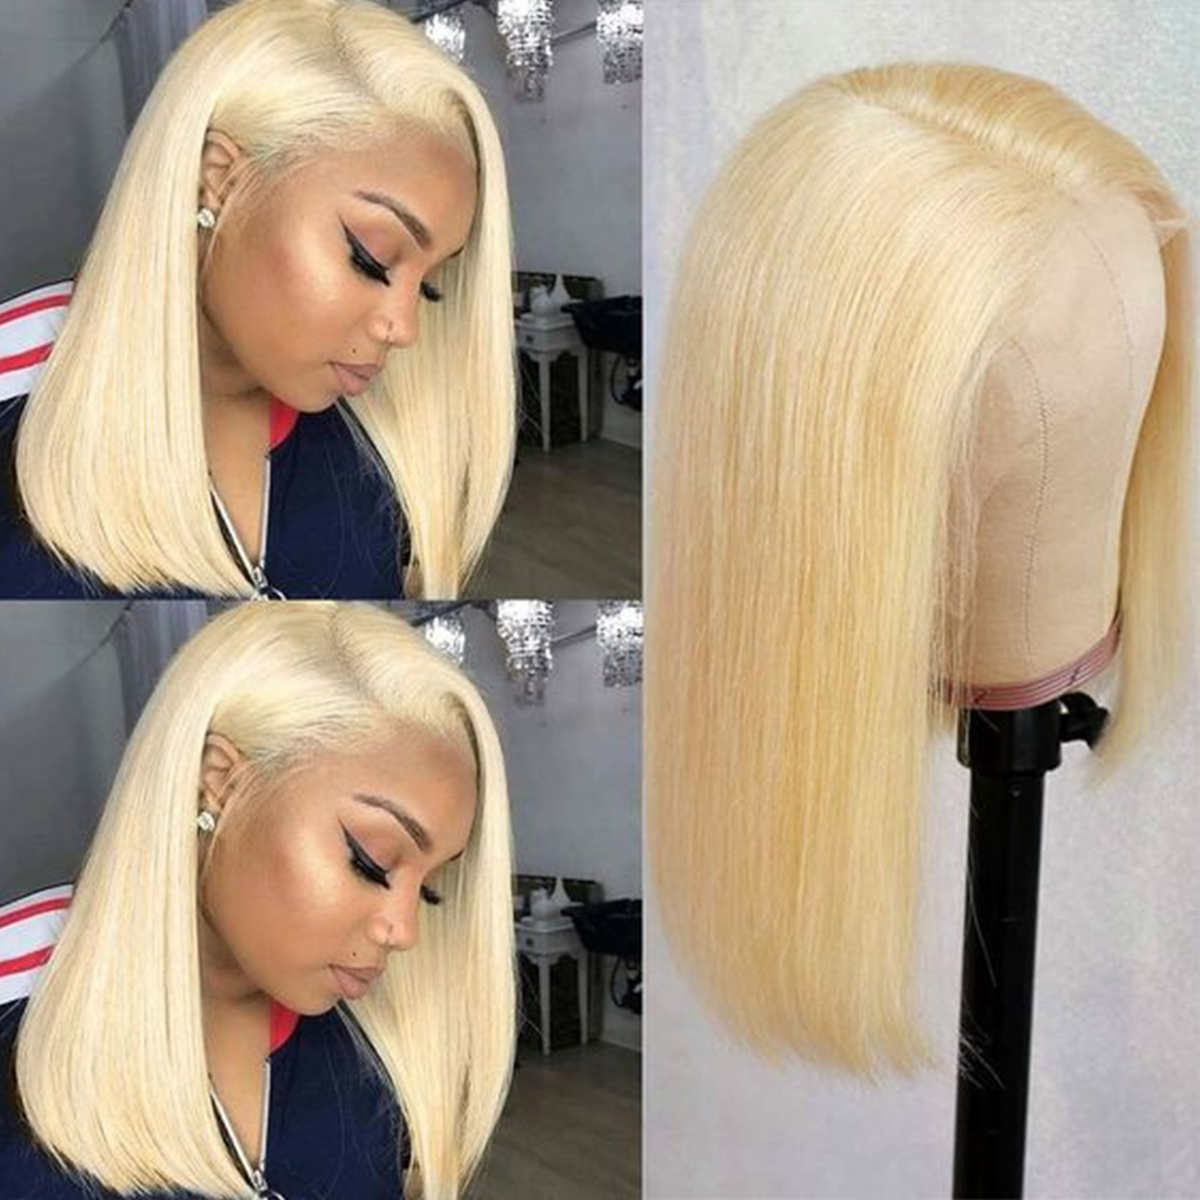
- Lace Closure
- By Anonymous
Thank you so much for watching be sure to Like , Comment, Share & Subscribe♡︎♡︎♡︎♥︎
✨Ig: @goldnmae
✨Twitter:@maeaubrianna
✨Tikok@999goldn
Intro: 00:14
Wig start : 2:06
Wig end: 7:10
Products from video:
Shake-N-Go Organique Mastermix Weave - BALI WAVE 4PCS 18"/20"/22" + 4x4 lace closure
https://tophairwigs.com/shake-n-go-org...
salon pro 30 second bonding glue
https://www.google.com/aclk?sa=L&ai=DC...=
Hey what is up guys, i'm not going to be saying too much, because i'm not going to use this mic yet, but um welcome you to my channel. My name is golden may or actually i already done messed up. Dang anyways. My name is mae abriana. That'S the name i'm going to go buy on this channel um. You can find me on insta other social medias by the name golden may um. Today, i'm going to be doing a hair tutorial and i'm going to get right into it, so yeah, so we're gon na get right into this. Video i'm using shaken go organic valley wave. It comes with three bundles, i'm using the 22 20 and 18 inch with a 4x4 frontal, as you can see, i'm taking it out the pack to show you the hair close up. I would say the lace is more medium brown. It didn't really match my skin of tone, but i fixed it in the end. I also bought the 30 second salon pro super hair bond glue about two of those also a dome mesh cap, which is already open because i was excited for the video. So obviously, if you've clicked on the video, you know that we're making a quick weave wig, which in my opinion, is one of the easiest wigs to make i'm going to go step by step, i'm putting a plastic bag over my mannequin head for prevention of stains. As you can see, it has some already from prior, you know experiences and then adding my mesh dome cap. On top of that, i pinned the back. I don't think i recorded that just so. I can hold it in place. While i put the tracks on in the back so here i have my 4x4 frontal, i'm going to give you guys a close-up of my lace front, it's quite plugged. In my opinion. I like that a lot, especially for a synthetic blend pack of hair. So now i'm going to go step by step as to how i'm putting it together. One thing i would say about gluing my lace front is that you don't want to do it all the way to the end like i did, which was my one mistake. I can say so, as you see me holding it up, i would have stopped as where the hairline would have began and i'll explain that reason as to why later, but as you see, i'm just applying it to the front of the cap, making sure that the Edges are lined up on both sides evenly i'm pressing it down with my fingers to hold it, and eventually i will come in with a hair dryer to apply the heat to it, to let it dry and that's pretty much everything that i'm doing for the whole. Video is applying lace or excuse me wefts to it and then applying heat and that's it. As you see me, drying the glue around the lace, i'm using my pink comb to press and drag the remaining non-dried glue to the edge. So it does dry and that's just a tip to help make sure it's more secure when you're putting the wefts on or the lace that just helps better for it to evenly dry and evenly stick without it coming up. So, as i mentioned before, i probably glued a little bit too far out on this 4x4 frontal. But in the end it was not a problem, but just to be clear. Basically where the mesh dome cap ends is where you should stop doing it. And what you see me doing in this clip is just adding another layer of glue to make sure that the 4x4 closure is secure, and now we move right along to the back. So eventually i took the pins out as i started gluing my wefts on. I started with my longest one, which is going to be my 22 inch and instead of wrapping, i cut them directly to size, so i've already put it onto the mannequin head and sized it up, and this is the easiest part in my opinion, is just adding A thin layer to each weft and simply applying it to the mannequin head and adding heat, and that is all i did through the whole video. So at this point in the video i won't be doing too much talking. Unless you know, tips are needed or something needs to be said, but just simply allowing you to follow along with me, so without further ado enjoy. So one quick tip is, if you have any type of angled brush for like makeup purposes. You can use that to apply the glue evenly around the weft if you need an extra layer instead of using your finger, and that is also the 22 inch bundle. So now we are on to using the 20 inch bundle and finally, on to our last bundle, which is the 18 inch do, and now we are done guys so what's left to do is to cut the mesh dome cap, which is right under the lace. So only cutting around the lace portion i.e the portion that has lace showing so kind of a u-shape and right after that, we're done - and i will show you the final product. Also in the description below i will list out the hair and the things i used to make this wig. As you can see, she is giving body length shine. All of the above. I love this hair. I will definitely be using it again. 100. An easy tutorial for somebody who's a beginner at wig making. Thank you guys for watching make sure you like comment and subscribe for more content and, as always i'll see you later bye.


Comments
Topeka Hughes: U did an excellent job Sis,keep up the gr8 work & u have a new subscriber ☺️
Official TAY2PAIID: Proud Of You Keep going love
Ann J: Did an amazing job! How did the hair hold up? Would you use it again?
Dr. K Dot: You have a very nice speaking voice. Very calm and well spoken. I’ll subscribe sis
Jazzy Perfection: How did you secure it?
Iambarbiana _: More videos pleaaaseeee
lilbit27: Yeah until it gets tangled n nappy