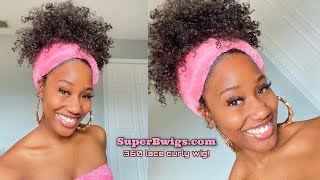
How To: Side Part Closure Quickweave Ft. Organique Mastermix
- Posted on 30 June, 2021
- Lace Closure
- By Anonymous
Welcome to my channel ! In today's video I'll be installing another closure quickweave using Organique Mastermix, purchased from my local beauty supply store. Make sure to like the video and leave a comment with any wigs that you would like to see me install or review on my channel. Don't forget to subscribe and join The Nyx Clique !
Links :
I purchased mine from my local beauty supply store but here are links to the hair used:
Closure: https://rb.gy/46hv6p
Closure with bundles: https://rb.gy/o23dmu
Three bundles: https://rb.gy/svsrzh
Connect With Me On My Socials
IG / Twitter / Tik Tok / Pinterest :
NyxNise_
*For business inquires*
Email me at: [email protected]
#SidePart #NyxNise #OrganiqueMastermix #ClosureQuickweave #QuickweaveTutorial
I do not own the rights to any music played in this video.
Hey guys and welcome back to my channel so today we're doing a side part closure. I just wanted to show you what my caps are looking like. My closure is going to go right there, where the clips are. I have a brown cap underneath and a black cap on top and we're going to use the organic master mix hair with the 4x4 closure and three bundles. It'S in the color number two. This is what the closure looks like straight out of the pack. It'S in a body wave texture next is the bundles. This is how thick they are, and then i'm gon na show you everything that i use. This is what i use on my cap to protect my hair. I'M going to use got to be as well as spritz and then the 30 second super whole hair glue, because you guys have already seen me. Do a few closure, quick weaves on my channel, i'm going to kind of speed through this. I always start in the back at the bottom and i just go from ear to ear and curve the tracks to fit my head. I blow dry them. I like to put glue on the track. First, spray some spritz either on the glue or on my wig cap, and then when i attach the track to my head, it kind of the spritz helps the glue stick, a little better like it. When it gets tacky it helps it hold a little better. So that's what i use that, for i also decided i wanted some color. So you'll see me, add some pieces of 613 hair in it's by the same brand um. It was for a different tutorial, but that tutorial didn't come out the way i wanted it to so i'm going to try to redo that video, for you guys and then i'm going to add that to my closure, quick weave series, which i am currently still working On so you'll just see me lay lay tracks one at a time until i get to the closure part before i do the closure i like to cut the black cap right above the brown cap to just kind of expose it so that underneath the closure, it Looks a little bit more realistic. I'Ve tried to add makeup to the closure before, but it just worked better this way with having the brown cap underneath instead of adding like foundation or my contour shade to the closure directly. So, first i'm going to use ghostbond and put that along my hairline right in front of where the closure is going to go, and i spread that out and blow dry it until it gets tacky. Once it's tacky enough, i like to lay my closure directly on top of the glue i like to do it this way. First, so that when i tie my elastic band down on the front of the closure, it'll hold the closure in place. So when i glue it it's already, it's going to lay flat it's going to help it lay flat. So when i glue the edges of the closure, i won't have to worry about any lumps or any wrinkles or anything like that, but you can always glue the closure on first and then glue the lace to your skin. Do so now, i'm just going to show you exactly what i mean by the elastic band will hold it in place. While i glue the closure and then i'll, stick the closure down and blow dry it. So this is an example of that, but you can always do it in the opposite order and just glue the closure on first and then stick the lace to the skin afterwards. So now that my closure is secure, i'm just going to part my closure just to make sure that i'll have a deep enough side part and have it exactly where i want it. This is how it's looking so far and as you can see, it looks really natural because of that brown cap underneath so then, i'm going to finish gluing in the tracks and just close up that hole that i left around the closure i like to save those Last couple of tracks for last just in case, i need to adjust the placement of the closure at all. So do so, i kept the style pretty simple. I left the hair in its natural state. I didn't mind the body waves. I actually like how they looked on me, so i didn't straighten the hair. Of course you can straighten the hair um and, if you want to, you can also do a swoop. Bang with this and straighten the hair, but that'll be in a different tutorial. I'Ll show you guys how to do that later on in the quick move series, so i'm just going to cut off the lace and then i'll be working on the baby, hairs and melting the baby hairs into my skin and once i've done that, i'm just going To flatten the closure, so you'll see me do each of those steps in that order and then i'll be back at the end of the video. So at this point, i've already flattened most of my closure, but i just wanted to demonstrate to you guys how i did it, so i'm just going to take my wax stick. This is just a generic wax. Stick from the beauty supply store, i'm going to section off a portion of my hair and then i'm going to use my flat iron to flatten the root of that part. But i'm not going to bring the flat iron all the way down, because i don't want to mess up the body wave. That just helps me flatten the area around the closure, so that it's not as poofy and as lumpy and i can still maintain the body wave texture of the style and just for added flatness. I take my curling wand and just press that into the wax as well. Like i said before, i didn't want to straighten the hair, so i left it in the natural state um. So this is the finished look. I hope you guys liked it. I hope you guys enjoyed the video, please let me know if you have any questions or any video ideas down below in the comment section. I love talking to you guys. So just let me know your thoughts on this tutorial. Let me know who's going to be tuned in for that closure, quick weave series, and thank you guys so much for watching and i'll see you in the next one bye
Comments
Nikki c: Another SLAY❣️ I’m definitely tuning in for the quick weave series. Keep up the good work hun!
Britt D: This was SO well done. Beautiful job!
#OBJ Event Planning: Just the video I needed to slay my 29th birthday. Thanks for this babe!
Elaina Dawson: Ima try this look I been hesitant about it but now seeing it being actually Done on someone else ✔️ I love it
Fravolous Film: Damn you literally rock every hair color girl!! Also, you're so talented!
Samon Sisson: You did an amazing job
Akera Tinea: Yes you did that girl very pretty
Deshanda Henderson: How long did it last
Gabby Hunter: Okay so with the caps how are you doing them you just do the brown first then the black one do you use anything to keep them in place
Mia Pia: What’s the difference between having the black cap n the regular brown cap ??
Kerise Richards: