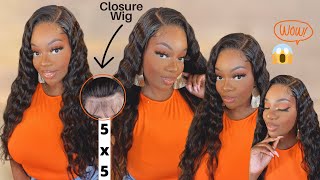
30 Minute Removable Quick Weave Lace Closure Wig Featuring Hair From Wigsbuy.Com
- Posted on 06 December, 2018
- Lace Closure
- By Anonymous
Hey guys this is a super easy quick weave wig tutorial
I show you how to make this easy wig start to finish this wig will last you a very long time
This hair was provided to me by WIGSBUY.COM
THE LINKS TO PURCHASE THIS HAIR WILL BE PROVIDED BELOW
16 in closure 3/18 inch body wave bundles
https://shop.wigsbuy.com/product/Wigsb...
Follow me on my social media
Http://Facebook.com/Shanequaoliver
Http://Instagram.com/hairstylesbyshane...
For business inquires or sponsorship
If you like my videos please SUBSCRIBE LIKE AND DONT FORGET TO HIT THAT NOTIFICATIONS BELL SO THAT YOULL BE FIRST TO KNOW WHEN I UPLOAD A NEW VIDEO
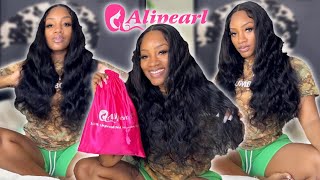
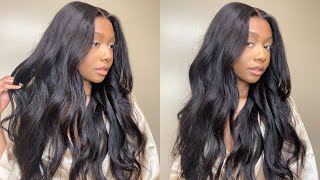
Hey guys and welcome back to my channel today, I'm gon na be doing a quick and easy quick weeds, close your wig. I will sit a 16 inch closure and 3 18 inch bundles of body wave hair by weeks by calm. It came packaged like this and also came with a comb and clips in caps and here's the hair after I washed it or shampooed it, and I'm just taking the closure. I'M gon na put in about 1/4 inch in front of the cap and I'm gon na. Take my two pins and pin it down first the front and then the back of the closure, and then I'm also gon na put two t-pins on the sides just the whole. Besides my so it okay, I'm also going to start sewing in the back in the middle on the side of that TPM that I have right there, I'm just taking my needle and thread and just start sewing very close together, sewing the closure. Damn I just want to so the closure down just to make sure that it's secure, because the other parts will be glued and I don't want the closure to accidentally come off or lift up or anything like this. So I prefer to sew the closure down. So just want to sew small stitches right next to each other until you get down to the end of the closure in the front. Okay, so once you're done sewing on that side, you just wan na go up to that side and do the exact same steps. You did on this side and you may need one more TPN just to secure the front of a culture, but you just want to sew along the side of the closure and small stitches small little stitches right next to each other. Until you get down to the front of the closure and then that's it, here's the three bundles after I shampoo them. They turn they were much curly here when I first got them, but they were more like body waves after they were shampooed and dried. So you just want to cut your first track to see it on that nape part, the bottom of the trick. You just want to cut it right there and fit it just along the bottom part by the nape of the cap for the week. So then you just want to take your blow dryer and blow dry. It make sure that the glue is completely dry on each track and then I just went over the top of that last one just to make sure it's really really secure so that the wig will be long-lasting and you won't have to worry about the tricks coming Up so anyway, I just cut another piece and another piece and just glued them down, and I'm just going side to side from like the top of the ear and just taking a blow dryer and making sure that each one is dry. If you need to reinforce the trick with by just putting a little bit of glue on top, you can do that to make sure that the track stay in place. And you just want to continue measuring at the track along the side and kind of like a u-shape above the ear, and you just want to keep doing that until you run out of hair completely so you're gon na use the whole three bundles on the entire Head and just make sure that the hair is full, so you just want to track the hair in a u-shape until you get to the top. Once you make it to your very last track, you just want to apply your glue and lay it down around the closure and au shape, press it down below dry. It really good make sure that is completely tacked to the wig cap and there you have. It see how quick and easy that was. I didn't take no time so yeah. That'S how your week should look once you're done. You can take it off of the week head and I just cut down the middle of the cap where the closure is - and I just cut the size of the cap off after that. So the only thing you don't want to have any fabric left over under the closure once you're done making the week. So you just want to cut all the fabric off under the closure and that's why it's important to so the closure down when you're, making a quick weave we now just taking some Nairobi foam. I actually meant to put water and spray some water on her first, because I thought the closure was already pluck good enough, but I ended up putting Nairobi's on there anyway. I'M just gon na go through and plug it in just a little bit more, not much. Just a little bit more, you can pluck it as much or as little as you like, but I just plucked it a little bit and then I'm going back and add a little bit more of the Nairobi foaming wrap lotion because I'm gon na sit this week. In milk was can be a middle part, but I made sure gon na wear in the sideboard, but I parted it down the middle of the Folger and then I'm just going to kind of make sure it's late and everything is covered. And then I'm gon na put it under the hair dryer for about 20 minutes and let that close, you're dry, okay, once you're done with the week, my hair was already in a ponytail anyway, so I just pulled it up in the back and put some bobby Pins in put a beige stocking cap down over my ponytail and adjusted it I'm just a little bit. I'Ve got to be breathe spray and I'm gon na blow dry, but yeah. I'M gon na take a little bit of makeup on a little makeup brush and I'm gon na go at a tea because I had already sticked the closure in a middle part. So I'm just gon na go and like the team, I'm gon na go down the middle of the closure with the party and get right into the princess. I'M kind of like the makeup is I'm wearing a tee, and then I just wanna five though week we might. I have to put the wig on front first, because my ponytail kept falling down in the bed, but you just want to pull the wig on it. Should be nice and tight, I already put some curls in the hair just for time sake, so I didn't show the hair being curl, but I just put a few big barrel curls in there I'm just gon na take my got to be free spray and pulled My lace back on the closure use a blow dryer blow dryer, but a little bit more of the priests pray take the blow dryer and blow dried a little bit more because I wanted to give tacky so that I can just lay the clothes you're down. I'M spray it one more time just to make sure it's tacky cuz, I'm not using any glue. So I want to make sure it's sticky enough to stay down. So just take your blow dryer and just continue blow-drying it until you get it sticky enough for you, then you can just roll your lace down and take a little rat tail comb. I like to use the red cell phone with the middle in because it just helps me lay the lace down into my skin and then you guys so use your fingers and just kind of massage it in with the blow-dryer, make sure it's dry make sure you Keep blow-drying it on like a medium setting until the hair is sucked down. It should be stuck down almost like glue with that free spray. Then just take the scissors cut it in the middle and then take the eyebrow or chin just kind of in a jagged kind of way. Click the lace off basically - and I had those little tabs left over after I clip the lace off. So you just take some scissors and cut it and then use your razor to do the other side. You don't want it to be perfect, one to kind of be jagged and then just cut those little Ian pieces it that I had leftover just cut those off now, so I'm gon na take a little bit of blank spray just to spray that little tab. I don't know why those tabs are so big on the side and then just section out a little bit of baby hair. You use more baby, hair or less baby hair. Usually, I don't like to use a whole lot of baby hair and but I have to use some because my hairline is really low and to cup up my own hairline. So I did use a little bit of the baby here. You just pull out as much as you want. You take the eyebrow or sure razor and just cut the little hairs off. You can do it with seals into it. Does it really matter? Fixin got to be freeze, brain lady herons down just a little bit as you want. There freeze places to get a little taxi so that you can lose the hair it's the way. He needs to go a little bit more free spray and then you can kind of mold the baby here. The way you want to, I really didn't want a whole lot of baby there, but I did do just a little bit right in the front and then take a little free spray in blow-dried and you can you also use that Nairobi to moisture baby hairs after I did it. I realized this. What I should have done too, but that's okay. So anyway, I'm spread a little olive oil oil sheen on my hair and get my purple shampoo comb me just a wig right, quick girl, hello, okay, get my purple shampoo comb and just comb all the curls out boy back and then just kind of push the Curls forward, I don't think you look cute yeah, which I think it turned out, really where the hair is fall, it's thick. It had like a luster to it. I don't know if y'all like that and my buddy be have like low luster to it hurt, killed the curls really well. The hair is hanging up in the bathroom in my house. My dad is still really curly so anyway. Here'S my finished look. I hope y'all liked it if you did hit that subscribe button click that notification bill so you'll be the first to know whenever I upload a new video and go two weeks buy back


Comments
Bonita Stinson: That looks great pretty hair thanks for sharing
Linda Humphrey: Stunning!
carolyn moore: Oh My.... That's really CUTE!!!
Tammie Darice: Looks great
Keshaun Plummer: I need to buy this wig for my appt tomorrow.
Ms Llb: Too cute
LP1234: Pretty