Detailed How To: Quickweave Lace Closure Wig Ft. Ali Bele Hair Hot Glue Gun Method| Brwnskindbeaut
- Posted on 26 September, 2019
- Lace Closure
- By Anonymous
WATCH IN HD 1080p
Open Me
♡♡♡♡♡♡♡♡♡♡♡♡♡♡♡♡♡♡♡♡♡♡♡♡♡♡♡♡♡♡♡
L E T S B E F R I E N D S :
➢ SUBSCRIBE : http://bit.ly/2nnYO9Y
➢ Instagram : http://bit.ly/2msHu43
➢ Snapchat : Brwnskinbeaut
➢ Facebook : http://bit.ly/2lM03TU
♡♡♡♡♡♡♡♡♡♡♡♡♡♡♡♡♡♡♡♡♡♡♡♡♡♡♡♡♡♡♡
B U S I N E S S I N Q U I R E S :
Are you a Company/ YouTuber looking to Collab? Please feel free to email me!
➢ EMAIL : [email protected]
♡♡♡♡♡♡♡♡♡♡♡♡♡♡♡♡♡♡♡♡♡♡♡♡♡♡♡♡♡♡♡
Want to get paid to shop? Well check out Ebate's cash back program ! On top of getting cash back you also get discount codes! who doesn't like saving ?!?! I
S I G N U P :
➢ https://www.ebates.com/r/KCLINT17?eeid...
♡♡♡♡♡♡♡♡♡♡♡♡♡♡♡♡♡♡♡♡♡♡♡♡♡♡♡♡♡♡♡
P R O D U C T S M E N TI O N E D :
Clairol BW 2 Bleach
Blond Brillance 35 Vol. Developer
Ion Color Sulfate Free Shampoo
Hot glue Gun
♡♡♡♡♡♡♡♡♡♡♡♡♡♡♡♡♡♡♡♡♡♡♡♡♡♡♡♡♡♡♡
HA I R I N F O :
Ali Bele Hair
➢ Store : https://tinyurl.com/alibele
➢ Link to Hair :https://tinyurl.com/directhairlink
♡♡♡♡♡♡♡♡♡♡♡♡♡♡♡♡♡♡♡♡♡♡♡♡♡♡♡♡♡♡♡
================================================
FAQ:
➢ Camera : Canon Rebel T6i
➢ Editing Software: Final Cut Pro X
➢ Lighting: Ringlight / Vanity lights
––––––––––––––––––––––––––––––
Piña Colada by LiQWYD https://soundcloud.com/liqwyd
Creative Commons — Attribution 3.0 Unported — CC BY 3.0
Free Download / Stream: https://bit.ly/_pina-colada
Music promoted by Audio Library https://youtu.be/dcoIsg4I-YQ
––––––––––––––––––––––––––––––
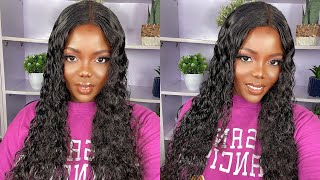
What'S up beauties, we're back at it again and to start it on off? I have my bleach. I have developer and I also have my mixing bowl and spatula thingy, so I have some saran wrap. I learned this trick from Sierra I'll put her you tube down below, and this just helps you look at your knots while it's being bleached and it's just a simpler and easier way. Ever since I seen this technique, I always do it and I absolutely love it now. I'M gon na be using about a cup of the bleach, because I'm only bleaching this one closure. So I don't need that much and I ended up using a little bit more developer than that because it was just still too powdery, so you're gon na mix it until you get like a thick consistency. You don't want it to be too runny, because then your bleach, your knots, will be over bleached and you don't want it to be too thick because then you're not won't be bleached at all. So now I'm using my spray bottle just to wet the hair and get it out the way a little bit and I'm also gon na spray it the lace. Now. I'Ve also realized that when you spray the lace down a little bit, it helps it bleach better. Just to give it that scalp look now I like to use a butter knife to help me smooth the bleach on you can use whatever your heart desires, but you also want to make sure the hair is out of the way. As you can see, I was pulling the hair out of the lace that was stuck so now, I'm just gon na spread. It also. I like to make sure that when I'm bleaching I like to start at the middle and the back first before I really hit the front of my knots, because since it's the thinnest and most dense area well at least dense area, I should say it reaches faster. So you just want to keep that in mind as well. Okay, so now we're gon na flip it over and I'm gon na check to make sure none of the bleach ran through the lace and actually got on the hair, but enough to make sure it's on the knots you're gon na set your timer to about 10 Minutes at first just to see how the hair does, and you should always go back and check to see how the process is going just to make sure you're not over bleaching or under bleaching, because who wants to have to bleach twice. So I realize it needs to be done more, so I'm gon na add six more minutes and then we should be good now to wash it off. I like to use warm water and when rinsing it out, I like to put the closure downward so that the rest of the remaining bleach does not land on the hair and also make sure you get all that bleach out before. You start to tone and do all the other things you need to do now using my neutralizing shampoo, I'm gon na really make sure I get it in there, so it stops the process and I run some through the hair just in case, if any of that Extra bleach did get on the hair. It does not process it time for a scalp check, and that looks great, I'm so happy so now using your purple shampoo. Honestly, I don't recommend this one. I recommend the iron color um purplish sulfate shampoo, that one works way better than this one, but this is the only way I could get my hands on at the time. So just look at the lace and everything is looking great on to making the wig right now we're gon na sew down the closure. Even though we're doing our hot ghoul has gone away. I always sold my clothes now up close and personal. I'M gon na show you how I sewed it down. I go through the cap, go through the loop, the lace and then wrap it around two or three times to create that knot. That'S how I always start and finish my sewing on anything that I'm doing on the cap so now here it is again just to show you one more time and pretty much. This is simple, and you also want to make sure that you stitch it really close. So that it lays down flat and better so now, I'm just gon na speed things up until we get to the next step, enjoy all right. Now, we're gon na place a shower cap or plastic bag on the canvas head and then put back on our cap. Now you're gon na measure out each track and then you're, just gon na get the hot glue gun, put it on the track and literally place it on, and that is all I kid you not. It is the most easiest way to make a wig and fast. This way I made this week in 30 minutes, and that was it also when you're gon na place the tracks make sure you're placing it in AU formation all the way to get to the top of the closure and then you're gon na close off the tracks. Also, I wouldn't put the tracks this close, especially because you're making a bob. This is something that I realized after, because it makes the buff too full and too thick. You want your bob to be a little bit thinner and more effortless, so I will suggest using at least two fingers face in between your tracks to make sure your bob is just effortless. It still will look good like this. If you like a lot of hair to each its own, but if you want all of that movement and grooving - and everything like I said - we're not trying to be sticky stuff easier, make sure you at least do two finger spaces within each track. Also, don't worry about the glue it can come off easily as soon as it dries alright time to close this bad boy up now I just take smaller tracks and go straight across all the way. So I get to the top of the closure, and literally that is it you're done, hey beauty. So, as you can see, I have, I was not able to finish showing you guys how I finished the wig and that's because of my files got corrupted. Basically, any youtubers worst nightmare, anybody who does film and Records whatever, so I did not have the files backed up and saved somewhere else. So the footage you guys seen previously before this is everything that I was able to salvage out of all my crooked files, because only certain ones got corrupted, which is so stupid, but anyway um, so the whole process was finished, putting on the lattice track. I looked at the wig and looked at way. It was the most sparse, and so once I started seeing the hair getting more full, that's where I started my cut now. I opted to cut there first because I didn't know how short I was cutting. So after I cut all those thin ends off, I place the wig on my head and then that's when I went in with my shears, and I did like you know like this, and I cut it so basically after I did that, I took the wig off Of my head put it back on the mannequin and got Clippers, you can use any Clippers, you do not need the most fanciest Clippers ever I got like $ 20 Clippers, I think from Burlington or Walmart, something like that and you basically just go glide it across The hair just like that and make it even yeah so after I did that, once you get your judgement of what you want, your Bob to fall, you can just go ahead and straighten it and bump it now. The hair is already straight. So all you have to do is, though, you've not even a full pass through the hair and just really just bump the ends. I would say to get some shears and thin out the bottom. I do have movement, but I think I'm gon na go back in and thin it out a little bit more just so that it has more of an effortless flow, even more of an effortless flow like it moves pretty good, but even more of an effort. Um effortless flow and what else um the closure. Now, as I stated in my previous video, I was like oh my gosh, there's so many short pieces in the closure. Now this closure has so many flyaways. I had to UM get some hair spray brush it down and even use a hot comb to help keep it down, but you can also get a characteristic. I don't have one so I have to go get one and that would definitely help you pretty much it. So this is how the wig is looking like. This is dead. My goal wait I've gotten! So many compliments on this Bob. I really do like to hear. I do recommend their hair. Their hair is still silky and soft I've been wearing this here for a while. Now I've had this hair for over a year, so the hair is good and I do wear it. And yes, it is a wig, so I do take it off at night. Put it on my mannequin head and go to sleep or girls, sometimes they're putting on a night. You might not even get on a head, throw them to the side, but don't do that. You know carrying stuff um but yeah this personal, affordable here the hair holds up really good and it lasts really long. I don't get any tangling because, like I said, the hair is short. I don't know if I said that yet but yeah, I really don't have any complaints. The only complaints I have with this here was that the ends were too thin and sparse. It was like where's, the hair, I don't I don't see it. Are these blinds or is this bundles? That'S what I want to know. You know, but um yeah, so that's pretty much it. I would recommend you know, I'm not sure about the longer bundles, I'm not sure how they're gon na come and the different textures. I just know what what I've been working with and from what I've gotten um yeah. You might need to cut the ends, so I will keep that in mind as well when shopping for the hair, but that is all for today. If you guys have any suggestions for me. Anything you want to see. Please do not hesitate to comment down below. Okay, your girl wants to know which I want to see. Do you guys want more synthetic wigs? Do you guys want more virgin bundles more expensive here? What'S the tsys, let me know I'll give it to you, okay, so that is the end of this video. I love you guys. I will see you in the next video bye


Comments
Danniella Quick: You look soo good!