Under $70 Baddie On A Budget | Closure Quick Weave Tutorial!
- Posted on 20 July, 2020
- Lace Closure
- By Anonymous
Please follow my socials
Instagram @keithandashun
Facebook @keithan brown
Twitter @keeitthaan
Snapchat @kkkeithan
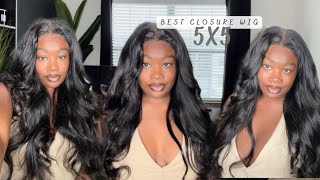
Hey everyone today i will be doing a closure, quick weave, and i will be showing you a few steps on how i make them look so flawless. As you can see, i've already modded down her cap and what i used to mow down her cap was bolt. Hold active, i don't like to use free spray anymore, because it's really not good for your edges, so it's just best that we stay away from that as much as we can. Please please, please watch what you're doing, because you do not. You do not want to cut your client whatsoever. Hmm do as you can see, i'm trying to find the color that matches her best. But what i like to do is use a color. That'S slightly darker, because once you let that close down, you won't be able to tell that the cap is there right here, i'm taking my 91 alcohol and putting it on a q-tip and cleaning that skin, because you don't want any makeup on the skin once you Lay that glue down, because it's not going to really stick - and you don't want this so clean that skin and make sure you use 91 alcohol right here, i'm going in with my photo skin protect because you need that skin protected from that glue. Sometimes the glue can be too harsh and you can leave bumps and just you know stuff that you don't need on your skin. So it's best that you keep your skin protected while under this down, no i'm not shaving off her edges. What i'm doing is shaving off the extra hairs, that's in front of her hairline, where the glue will be laying because you don't want the hairs to get in the way of the glue i'm going to be using three layers. Sometimes i use four, but i think today i'll do three layers, i'm not sure, but you can use how many layers you want to use it's your preference. But this is how i do it right here. I'M cutting off the side tabs on the closure, because you don't want to let that closure down with the side taps on, because it just won't look right and it won't be as flat as it would with them off. So it's just best that you cut them off you, so, as you can see, i've already laid the closure down and i've already glued the bundles in because i was not going to sit there and record all of that when i know that i was not going To sit there and watch it, so it was just no point, so i just did it off camera and right here you see me doing their edges with the phone i like to use nairobi and erica j's flip stuff, oh foreign, as you can see, i've already Went ahead and creamed the left side of her head and now i'm on to the right, and i'm almost done and i've already touched up the reverse and it's looking real nice and after i fixed that part, because you know the parts got to be sharp. Do what lace i'm just making a couple finishing touches, but i am finished. This is the finished look and it came out very beautiful. Please, like comment and share, thank you guys for watching bye.


Comments
Corbie Marie: Yess you did a wonderful job on her hair
Amara Le’Duff: So prettyyy
Diamonique Porter: I love it
Makayla Spikes: Proud of you !!
Keeping up with Tip Adams: Yes I love ❤️ it
Tiff with the Tea: Great job
Danyelle Lynch: Amazing what hair did you use?
D K S: Here from Nicole of course please please make more videos I love your channel
Noël Rina: Omgggg yesss post moreeee
Pretty Mess: Skilled.
Antwanette Walker: Period
Tayaaa: You did that
channel: where did you get your crimper?
Damnmecee: Goodbye .. periodt and I meant it
LaTajah K.: STOP PLAYING !! ❤️❤️
Chris Brooks: Welcome to Houston.
Zaylon Beatty: Yea bruddah
Perla Guadalupe: