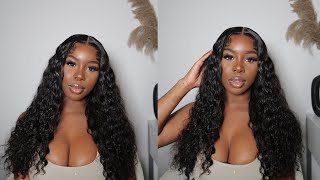
No Glue No Spray! All Sewn! Best Thin 4X4 Lace Closure Curly Wig Install From Luv Me Hair
- Posted on 29 January, 2022
- Lace Closure
- By Anonymous
Hey fran !
In this video, I am showing you a video on how I installed this hd lace closure wig on my friends 4c colored natural hair !! Come thru luv me and that thin lace ! Love ittttt
Enjoy and remember to like, comment, and subscribe!
Social Media
❤️Facebook : London Tayy
❤️Instagram Hair page :@thelondontayy
❤️Instagram Personal page: @londontayysway
❤️ Amazon Storefront : https://www.amazon.com/shop/londontayy...
❤️ Business email : [email protected]
Location: US -Columbia, SC
-------------------------------------------------
------------------------------------------------
Products used:
doo gro hair moisturizer: https://amzn.to/34QmdM8
got2b spray:https://amzn.to/386S6hP
aphogee mousse: https://amzn.to/3KWUbza
got2b cream: https://amzn.to/3Gdmd5Z
afrohantas leave in conditioner:
ebin edge control: https://amzn.to/3AIUNn5
---------------------
Tools used:
crochet needle: https://amzn.to/3tqSLGE
needle and thread: https://amzn.to/3p4eJwS
edge brush:https://amzn.to/2WgCypc
wide tooth comb: https://amzn.to/3qoFzAa
rat tail comb:https://amzn.to/2UHPp3h
------------
Music by Madeline Lauer - Silky - https://thmatc.co/?l=0B6E326A
-------------
luvme hair,luvme hair review,glueless wig,luvme wig review,closure wig,glueless wig install,glueless closure wig,no glue no spray wig,glueless closure sew in,glueless closure wig install,glueless closure wig install 4x4,glueless curly wigs,glueless closure install,glueless closure wig install beginners,glueless closure
keywords:
Clean it up just to make it filthy, hey, hey, hey guys! What'S up welcome back to my channel, this is linda tay, coming to you today with another video. Today'S video is going to be a wig install tutorial. It is clueless, but the wig i'm using is from love me hair. It is an hd lace. Um 4x4 closure wig, okay, it's like a deep curly and i think the interest is like 18 inches, i'm not really sure, but i'm pretty sure that's what it is. So i'm just showing you all the goodies that it came in the box with this. I love me, hair love me is my favorite brand guys. Definitely definitely definitely one of my favorite brands. I really really really love love me. Their wigs are very good quality. The lace is always thin, at least it's always great and yeah. I freaking love it here. I am just detangling her hair. It'S pretty much stretched out, but you know she does have some tangles in it. So i'm just using that long tooth comb to kind of get the tangles out in every section. Now i'm going to do try to do a perfect middle part, her head, because i'm not going to do a cap, a ball cap. You know with a ball cap. You really can part it anywhere, but when you have no ball cap and things like that, you just kind of sewing the wig down. You are going to want to make sure that it lines up perfectly with the you know, with her parts. Okay. So that way, whenever you see under the lace, you'll see straight scalp and you won't see like hair under the lace, you know so right here, like i said, i part hair down the middle because she wants a middle part. If she wanted a side part, i would have kind of just a part to the side, all right so yeah, i'm just going to get a little bit of even edge control and i'm going to kind of blend her edges in guys. This is a closure wig and it's no glue and no ball cap. So i'm going to have her edges kind of below her brow at her brow and then below it. I'M going to kind of put a little bit of those edges out because i feel like it gives it a more natural look now, when i do the closure wigs, i don't like take all the edges in. I do a little bit of the edges out because, like i said it gives it a natural look, so any part where there isn't any like lace. That is the part i'm going to have out. If you need to measure how much lace is going to be shown and how much is it then make sure you kind of put the wig on and give it get it kind of like a good estimate of how much edges you want out. So after i um do some of that even edge control, i'm going to kind of braid this foundation braid. This is where i'm going to sew the wig down on kind of like a sew in, but this is just a wig, so i'm just going to sew. Like the perimeter um also that edge control gives it a lot of grip, so it'll be like more sturdy and more stable and more secure. I am using a little bit of braiding hair on the foundation braids only like i said just to provide some security. So you see, i don't have extra crazy baby hairs just a little bit of swoop action. I didn't want everything kind of going straight to the back. I just wanted a little bit of swoop action, i'm going to go back and fix the baby hairs when i'm done braiding and i'm going to seal the baby hairs with got to be blue cream. After that, and that's going to keep a light hold on the baby hairs as well right here, like i said, i'm just going to braid it all the way. Now this first foundation braid you're, going to want to make sure you're braiding straight across the back and then the other side you're going to do the same way and just connect the two. After that, you can just braid regularly down and kind of connect the braids to each other, but for this first braid make sure it is going across the nape of the neck clean it up just to make it filthy. So guys, like i said this wig is completely completely glueless, so i'm just going to start to kind of cut off the lace. As you guys can see, this lace matches her skin complexion perfectly. So i'm not going to have to do any like blending under the lace or anything like that, making anything darker because she's very fair skinned it if it was. If it was on me, then i would have to put some type of powder or cream or something like that, underneath um the lace and make sure it blends in, but not with her so guys. I'M not gon na do any glue or any type of adhesive. Really so i'm just going to kind of sew this wig straight down. Okay, this wig is perfect because the lace effortlessly blend because it's super thin, so you can always just sew and not do any type of adhesive and it will still look very flush to the skin right here. I'M just kinda, her hair is still kind of wet. So i was just pressing down where the parts gon na be so kind of get that flat. I'M not gon na use any type of hot comb, because the hair is curly, it's really no point of using heat, so i'm just kind of going to use. You know the source of the resources. I have just kind of make everything flat. So right here guys i answered, did she want any baby hair? She said very light baby hairs. So what i generally like to do is i only like to put baby hairs where her hair is already swooped on the sides. You know what i'm saying as like i said before: i'm putting that foam. The foam has a light hold. So that is what you can use to kind of have that glueless method i'm going to use that foam and then i'm going to tie her edges down. Okay, you have to apply that foam first and kind of let that foam dry underneath that elastic band that you're going to tie down after applying the foam. Okay, apply the foam pretty much everywhere in the front where that closure is like, i said, to give that light hole. Now this wig is removable. You can remove it okay at night. If that's what you choose to do so, i'm gon na tie her hair up gon na tell her kind of put this this little front out almost like you would use glue but you're not using glue, okay and then um you're, just going to kind of tie. The edges down and let that do what to do, let it dry whatever and then you're going to style the hair while it's drying. So after i do that guys, i'm just going to kind of you're going to customize the wig, so you're going to cut the around the ear a lot of times. Wigs are too big. So if the wig is too big make sure you cut, you can cut through the trash cut through all of them tracks cut through all that if it doesn't fit cut it. Okay, um, but, like i said i am going to um sew this wig down. So i'm just on the back like i said this wig is too big. So if the wig is too big, if you try to sew the back down just the straight back on the back braid, it may be too big. So i like to just part out a section at the back. If it's like two or three rows, that's kind of laying down and i'm sewing on that row - then that's fine loans is snug and it fits okay. So i'm going to sew on on that perimeter. Okay right here when it comes to the closure, you're just going to part that front out and then you're going to sew that down almost like you sew down a closure: wig, okay! So yes, literally the same concept needle and thread go under that braid right there. You kind of feel for that braid and you're just kind of sewing through that lace. This is the same concept i use for closure. Wigs guys, like i stated so exact same so i'm going to sew up and you're, going to sew down and you're, going to end the thread and you're going to do the opposite. The same way sew up so down and then in the thread get as close to the part as you can. I think i got a little too close. Okay, if you get a little too close, you can kind of snip it and redo it um. If it's, you know if it's showing through the part but yeah i'm going to do that and i'm going to kind of go on the edges and i'm going to sew those down and yeah guys and then i'm going to style the hair. So i'm going to um take that band off because it seems like it's dry now. You see the the um edges are kind of just laid, but that's not how it's going to be guys. It'S not gon na. That'S not how it's gon na be so i am using the afrohanza's leave-in conditioner. It works perfectly for weave um. It doesn't really work great for my natural hair, but it works great for um like deep wave, deep, curly, hair bundles or something like that. So i'm going to cut like any extra lace that i need. I'M going to use a bit of that guy to be glue spray guys and i'm just literally using that just to kind of lay everything down. I'M not using that to lay the lace down. I'M using that to lay the hair down so right here, guys i'm using some foam and i'm using a little bit of got to be blue cream. This is just for the baby hairs guys. That is all it's for the foam and the got to be glue. Spray is for on the sides of the part not for the lace guys. You could like always glue this but you're using baby you're going to want to lay you're going to want to use still use product to lay the hairs down. Okay, to make it look natural, so i'm using a bit of that foam like i said it's drying and i'm just going to kind of get that rat tail comb and kind of press it in um. So, like i said, i use that got to be blue cream and mousse for the baby hairs to kind of flex, have it flexibility and also have it laid and right here guys, i'm just using a bit of that cream. Contour palette that i have in a similar color, i'm going to use that um brush and i just kind of um clear the part out and i'm going to use some a scare that i only use for hair just to kind of fix any over bleach knots. Okay, and that is going to have it look really really clean any other spots that you kind of messed up on or is frizzy use that apogee mousse and kind of define those curls. Okay, guys love y'all so much. I hope you guys enjoyed this tutorial baby. It'S glueless, you can do it yourself, you can get somebody else to do it, but love me has literally the best hair one of the best companies. I freaking love them. Yeah love! You guys so much talk to you on my next video bye, clean it up. Just to make it filthy


Comments
London Tayy: I wish I would’ve saved this wig for myself , it’s scalp even in person lol.