Detailed How To: Bleach Knots On Lace Closure & Pluck Hair Line| Customize Hair Line
- Posted on 01 March, 2020
- Lace Closure
- By Anonymous
Hey babes,
So I finally made a tutorial on how to pluck/customize and bleach knots on lace closure / frontal.
I hope this helps you all because a lot of ppl get scared doing this but I want to assure you, YOU CAN Do it! ❤️
Shop www.EvalynRose.com
Featured wig name is Jayda under custom collections tab
We accept payment plans through sezzle.
Follow our hair page
IG: EvalynRoseHairCollection
& of course comment, like and subscribe!
Let me know what videos you want next.
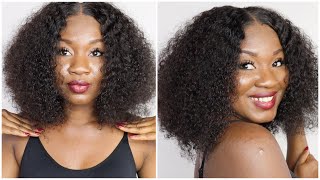
You Hey, ladies, I'm back with another tutorial this time, I'm showing you how I bleach my knots as well as pluck and create a custom hair line or my wigs. So, as you can see, I'm using well a charm bleaching powder, a mixing bowl. I like to use this fork to mix my bleach and then an applicator brush, as well as rental, spoiled wrap. So I'm gon na start off with one scoop of bleach and then I'm gon na pour in my developer, but by learning purposes. I'M going to over pour my developer because I want to give you guys a really good understanding of the consistency of your bleach, and I also want to show you how to fix it in case you over pour or don't have enough so right now I over Poured - and I did this by eyeball, but you know I'm just having it and as you can see, it's super runny. This is not what you want when it comes to bleaching you're, not so to fix this, I'm going to add in like a little bit of bleaching powder, then I'm gon na mix again and then I'm gon na show you what this consistency is. So I can show you that this is also not acceptable, but that's a really good consistency, so I'm just gon na put in just a tiny bit more because I want to show you how to correct. In case your bleach gets runny and then you'll see that now it's super thick and it has a pancake consistency and it also does not like run off the fork. This is what you want, because if you don't have it thick, then it will seep through your hair and it will bleach your hair instead of only staying on your knots, so you want it to be very big. This is the unit that I'm going to be customizing today it is a 24 inch deep wave 5 by 5 HD lace, closure unit to start off. We are going to just slip back all the hairs and to do that, you can either use water or you can do what I'm doing, which is just bring a little bit of free spray on the front of the hairline and just pushing you back to make Sure that I don't bleach any of the small hairs or the front of the hairline. Next, I'm going to flip the unit inside out and I'm going to begin to apply the bleach on the lace closure, starting from the back and then working my way to the front when you're applying your bleach, you do want to use a little bit of pressure, Not a lot to where it seeps through on the hair and turn your hair orange, but enough to cover the entire knot and not just have it kind of lay on the bottom. If that makes sense here, you can see exactly what I mean when you're looking at the closure. If you want to know, if you're doing this right, you want to check it, you can see that it's just not on the bottom as like a coating, but it also kind of seeps through just a little bit enough to cover the entire knot. This will help you get a bigger and a better parting situation. As you can see here, this is a better clip that you can see that the entire knot is covered, not just the bottom. After that's finished, I'm going to place the lace closure face down onto aluminum, foil for 20 minutes or less. This creates heat and allows the bleaching process to speed up next. I'M going to wash the bleach out, I like to use my little water spraying thing, because it has a lot of pressure, and it lets me know that I'm getting all of the bleach out. You don't want to leave any bleach in because it can cause an allergic reaction or you know, bother someone skin so make sure that you rinse it out thoroughly after that, I'm gon na use shimmer lights, I'm sure in this YouTube world you have seen shimmer lights, But it is the truth and it will kind of help neutralize as well as change any brassy Orange out of your closure, to give it a more realistic, scalp. Look, I actually let it sit on there for about 5 to 10 minutes, and this is scout after that. Complete process is done. This is what you should see. You should see less little black dots and when you part it you to see a more of a realistic Scout, look like such next up is plucking, which is key. I like to use these specific tweezers. The brand is called Knick Knack. This is just my preference, but you can use any type of tweezers that grip really well. So what I'm, showing you here is that the flat side of the tweezer goes down towards the closure and that's how you plug not this way, which is the pointed side down. That'S basically the number-one rule, because you don't want to rip your lace. So I like to start by parting out the pre plucked part. If your closure is not pre plucked, you can still do the same thing. It'S just going to be a lot more work, but I'm gon na part out the pre plug part and I'm going to part another section which is like less than a half an inch of another section and I'm gon na start back. Some people start back three rows, but I guess it depends on how thick your closure is, but I'm only gon na do two. I never start in the front, because if you mess up the front of the closure, then you know it's pretty much like bad once. You mess up the front and of course, you really want to thin out the back, because I hate to see that super heavy line of demarcation where it's like baby hairs and then like boom like hair, that is so ugly. It like kills me every time. So I start in the back to thin it out first and then I move my way up to see what it looks like to see how much I need to pluck towards the front and you'll see that here. So when it comes to plucking, there is no real way to really say it. The only thing is is that I'm just making a gradient effect right now I slowed the clip down, so you can see that I'm pretty much just pulling the hair back and then make sure that you continue to comb. So you can see what your hairline is. Starting to look like and as you can see, it kind of has like a zigzag gradient look on the hairline, so I'm gon na go ahead and hurry and finish this up speed up the clip, because it's pretty much the same thing like I don't know how Many times I can say it or over and over again you know, I teach this in my wig making classes, but it's really all you have to do is just kind of like pluck it to where you don't see a straight line. I mean that's pretty much. It like pluck it to where you don't see a straight line and never stay in the same spot too long as you can see I'll go in one spot and I'll just keep moving along back and forth back and forth, because once you comb the extra hair Out that you're pulling out you'll be able to see what it's looking like so just keep moving, keep moving plug plug plug, and then you know until you start to see what you like and that's I mean that's really the number one rule just plug and as You can see here, I feel like. I need to do more on this side, because that side had a little bit more of hair missing and it may look like there's a bald spot, but it's it's not like. I don't know how to explain it, but it's really not so, as you can see, I'm just going back and forth back and forth back and forth like no rhyme, no reason and just back and forth combing out this extra hair. So I can see what it looks like this looks good to me. I like it, has a great in effect that you can pay attention to the hairline. It'S like zigzag zigzag zigzag zigzag, that's pretty much! What you want, because it'll make it look natural instead of having this straight super heavy line. I don't want to ramble on too much. I just really want to stress the fact that the only thing you're doing is making sure that the hair line is not straight. So, in my only way of like explaining, it is to say make sure that the hair line looks like it's like a zig zag. Look to it like just like this, like you just don't want it to be straight and make sure that you're thinning it out. A little bit and honestly, if you feel like you're scared, just pluck a little bit and then when you put it on you'll, definitely be able to see like oh yeah. I need more from this spot or yeah. It'S too thick right here and then take it back off and then plug so you're really gon na have to practice this technique. It'S not gon na come right now, just from looking at this video or any other YouTube videos. But it is a very good guide on how to get a perfect hair line, because when it comes to laces, the three things that make a lace pop like have a flawless lace is the type of place either HD or a thin Swiss lace. Making sure that the knots are bleached and plucking it I guess for and then the color tinting game, those four things are gon na make sure that your lace looks flawless. If you have those things, I mean you're good to go so again. I'M just gon na make this front of the hairline a little zigzag, also you'll be using the same technique for all your laces, whether it be a closure frontal or a full lace. Wig. So keep that in mind, and also I won't lie to you. This is a lengthy process. It will take you at least 15 to 30 minutes to plug your closures or your frontals, and that's depending on how thick it is, but it's very much worth it because look at this end product this hairline is flat. It has that gradient. Look that I said, if you want to, you know, say zigzag. It has a zigzag look, but that creates a natural hairline and it's not just straight across, and this is what you want. Also you'll be plucking out a lot of hair. So don't get scared when you see a lot of hair like this and the end of the floor, because it's natural when plucking and just for a quick comparison. This is the before very thick and not cute at all, and then you have the after, which is look to the gods honey. Okay, all my units come flood and I make sure that they are all uniform and they all look the same in this last clip. I'M going to show you what the unit looks like completely styled and finished. This unit is beautiful, the deep wave curls are beautiful and I'm sure in the beginning, you thought that it was going to look very skimp, but the curls were just not pulled apart and washed and she's beautiful, she's everything this unit sold within one day make sure To follow us on Instagram like comment and subscribe, thank you.


Comments
Erin Suggs Pompey: Thanks for this tutorial! It was really good, perfectly descriptive, and I like your voice! Looking into to taking your class after I have my baby. ❤️Erin
Cynethia Alexander: This is so awesome. You are so talented and I'm so proud of you.
Lindsey and Kaylinn Miller: Hey I’m thinking about ordering from you, quick question, if the closure in front as you have our HD place, why did you decide to bleach the knots?
Juliet Chizaram Obika: Thanks so much for this. I don’t subscribe to pple on YouTube but you super deserve it
Thatiana: Yes ! I learn something ! You should do a wig making tour . When you coming to New York ?
D'Andra Smith: If I'm wearing my hair in a middle part should I still pluck the same way or part my part first and avoid the centre
M.Cayo: What size frontal is this?